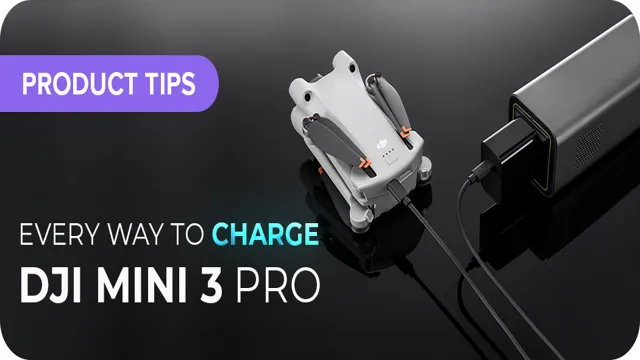
If you’re excitedly waiting for your DJI Mini 3 Pro to arrive, you might be curious about the charging process. How long will it take, and are there any important tips to know? Charging your drone correctly is crucial for maintaining its lifespan and avoiding any mid-flight mishaps. In this blog post, we’ll cover everything you need to know about charging your DJI Mini 3 Pro.
Whether you’re a novice drone pilot or a seasoned pro, you’ll find valuable information here to make the most of your flying experience. So, grab your charger and let’s get started!
Understanding Your Charger
If you have recently purchased a DJI Mini 3 Pro drone, you may be wondering how to properly charge it. Understanding your charger is crucial to maintaining the longevity of your battery and ensuring your drone is always ready to fly. The DJI Mini 3 Pro comes with a standard charger that should be used with caution.
It’s important to never leave your battery unattended while charging and to avoid charging your battery in extreme temperatures. Additionally, it’s vital to use the charger provided with your drone, as using an incompatible charger can cause damage to the battery. To charge your DJI Mini 3 Pro, simply plug the charger into a power source and connect the charging cable to your battery.
Once your battery is fully charged, unplug the charger and disconnect the charging cable. Always remember to store your battery in a cool, dry place and to avoid overcharging or undercharging it. With proper charging techniques, you can extend the life of your DJI Mini 3 Pro drone and enjoy countless hours of aerial photography and exploration.
Types of Charging Ports
Understanding the different types of charging ports on your electronic devices is crucial as it ensures compatibility with your charger. The most common types of charging ports include USB-C, Lightning, Micro-USB, and USB-A. USB-C is the latest and most versatile charging port that allows for faster charging and data transfer speeds.
Lightning is an Apple proprietary charging port commonly found on their devices. Micro-USB is a small and universal charging port used in many Android devices. Finally, USB-A is the standard charging port found on most charging bricks and computers.
It’s important to check the type of charging port on your device and make sure your charger is compatible before attempting to charge your device. If you’re unsure, it’s best to consult the user manual or contact the manufacturer for guidance.
Charging Time Estimates
Are you curious about the estimated charging time for your electric car? Understanding your charger is key to knowing how long a charge takes. Most electric vehicles come with an onboard charger that converts AC power from the grid into DC power for the battery. The charging time depends on the capacity of the charger and the size of the battery pack.
A level 1 charger, which typically comes with the car, can take up to 12 hours to charge a fully depleted battery, while a level 2 charger can reduce that time to 5-6 hours. If you’re in a hurry, a level 3 charger, also known as a DC fast charger, can charge your battery up to 80% in just 30 minutes. Keep in mind that charging time also depends on the temperature of the battery and the charging station, and fast charging can degrade the battery over time.
So, take the time to understand your charging options and plan accordingly.
Charging Preparation
Preparing to charge your DJI Mini 3 Pro drone can help prolong its battery life and ensure the best flying experience. First, make sure you have the correct charging cable and adapter. Using an incorrect charger can damage the battery and cause safety issues.
Additionally, check the battery’s condition and charge level before plugging it in. If the battery is damaged or below 50%, it’s best to replace or charge it until it reaches at least 50%. It’s also important to monitor the charging process and avoid overcharging, which can shorten the battery’s lifespan.
Once the charging is complete, disconnect the battery and store it in a cool and dry place, away from direct sunlight and heat sources. With proper charging preparation, you can maximize your DJI Mini 3 Pro’s flight time and overall performance, so you can focus on capturing stunning aerial footage.
Checking Battery Level
Checking the battery level of your device is essential to prevent sudden shutdowns in the middle of an important task. It’s always better to be prepared and know when your device needs to be charged. Before plugging in your charger, make sure to close all the unnecessary background apps and turn off features such as Bluetooth and Wi-Fi.
This not only saves battery life but also speeds up the charging process. Moreover, it’s crucial to check if the charger and cable are in good condition to avoid any short circuits or damage to your device. Remember, charging your device is just like giving it a nutritious meal; it’s necessary but should be done with care.
So, always check the battery level, prepare your device for charging, and give it the love it deserves to keep it running flawlessly.
Turn off Aircraft and Remote Control
When it comes to charging your aircraft and remote control, there are a few things to keep in mind for optimal performance. First and foremost, make sure to turn off both the aircraft and remote control to avoid any potential safety hazards during the charging process. Once both devices are turned off, you can then begin preparing them for the charging process.
This may involve removing any batteries or other components, depending on your specific model. Additionally, you may want to consider investing in a high-quality charging station or other charging equipment to ensure that your devices are charging efficiently and effectively. By taking these simple steps, you can help extend the lifespan of your aircraft and remote control while ensuring that they’re always ready for your next flight.
Connecting Charger to Battery
Before connecting your charger to the battery, there are a few things you need to prepare. First, ensure that the charger you’re using is compatible with your battery. You don’t want to damage your battery or risk a fire by using the wrong charger.
Secondly, make sure that your battery is in a well-ventilated area, as some batteries release gas when charging. Thirdly, inspect your battery for any visible damage or leaks. If you notice anything unusual, it’s better to have a professional inspect the battery before proceeding with the charging.
Lastly, ensure that the battery terminals are clean and free from any corrosion, as this can affect the charging process. Once you’ve completed these preparation steps, you can confidently connect your charger to your battery and begin charging. Remember to monitor the charging process and never leave your battery unattended while charging.
By following these steps, you can safely charge your battery and extend its lifespan.
Safety Tips During Charging
When it comes to charging your DJI Mini 3 Pro, there are a few essential safety tips that you should keep in mind. First and foremost, it’s crucial to use the charging cable that came with your drone to prevent any damages or potential risks. Additionally, make sure that the charging cable and battery are both in good condition before plugging them in.
Charging your drone on a flat, stable surface is also recommended to avoid any accidental falls. It’s also important to never leave your drone unattended while charging to immediately address any potential issues. Avoid charging your drone overnight or for an extended period as it can lead to overheating, battery swelling, or even catch fire.
Lastly, avoid charging your DJI Mini 3 Pro in extreme temperatures, as it can cause battery issues. By following these safety tips, you’ll ensure a safe and efficient charging process for your DJI Mini 3 Pro.
Avoid Extreme Temperatures
When it comes to charging your electronic devices, safety should always be a top priority. One important safety tip to keep in mind is to avoid extreme temperatures during charging. This means not leaving your device to charge in direct sunlight or exposed to cold temperatures.
Extreme temperatures can damage the battery and even cause it to catch fire. It’s best to charge your devices in a cool, dry place away from direct sunlight or any heat sources. Additionally, make sure to never leave your device charging overnight or unattended for long periods of time.
By following these simple safety tips, you can ensure a smooth and risk-free charging experience for all your electronic devices.
Using Proper Charger Voltage
When it comes to charging our devices, using the correct voltage charger is crucial for safety purposes. It’s easy to think that any charger will do the job, but using the wrong voltage can cause damage to your device and even be a fire hazard. Always check the voltage requirements of your device and use a charger that meets those specifications.
Using an improper charger can cause overheating, a decrease in battery life, and even create a potential shock hazard. It’s essential to take the necessary precautions to ensure that the charging process goes smoothly. Remember, it’s always better to be safe than sorry.
So next time you’re charging your device, make sure to double-check that you’re using the proper charger voltage to avoid causing any damage or harm to yourself or your device.
Final Thoughts
If you’ve just purchased a DJI Mini 3 Pro, you may be wondering how to charge it properly. Thankfully, it’s a fairly simple process. The Mini 3 Pro comes with a USB-C cable that you can plug into a power source such as a wall adapter or a computer.
However, it’s important to note that the Mini 3 Pro has a battery life of up to 31 minutes, so it’s essential to charge it fully before each flight. Additionally, it’s advisable to use a wall adapter that can deliver a minimum of 18W power output for a faster charging time. Finally, always monitor your charging process and avoid leaving your drone unattended while charging to prevent any accidents that may occur.
By following these steps, you’ll be able to keep your DJI Mini 3 Pro charged and ready to fly whenever you need it.
Conclusion
In conclusion, the DJI Mini 3 Pro is the ultimate drone for those who want to take charge of their aerial adventures. This high-tech device packs a punch with advanced features such as obstacle avoidance, improved camera capabilities, and extended flight time. With its sleek design and user-friendly controls, you’ll be able to capture stunning footage and impress your friends with your pilot skills.
So, let the DJI Mini 3 Pro take charge and elevate your flying experience to new heights!”
FAQs
What is the battery backup time of DJI Mini 3 Pro?
The battery backup time of DJI Mini 3 Pro is around 31 minutes on a full charge.
Can DJI Mini 3 Pro be controlled using a smartphone?
Yes, DJI Mini 3 Pro can be controlled using the DJI Fly app installed on a smartphone.
What is the maximum range of DJI Mini 3 Pro?
The maximum range of DJI Mini 3 Pro is around 10 km in ideal flying conditions and without obstacles.
Does DJI Mini 3 Pro come with obstacle sensing and avoidance technology?
Yes, DJI Mini 3 Pro comes with 4-directional obstacle sensing and avoidance technology, which helps the drone avoid crashes.


