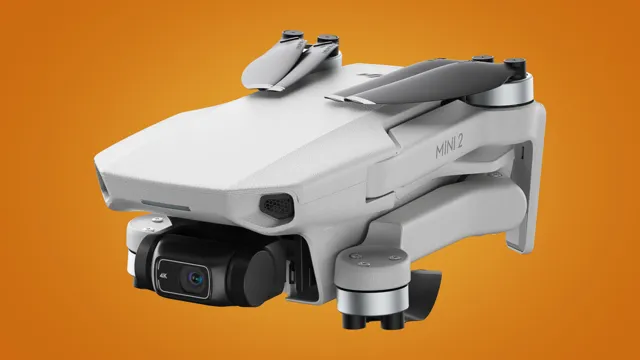
Looking to capture stunning aerial shots but don’t want to invest in a bulky drone? Look no further than the latest addition to DJI’s Mini series, the DJI Mini 3 Pro. This advanced mini drone packs a punch, delivering high-quality video and photos with ease. With improved stability and up to 46 minutes of flight time, the Mini 3 Pro is the perfect tool for anyone seeking to unleash their creativity from above.
Whether you’re a professional photographer or just starting out, the DJI Mini 3 Pro has something to offer. Ready to take your photography to new heights? Let’s take a closer look at what makes the DJI Mini 3 Pro so special.
AEB Mode Explained
If you’re looking to take your aerial photography skills to the next level, you’ll want to have some understanding of AEB mode on the DJI Mini 3 Pro. AEB stands for “Auto Exposure Bracketing” and it’s a feature that allows you to take multiple shots with different exposure levels. This can be especially helpful when you’re shooting in challenging lighting conditions, as it gives you more options to choose from when you’re editing your photos.
When you activate AEB mode, your DJI Mini 3 Pro will take three shots – one at the normal exposure level, one that is underexposed, and one that is overexposed. This creates a range of exposures that you can choose from when you’re editing your photos. AEB mode can also help you capture more detailed and vibrant photos, especially when you’re shooting landscapes or other scenes with high contrast.
So if you’re looking to take your photography to the next level, try experimenting with AEB mode on the DJI Mini 3 Pro.
What is AEB mode?
AEB mode, or Automatic Exposure Bracketing mode, is a feature found on most DSLR cameras that helps photographers capture the desired exposure for their shot. With AEB mode, the camera takes multiple shots at different exposure settings, allowing the photographer to choose the one that best captures the subject in different lighting conditions. This is particularly useful in situations where the lighting is difficult to control, such as capturing sunsets, landscapes, or interiors with bright windows.
AEB mode can be set to capture between 3 to 7 shots at different exposure settings and can be adjusted to capture different amounts of exposure compensation, giving photographers even greater control over the final image. Overall, AEB mode is a highly useful tool for photographers looking to improve their shots in challenging lighting conditions.
Advantages of AEB mode
AEB (Auto Exposure Bracketing) mode is a great tool for photographers to capture the perfect shot. This function allows the camera to automatically take multiple shots with different exposure values, resulting in a range of exposures from under-exposed to over-exposed. This feature is particularly useful when shooting in tricky lighting conditions, such as bright skies or low-light situations.
With AEB mode, photographers don’t have to spend time manually adjusting settings to achieve the desired exposure, making shooting faster and more efficient. Additionally, AEB mode is ideal for HDR (High Dynamic Range) photography, where multiple shots taken at different exposures are combined to create one perfectly exposed image. Overall, the benefits of AEB mode include improved efficiency and the ability to capture high-quality images in challenging lighting conditions.
How to activate AEB mode on DJI Mini 3 Pro?
Are you having trouble activating the AEB mode on your DJI Mini 3 Pro? Don’t worry; it’s a common issue that many drone users face. AEB stands for Auto Exposure Bracketing, which is a feature that captures multiple shots of the same scene, each with a different exposure level. This mode is incredibly useful when you’re capturing photographs in challenging lighting conditions as it can create a more balanced image with better dynamic range.
To activate AEB mode on DJI Mini 3 Pro, first, turn on your drone and go to the camera settings. Look for the ‘AEB’ option and enable it. Once enabled, set the exposure value (EV) range and go to the camera’s live view screen.
Press the shutter button, and the drone will capture multiple images with different exposure levels. AEB mode can be a game-changer when it comes to capturing high-quality drone photos, so don’t hesitate to give it a try.
Maximizing your AEB Shots
When it comes to maximizing your DJI Mini 3 Pro shots, the AEB mode can be a game-changer. AEB (Auto Exposure Bracketing) is a feature that takes a series of shots at different exposure levels. By doing so, you get a range of images with varying brightness levels.
This can be incredibly useful, especially when you’re shooting in tricky lighting conditions. With AEB, you can capture a wide range of details that would be lost in a single image with a standard exposure. To activate AEB mode on your DJI Mini 3 Pro, simply go to the camera settings, find the AEB option, and choose the number of shots and exposure differences you want.
Once you’ve taken your AEB shots, you can use editing software to merge them into a single HDR (High Dynamic Range) image for even better results. In essence, AEB mode is an incredibly powerful tool that can help you capture stunning, detailed photographs with your DJI Mini 3 Pro.
Choosing the right exposure values
When it comes to photography, choosing the right exposure values can make all the difference in the world. One technique that photographers can use to ensure they get the perfect exposure is AEB or Auto Exposure Bracketing. AEB involves taking multiple shots of the same subject at different exposure values, so you have a range to choose from later.
To maximize your AEB shots, ensure that you’re shooting in RAW format as opposed to JPEG, as this will give you more flexibility to make adjustments later. Additionally, ensure that your camera is set to continuous shooting mode so that you can capture the shots quickly without missing a beat. Finally, pay attention to the scene and choose your exposure values accordingly.
If the scene has a lot of contrast, you may want to take shots at a wider range of values to ensure that you capture all the details. By following these tips, you can take your photography skills to the next level.
Getting creative with AEB
AEB, or Automatic Exposure Bracketing, is a feature found in many cameras that can help you capture stunning images. Instead of relying on just one exposure, AEB allows you to take multiple shots at different exposure levels. The trick to maximizing your AEB shots is to get creative with how you use it.
For instance, you can use AEB to capture a wider dynamic range of colors and contrast in your photos. Alternatively, you can use it to create HDR (High Dynamic Range) images, which bring out the shadows and highlights in a scene for a more dramatic effect. Another idea is to use AEB to capture a sequence of shots and later combine them into a time-lapse video.
With AEB, the possibilities are endless, and by experimenting with it, you can discover new ways to take your photography to the next level.
Post-processing your AEB shots
If you’re interested in HDR photography, you’ve probably heard of AEB shots, or Auto Exposure Bracketing. This technique involves taking multiple shots of the same scene at different exposures, then combining them into a single image to produce a more dynamic range. While the process might seem complex, the results can be stunning, especially if you combine it with some post-processing.
So, how can you get the most out of your AEB shots? First, consider investing in software like Photomatix or Aurora HDR to merge your exposures. These programs offer a range of features and presets that can enhance your photos with just a few clicks. Next, adjust your contrast and brightness settings to bring out the details in your shadows and highlights.
Don’t be afraid to experiment with saturation, as this can add depth and richness to your images. Another useful tip is to make use of layer masks in Photoshop. This enables you to blend your bracketed shots selectively, giving you more control over the final image.
You can also try using different filters and effects to further enhance your photos. Topaz Adjust, for example, offers a range of presets that can add a unique flavor to your images. At the end of the day, the key to maximizing your AEB shots is to experiment and have fun.
HDR photography is an art that requires some trial and error, but the results are well worth it. With the right tools and techniques, you can transform your ordinary shots into stunning works of art that will captivate and inspire. So, why not give it a try?
Conclusion
In conclusion, the DJI Mini 3 Pro’s AEB (Auto Exposure Bracketing) mode is like having a personal photography assistant that ensures you always capture the perfect shot. By taking multiple shots at different exposures and combining them, AEB mode allows you to compensate for tricky lighting situations and create stunning, well-balanced images. So next time you’re out with your Mini 3 Pro, don’t forget to give AEB a try and let the drone do the legwork while you sit back and enjoy the results.
“
FAQs
What is AEB mode on the DJI Mini 3 Pro?
AEB mode, or auto exposure bracketing mode, is a photography technique where multiple photos are taken of the same scene at different exposure levels. This allows for a wider range of exposure to be captured, which can then be merged in post-processing to create a single, perfectly exposed image.
How do I activate AEB mode on the DJI Mini 3 Pro?
To activate AEB mode on the DJI Mini 3 Pro, open the camera settings and select the “AEB” option. From there, you can choose the number of shots to be taken (usually 3 or 5), as well as the exposure value (EV) spacing between each shot.
What are the benefits of using AEB mode on the DJI Mini 3 Pro?
The main benefit of AEB mode on the DJI Mini 3 Pro is that it allows you to capture a wider range of exposure in a single photo. This can be particularly useful in high-contrast scenes where parts of the image may be overexposed or underexposed. With AEB mode, you can ensure that all areas of the image are properly exposed and can then merge the shots together in post-processing for a final, perfectly balanced image.
Can AEB mode be used for video on the DJI Mini 3 Pro?
No, AEB mode is only available for still photos on the DJI Mini 3 Pro. However, there are other techniques you can use for capturing a wider range of exposure in video, such as adjusting the exposure settings manually or using a graduated neutral density filter.


