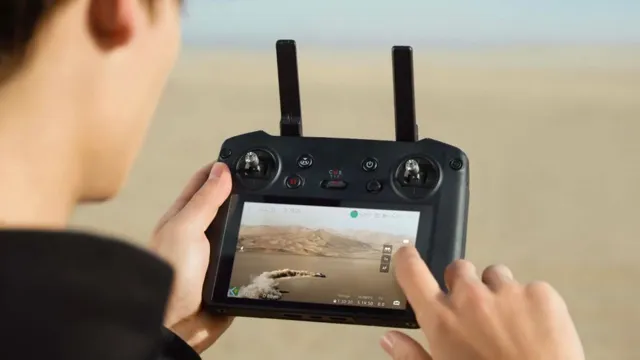
Have you been experiencing issues while trying to charge your DJI Mini 3 Pro controller? It can be frustrating when your drone is ready to go, but the controller just won’t charge. Not to worry, you’re not alone in this problem. Luckily, there are some easy DIY solutions to troubleshoot these charging issues.
Before we dive into the solutions, it’s essential to understand the common reasons why the DJI Mini 3 Pro controller doesn’t charge. Firstly, it could be that the charging port is damaged. Secondly, the cable or adapter that you’re using to charge the controller could be the culprit.
Lastly, the battery on the controller might have reached its end of life and needs a replacement. Now that we know the reasons let’s talk about the solutions. One DIY solution is checking the charging cable and adapter.
Ensure that they are compatible with the DJI Mini 3 Pro controller and undamaged. Another simple solution is to choose an alternate charging method. You can swap out the USB cable with an AC adapter or vice versa if you’re facing difficulties with one type.
In some cases, changing the charging cable entirely can solve the problem. If the issue persists after trying the above solutions, it’s most likely the controller battery that needs replacement. It’s essential to use the correct replacement battery to avoid more troubles.
In conclusion, charging issues with the DJI Mini 3 Pro controller can happen, but with a little troubleshooting and the solutions mentioned above, you can get back in the air with your drone in no time.
Check Connections
Have you been experiencing trouble charging your DJI Mini 3 Pro controller? Before panicking and assuming the worst, it’s essential to check the connections first. Ensure that the charging cable is firmly attached to the controller and the power source. It’s also wise to try a different charging cable to rule out any issues with the current one.
Additionally, check for any debris or dust on the charging ports and clean them if necessary. These minor checks could save you from unnecessary expenses and getting too worried about your device. So, before you resort to any other troubleshooting methods, check those connections.
Inspect Charging Cable
When it comes to charging your devices, a common issue that many people face is a faulty charging cable. It’s essential to inspect your charging cable regularly to ensure that it’s in good condition and functioning correctly. One of the most crucial things to check is the connections.
Over time, the ends of the cable can become worn or bent out of shape, causing connectivity problems. If you notice that your device isn’t charging properly or that it keeps disconnecting, this may be a sign of a faulty connection. In this case, it’s best to replace the charging cable as soon as possible to prevent any further damage to your device’s battery or charging port.
Remember, a small investment in a new charging cable can save you a lot of frustration and money in the long run!

Verify Power Source Availability
When setting up any electrical equipment, it’s important to first verify power source availability. This means checking that you have access to a power outlet that is within reach of the device you want to use. Once you have located a nearby power outlet, the next step is to check the connections.
Make sure that the plug of the device is the correct type and will fit securely into the outlet. It’s also important to check that the outlet itself is functioning properly, as sometimes there can be issues with the wiring or circuitry that could cause problems. Testing the outlet with a basic electrical tester can help to verify that it’s working correctly.
Taking these simple steps before plugging in any device can help to avoid potential electrical hazards and ensure that your equipment will operate safely and effectively. So, before you plug anything into an outlet, take a moment to verify the power source availability and check the connections.
Reset Controller
If you’re having trouble with your DJI Mini 3 Pro controller not charging, resetting the controller might be the solution you’re looking for. Before resetting, try using a different cable or charging port to see if that’s the issue. If you’ve ruled out those possibilities and the controller still won’t charge, follow these steps to reset it: turn off the controller, press and hold the power button and the C1 button simultaneously for 5 seconds, release both buttons, then turn the controller back on.
This should reset the charging port and allow you to charge your controller. Remember to also check for any firmware updates that may address this issue. By resetting your controller, you can get back to flying your DJI Mini 3 Pro without any charging issues.
Perform a Soft Reset
Performing a soft reset on your controller is an effective way to fix minor issues without having to go through a complicated procedure. All you have to do is press and hold the reset button on your controller for a few seconds until all the lights turn off. This will erase any temporary data and restore your controller to its default settings.
Soft resets are useful when your controller is not responding correctly or if it’s behaving strangely. For instance, if your controller is not connecting to your console, a soft reset may solve the problem. Always remember that a soft reset will not erase any of your saved data, so you don’t have to worry about losing your progress.
Keep in mind that a soft reset should only be tried after exhausting other troubleshooting options. It’s important to read the instructions carefully before attempting to reset your controller and never perform a reset if you’re not sure what you’re doing. Overall, a soft reset is a quick and easy way to fix your controller and get back to gaming without any frustration.
Perform a Hard Reset
Sometimes a controller may become unresponsive, causing frustration and delaying your gaming experience. In such cases, performing a hard reset can help restore its functionality. To reset a controller, disconnect it from the console or PC, remove any batteries or rechargeable packs and let it sit for at least five minutes.
Then, reconnect the controller, turn on the console or PC, and press the power button. This should solve any issues and return your controller to its original settings. Remember to back up any saved data before performing a hard reset, as it will erase everything on the controller.
With a simple hard reset, you’re back to enjoying your gaming experience without any issues. In conclusion, a hard reset is a quick and easy way to restore a controller’s functionality. By following some simple steps, you can fix unresponsiveness issues and get back to playing your favorite games.
However, always remember to back up your data before performing any reset, as this will erase your saved content. With this simple solution, you can get back to enjoying your gaming experience without any interruptions.
Upgrade Firmware
If you’re having trouble charging your DJI Mini 3 Pro controller, one solution might be to upgrade its firmware. Firmware updates can fix bugs and improve the overall performance of your controller. To upgrade your firmware, first make sure your controller and drone are fully charged and connected.
Then, open the DJI Fly app and navigate to the settings menu. From there, select “controller” and choose “update firmware.” Follow the on-screen instructions to download and install the latest firmware version for your controller.
Once the upgrade is complete, try charging your controller again and see if the issue resolved. Remember to always keep your DJI Mini 3 Pro up-to-date to ensure the best flying experience possible.
Check for Firmware Updates
Upgrading the firmware on your devices is a crucial way to ensure that they operate at their optimal level and that they are free from any vulnerabilities that could compromise their security. Firmware updates can bring significant improvements to the performance of your devices, as well as new features and bug fixes that enhance your overall experience. To check for firmware updates, follow the manufacturer’s instructions.
This may include visiting their website or using a software update tool to automatically check for and download any available updates. It is important to make sure that you regularly check for firmware updates for all of your devices, including your computer, smartphone, and any other smart devices you may have in your home. By keeping your firmware up-to-date, you can ensure that your devices are running efficiently and securely, providing you with peace of mind and top-notch performance.
Follow Upgrade Instructions
Upgrading firmware can seem like a daunting task, but it doesn’t have to be. To make the process as smooth as possible, be sure to follow the upgrade instructions provided by the manufacturer. These instructions typically include the steps needed to upgrade the firmware, any precautions you should take before upgrading, and any pitfalls to avoid during the process.
Depending on your device, you may need to use special hardware or software to complete the upgrade. It’s crucial to read the instructions carefully and follow them step-by-step to ensure a successful upgrade. Remember, failure to upgrade firmware correctly can result in system issues or even render the device unusable.
So, take your time, read the instructions thoroughly, and proceed with caution. Trust the manufacturer, they know their product best, and by following their instructions, you’ll upgrade your firmware successfully and safely.
Contact DJI Technical Support
Are you having trouble with your DJI Mini 3 Pro controller not charging? Don’t worry, you’re not alone. It’s frustrating when your controller won’t charge, as it means you can’t fly your drone. However, before you panic, there are a few things you can try to remedy the issue.
First, check that your charging cable is firmly plugged in and functioning correctly. If that doesn’t work, try using a different charger or charging cable. If none of these solutions fix the issue, it may be time to contact DJI technical support.
They can troubleshoot the problem with you and help you figure out the best course of action to get your controller back up and running. Remember, always seek help from a professional if you’re unsure what to do next.
Conclusion
It seems that even powerful technology can run out of juice from time to time. The DJI Mini 3 Pro controller not charging may seem like a setback, but with a little troubleshooting and perhaps a new charging cable, you’ll be back in the pilot’s seat in no time. So, remember to keep your batteries charged and always have a spare cable on hand, because even the coolest drones need a little recharge every now and then.
“
FAQs
How long does it take for the DJI Mini 3 Pro controller battery to fully charge?
The DJI Mini 3 Pro controller battery takes approximately 2 hours to fully charge.
Why is my DJI Mini 3 Pro controller not charging?
There could be several reasons why your DJI Mini 3 Pro controller is not charging, including a faulty charging cable, damaged charging port, or a dead battery. Try switching out the charging cable and using a different charging port to see if that solves the issue.
Can I charge my DJI Mini 3 Pro controller with a USB-C cable?
Yes, the DJI Mini 3 Pro controller can be charged with a USB-C cable.
How can I extend the battery life of my DJI Mini 3 Pro controller?
You can extend the battery life of your DJI Mini 3 Pro controller by turning off the controller when not in use, reducing the controller’s brightness, and enabling power-saving mode. Additionally, you can purchase a backup battery to swap out when the current battery runs out of charge.


