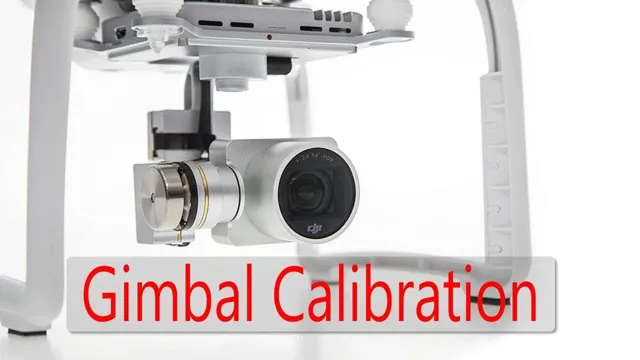
Are you excited to take your DJI Mini 3 Pro for a spin but noticed that the gimbal isn’t functioning as smoothly as you’d like? Don’t fret, because calibrating it is easy and can make a significant difference in the quality of your footage. The gimbal is the backbone of the camera’s stabilization system, and regular calibration is crucial to ensure that it works optimally. Calibration involves resetting the gimbal’s sensors and ensuring that it is level and balanced correctly.
Think of the gimbal as a delicate instrument that needs to be finely tuned to produce the best results. It’s like tuning an instrument before a performance or adjusting the focus on a camera lens before capturing a shot. Calibrating the DJI Mini 3 Pro gimbal might sound daunting at first, but it’s straightforward and can be done in just a few simple steps.
Follow our guide, and you’ll be capturing smooth, stable footage in no time. So, let’s get started!
Understanding Gimbal Calibration
If you own a DJI Mini 3 Pro, you know how important it is to keep your gimbal calibrated. What is a gimbal, you may ask? Well, it’s the mechanism that stabilizes your camera and allows for smooth shots, even when you’re moving around. Without proper calibration, you may notice your footage is shaky or tilted.
So, how do you calibrate your gimbal? First, make sure your drone is on a level surface and powered on. Then, access the calibration settings in your DJI Fly app. Follow the on-screen instructions, which typically involve holding your drone in various positions for a set amount of time.
It’s important to calibrate your gimbal regularly, especially if you notice any issues with your footage. With a properly calibrated gimbal, you’ll be able to capture stunning aerial footage with ease.
What is Gimbal Calibration?
Gimbal calibration is an essential process for ensuring that your camera or smartphone stabilizer works correctly. Essentially, gimbal calibration involves restoring the device’s original settings, which can be lost or altered over time due to wear and tear. When you calibrate your gimbal, you are ensuring that the device accurately senses the positioning of your camera or smartphone and provides smooth, stable footage.
This is particularly important in situations where you are filming while on the move or in windy conditions. To calibrate your gimbal, you will typically need to follow a few simple steps that involve adjusting the device’s settings and performing a series of tests to ensure everything is working correctly. Overall, gimbal calibration is an important process that should be performed regularly to ensure the best possible footage every time you use your camera or smartphone stabilizer.
Why is Gimbal Calibration Important?
Gimbal calibration is an essential process for anyone using a gimbal, whether you’re a professional photographer or just someone taking quick snaps on your smartphone. It involves making sure the gimbal is properly balanced and all its axes are calibrated to ensure smooth and stable movement. When a gimbal is calibrated, it helps eliminate any unwanted vibrations or shakiness, allowing you to capture smooth and steady shots.
It’s like tuning a guitar before a performance- the better you tune it, the better the sound you’ll get. Similarly, the better the gimbal calibration, the better footage or photos you’ll be able to capture. Furthermore, not calibrating your gimbal can lead to damage to the gimbal’s motors or wear and tear on the device, so it’s crucial to do it regularly.
In summary, proper gimbal calibration is key to capturing stable and beautiful shots, and keeping your gimbal in excellent condition.
DJI Mini 3 Pro Gimbal Calibration Steps
If you have a DJI Mini 3 Pro drone, you know how important it is to keep the gimbal calibrated for smooth and stable footage. Thankfully, you can easily calibrate the gimbal to ensure your drone captures the best footage possible. The first step is to turn on your drone and place it on a flat surface.
Then, navigate to the settings menu on your smartphone and select ‘Gimbal Calibration’. From there, follow the on-screen instructions to complete the calibration process. It’s important to note that you should calibrate the gimbal every time you fly your drone to ensure it functions properly and captures high-quality footage.
By taking the time to calibrate your DJI Mini 3 Pro gimbal, you’re one step closer to capturing breathtaking aerial footage and enjoying your drone to the fullest. So, what are you waiting for? Give it a try today!
Step 1: Put the Gimbal in Calibration Mode
So, you’ve got yourself a brand new DJI Mini 3 Pro, but you’re not quite sure where to start with calibrating the gimbal. Well, the good news is that it’s a relatively simple process! The first step is to put the gimbal into calibration mode. To do this, you’ll need to turn on your Mini 3 Pro and ensure it’s connected to the DJI Fly app.
Then, go to the “Camera” tab and select “Gimbal” from the menu. From there, you should see an option to enter calibration mode. Click on this and follow the on-screen instructions to complete the calibration process.
It’s important to note that you should only calibrate the gimbal when it’s necessary, such as if you’ve had a hard landing or if you notice footage that appears shaky or unstable. By following these steps, you can ensure that your DJI Mini 3 Pro’s gimbal is properly calibrated, leading to smoother and more stable footage.
Step 2: Wait for Calibration Mode to Initiate
After powering on your DJI Mini 3 Pro drone, the next step towards gimbal calibration is to wait for the calibration mode to initiate. The calibration process is essential for ensuring that the gimbal is perfectly balanced and stable, resulting in smooth and seamless photography and videography. Once you have turned on the drone, make sure to position it on a flat and level surface, ensuring that the gimbal is in a neutral position without any tilt or movement.
Then, wait for the DJI Fly app to recognize the drone and display the “Ready to Fly” message. From there, you can access the gimbal calibration option and initiate the process. Remember not to interfere with the drone or the gimbal during calibration to ensure accurate and precise results.
With patience and attention to detail, you can ensure that your DJI Mini 3 Pro’s gimbal is functioning at its best for outstanding aerial photography.
Step 3: Follow the Onscreen Calibration Prompts
After making sure your DJI Mini 3 Pro is level and stable, it’s time to proceed with the gimbal calibration. Make sure that the mobile device you’re using to control your drone has a stable connection with the controller. Start the calibration process by going to the DJI Fly app and accessing the settings menu.
From there, choose advanced settings and select gimbal calibration. Follow the onscreen calibration prompts carefully and make the necessary adjustments for the yaw, roll, and pitch axes. Keep in mind that each step is important, and the slightest deviation could lead to errors in the calibration.
To ensure better accuracy, it’s best to do the calibration process in an area with minimal wind and movement. Once you complete the calibration, test your drone’s gimbal movements to ensure that everything is functioning correctly. By following these steps, you can keep your DJI Mini 3 Pro’s gimbal in top condition and obtain better quality aerial footage.
Tips for a Successful Gimbal Calibration
Calibrating your DJI Mini 3 Pro gimbal is an essential step to ensure smooth and stable footage. Firstly, make sure you are on a level surface and remove any accessories attached to the drone. Then, power on the drone and open the DJI Fly app on your mobile device.
Navigate to the settings and select “Gimbal Calibration” from the available options. The app will guide you through the calibration process, which involves keeping the drone still and moving it in different directions. It’s essential to follow the app’s instructions carefully and be patient.
Once the calibration is complete, your DJI Mini 3 Pro’s gimbal should be functioning correctly, and you’ll be able to capture stunning footage with minimal shake and distortion. Remember to calibrate the gimbal regularly, especially after any crashes or impacts, to maintain optimal performance. Finally, enjoy capturing smooth aerial footage with your gimbal calibrated DJI Mini 3 Pro!
Make Sure You’re in a Stable Environment
Gimbal calibration is the process of ensuring that your camera stabilization system is operating at its best. To guarantee a successful calibration, you need to find a stable environment. This means that you should avoid any movements, whether it is caused by you or anything else in the environment.
You should also make sure that your camera is not positioned in an awkward place, such as on an unstable surface or in the way of any strong lighting. Working in a stable environment is crucial to avoiding misalignments and distortions that may result in poor quality footage or even camera damage. So make sure that you have a firm and secure setup before proceeding with the calibration process.
By doing so, you can avoid any potential issues and ensure that your camera will produce the smoothest footage possible.
Check Your Gimbal’s Firmware
Gimbal calibration can be a tricky task, but there are some tips that can make the process smoother. One crucial step is to check your gimbal’s firmware before starting the calibration. Firmware updates can bring improvements and bug fixes that can affect the calibration process.
Make sure to follow the manufacturer’s instructions on how to update the firmware correctly. This will help ensure that your gimbal is working at its best performance, and it will be easier to calibrate. If you skip this step, you might encounter problems during the calibration process, and you may end up having to repeat it.
It’s essential to make sure your gimbal’s firmware is up-to-date to succeed in calibrating it properly.
Inspect the Gimbal and Camera for Damage
If you’re looking to ensure a successful gimbal calibration, one of the first things to check is the gimbal and camera for any damage. Even the slightest damage can affect the calibration process, so it’s important to check thoroughly. Start by inspecting the gimbal arms for dents or bends, and make sure that they’re not loose or wobbly.
Then, take a close look at the camera lens and make sure it’s not cracked or scratched. If the camera has been dropped or bumped, there may be internal damage that isn’t immediately visible, so it’s always a good idea to test the camera and gimbal before attempting a calibration. By taking the time to check for any damage before starting, you can avoid potential calibration issues down the line and ensure that your gimbal and camera are working properly.
Conclusion
In conclusion, the process of gimbal calibration for the DJI Mini 3 Pro may seem daunting at first, but with a little patience and attention to detail, it can be a breeze. Think of it like taking your car in for an alignment – you want everything to be perfectly balanced to ensure a smooth ride. After all, a perfectly calibrated gimbal is the key to capturing stunningly stable footage and taking your aerial photography to the next level.
So don’t be afraid to take the time to calibrate your gimbal and get ready to soar to new heights with your DJI Mini 3 Pro!”
FAQs
How do I initiate the gimbal calibration process on DJI Mini 3 Pro?
To calibrate the gimbal on DJI Mini 3 Pro, launch the DJI Fly app. Navigate to the camera settings, tap on “Advanced Settings,” and then select “Gimbal Auto Calibration.” Follow the on-screen instructions to complete the calibration process.
My DJI Mini 3 Pro gimbal calibration fails every time. What can I do to troubleshoot this issue?
If you are facing gimbal calibration failure on DJI Mini 3 Pro, try restarting the drone, updating the firmware, or conducting a manual gimbal calibration. You can also perform a factory reset and then attempt the calibration again.
How often should I calibrate the gimbal on DJI Mini 3 Pro?
DJI recommends that you calibrate the gimbal on your DJI Mini 3 Pro every time you experience strong vibrations or after every software update. Additionally, if you notice any issues with the gimbal’s stability or movement, recalibrate it.
Can I manually calibrate the DJI Mini 3 Pro’s gimbal, and how do I do it?
Yes, you can manually calibrate the gimbal on DJI Mini 3 Pro. First, ensure that the gimbal is disconnected from power. Then, hold the drone horizontally, power it on, and wait for the gimbal to initialize. Now, slowly move the drone in all directions, ensuring that the camera remains level at all times. After this, power off the drone and restart it to complete the manual calibration process.


