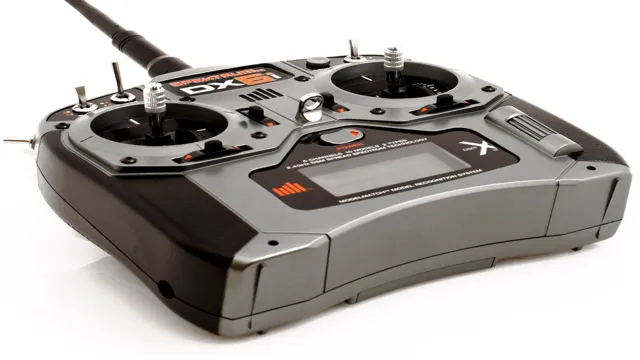
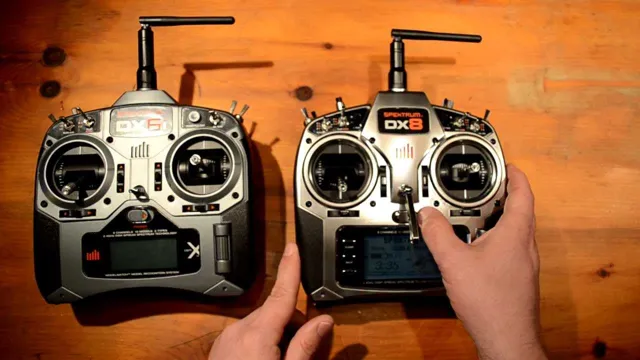
Have you recently upgraded to the DX6i Mode 2 transmitter? Congratulations! You’ve made an excellent choice. As an intermediate pilot, you want your setup to be nothing less than ideal. And in the world of radio-controlled aircraft, your transmitter is the brain that controls your aircraft.
So, it’s important to configure it in the most efficient and effective way. In case you’re not familiar with the DX6i Mode 2, let’s briefly explain what it is. Mode 2 is the most common type of transmitter for airplanes and helicopters.
It’s configured with the left stick controlling the throttle and rudder (yaw) and the right stick controlling the elevator and ailerons. Whereas mode 1 is set up vice versa. As an intermediate pilot, you’ll want to set up your DX6i Mode 2 for the best performance.
With the correct setup, you’ll enjoy more precision in your controls and more independence to experiment with your aircraft. That’s what we’ll be discussing in this blog. We’ll go into detail on how to configure your DX6i Mode 2 transmitter to get the most out of your aircraft.
In the following paragraphs, we’ll explore the ideal setup for intermediate pilots. So, strap in and let’s get started!
Understanding the DX6i Remote
If you’re in the market for a DX6i remote, one of the first things you’ll need to consider is which mode you want it to be in. Mode 2 is the most popular choice, as it places the throttle and elevator controls on the left stick while the aileron and rudder controls are on the right stick. This aligns with the standard control setup for most RC airplanes, making it an ideal option for beginners and experienced pilots alike.
However, it’s important to note that the DX6i can be programmed to operate in any mode, so if you have a different preference, you can customize it to your liking. Ultimately, the mode you choose will depend on your personal preference and the type of aircraft you plan to fly. Be sure to do your research and test out different modes before making your final decision.
Features and Capabilities
The DX6i remote is a powerful device that any RC hobbyist should have in their arsenal. It comes with a range of features and capabilities that make it easy to control your model aircraft. One of its most standout features is the ability to store and retrieve up to ten different models.
This provides users with the flexibility to switch between different models quickly without having to reconfigure their settings each time they want to fly. Additionally, the remote boasts a large backlit LCD screen that displays all of the critical information you need while flying, such as battery levels, signal strength, and trim settings. The DX6i remote uses the latest DSMX technology, which ensures that you have a reliable and robust connection to your model aircraft, even in densely populated areas.
This is a versatile and powerful remote that any RC enthusiast should consider for their aerial adventures.
Why Mode 2 Is the Best Choice
When it comes to flying aircraft, having the right remote control can make all the difference in your flying experience. For those who are new to the hobby, it can be overwhelming to choose the right one. However, the DX6i Remote is a great option to consider.
One of the main reasons is that it offers two modes of operation – Mode 1 and Mode Mode 2 is the best choice for most pilots, as it allows for more precise control over the aircraft. In this mode, the throttle and rudder controls are on the left stick, while the elevator and ailerons are on the right.
This allows for better coordination and stability, which is essential when flying more complex maneuvers. Overall, the DX6i Remote is a versatile and reliable tool for any aircraft enthusiast, and Mode 2 is the way to go for optimal control.
Setting Up for Mode 2 Flying
If you’re new to flying a radio-controlled aircraft, you might find it overwhelming to set up your dx6i transmitter for mode 2 flying. Mode 2 flying refers to the most common transmitter configuration, where the left stick controls throttle and yaw, while the right stick controls pitch and roll. To set up your dx6i transmitter for mode 2 flying, you’ll need to:
Check your dx6i transmitter manual to confirm if your transmitter supports switchable modes. If it does, the manual will have instructions on how to change modes.
Set the throttle and yaw controls to the left stick, and the pitch and roll controls to the right stick. You can do this by going to the dx6i programming menu and selecting the desired function to assign to each stick.
Once you’ve assigned the controls to the proper sticks, you’ll need to calibrate each function. To do this, go to the dx6i programming menu, select the function you want to calibrate, and follow the instructions. Repeat this process for each function.
By following these steps, you’ll be able to set up your dx6i transmitter for mode 2 flying in no time. And once you’re familiar with how your transmitter works, you’ll be able to fly your radio-controlled aircraft with ease and precision. So, take your time, read through the manual, and don’t hesitate to ask for help if you need it.
Changing the Throttle Stick
If you’re new to flying remote control aircraft, you may wonder what Mode 2 is and how to set up your throttle stick. Mode 2 is the most common control system in use and consists of a right-handed joystick for the throttle and rudder controls, and a left-handed joystick for the pitch and roll controls. To change your throttle stick, you’ll need to access the settings on your transmitter.
Look for the “Mode” option and change it to Mode Once you’ve made the switch, you’ll be able to control your aircraft with ease. With a bit of practice, you’ll soon find your fingers moving fluidly over the controls.
And before you know it, you’ll be soaring through the skies like a pro!
Adjusting Channel Assignments
When adjusting channel assignments for your remote control airplane, it’s important to set up for mode 2 flying. Mode 2 is the most common setup and involves using your right hand to control the pitch and roll of the plane while your left hand controls the throttle and rudder. To adjust your channel assignments for mode 2 flying, you should first select the “Mode” option in your transmitter’s settings and choose mode
Then, you’ll need to assign the appropriate channels to each stick. Typically, the aileron (roll) channel is assigned to the right stick’s horizontal axis and the elevator (pitch) channel is assigned to the right stick’s vertical axis. The throttle and rudder channels are usually assigned to the left stick’s vertical and horizontal axes, respectively.
It’s important to double-check your channel assignments and test your controls before flying to ensure a successful and safe flight.
Calibrating the Remote and Receiver
Setting up for mode 2 flying can be a bit daunting at first, but with the right information, it shouldn’t be too difficult. If you’re flying a mode 2 transmitter, the left stick controls throttle and yaw, while the right stick controls pitch and roll. Before you start flying, it’s important to calibrate your remote and receiver to ensure that they’re communicating effectively.
To do this, turn on your transmitter and receiver, and then center all the sticks and switches. You should also verify that the transmitter’s trim settings are all set to the center position. Once your transmitter and receiver are synced, you’re ready to go.
It’s important to remember that everyone’s preference is different when it comes to flying mode 2, so don’t be afraid to make adjustments until you find what works best for you. So go out there and have some fun!
Tips and Tricks for Piloting in Mode 2
If you’re new to flying in mode 2 with a DX6i transmitter, it can take some getting used to. Here are some tips to help you get started. First, practice hovering your aircraft in place while keeping the nose pointed forward.
This will help you get comfortable with the controls and build muscle memory. Next, practice flying circuits by flying forward, turning left, flying backward, turning left again, and then returning to your starting position. This will help you get comfortable with the left stick controlling altitude and rotational movement, while the right stick controls direction and speed.
Lastly, remember to keep your movements smooth and deliberate. Small, controlled movements are key to flying successfully in mode 2 with your DX6i. With a bit of practice and patience, you’ll be flying like a pro in no time!
Mastering the Throttle and Pitch
When it comes to flying RC helicopters in Mode 2, mastering the throttle and pitch controls is essential. The throttle controls the altitude while the pitch determines the forward and backward movements. To get comfortable with these controls, start with small and slow movements before advancing to more complex maneuvers.
It’s important to avoid abrupt and sudden movements as they can cause the helicopter to crash. Practice making smooth and gradual adjustments to the throttle and pitch to maintain a stable flight. Additionally, familiarize yourself with the trim controls to ensure your helicopter is balanced and not drifting off course.
By taking your time and practicing consistently, you’ll soon become a pro at piloting your RC helicopter in Mode
Using the Switches and Dials Effectively
When it comes to piloting in Mode 2, understanding the switches and dials is paramount. It can be overwhelming and confusing to navigate, but with some tips and tricks, it’ll become second nature in no time. First and foremost, start by holding the transmitter correctly – the domed part of the transmitter should be held in the palm of your left hand, with your thumb and forefinger resting on the gimbals.
The throttle and yaw will be controlled by your left hand, while the pitch and roll will be controlled by the right. Next, practice using the switches and dials in isolation before incorporating them into your flight. For example, try adjusting the throttle and yaw without altering the pitch and roll.
This will help build muscle memory and reduce errors during flight. Additionally, set the dual rates to a low percentage when starting out – this will make the controls more sensitive, allowing for more precise movements. As you become more comfortable with flying, gradually increase the dual rates.
Ultimately, mastering the switches and dials is all about practice and experimentation. Just like learning any new skill, it takes time and patience to become proficient. But with these tips and tricks, you’ll be piloting in Mode 2 like a pro in no time.
Conclusion: DX6i Mode 2 for Smooth and Precise Flying
In the world of RC piloting, choosing the right transmitter is crucial. And for those who prefer left-hand throttles and right-hand control sticks, the Spektrum DX6i Mode 2 is the perfect choice. With its advanced features, intuitive interface, and rock-solid performance, it’s a transmitter that will take your flying skills to the next level.
So don’t settle for anything less – get your hands on the DX6i Mode 2 and soar to new heights!”
FAQs
What does mode 2 mean for the DX6i?
Mode 2 is the most common and widely used configuration for the DX6i transmitter, which places the throttle and rudder controls on the left stick and the elevator and aileron controls on the right stick.
Can I change the mode of my DX6i from mode 2 to another configuration?
Yes, the DX6i transmitter allows you to change the mode from the default mode 2 to mode 1 or mode 3 through the settings menu.
What are the advantages of using mode 2 for flying with the DX6i?
Mode 2 is preferred by most pilots because it allows for greater precision and control when maneuvering the aircraft. It is also the most widely used mode, which means there is more support for it in terms of instructions and tutorials.
How do I know if I have a DX6i in mode 2 configuration?
You can check the default mode of your DX6i transmitter by looking at the programming menu. If the left stick controls the throttle and rudder, and the right stick controls the elevator and aileron, then it is set to mode 2.


