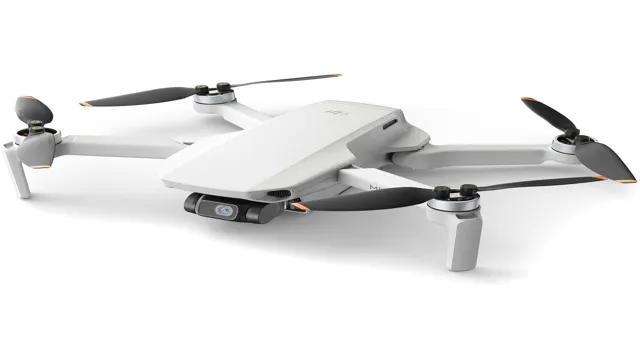
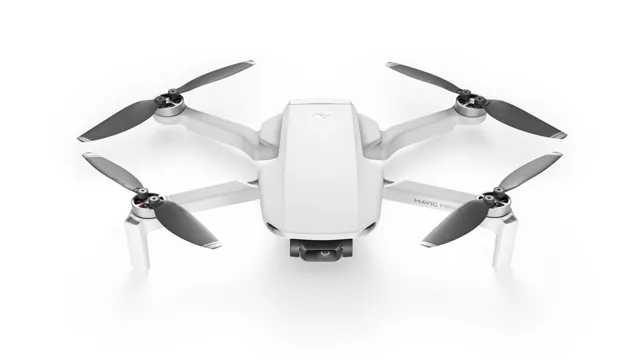
Have you been struggling with your DJI Mini 3 Pro Drone? Maybe it’s not performing as well as it used to, or maybe it’s stuck mid-air and won’t take off. Whatever the issue may be, one of the best solutions you can try is resetting the drone. This simple process can potentially fix any problems you’re experiencing and restore your drone to its full functionality.
It’s like hitting the reset button on a malfunctioning computer. In this blog post, we’ll go over everything you need to know about resetting your DJI Mini 3 Pro Drone, including step-by-step instructions and tips on when and why you should reset your drone. So, if you’re ready to get your drone back in the air, let’s dive in!
Step 1: Turn off the Drone
Resetting your DJI Mini 3 Pro drone can sometimes be necessary when troubleshooting issues. The first step in resetting your drone is to turn it off. This may seem obvious, but it is important to ensure the drone is completely powered down.
To turn off your DJI Mini 3 Pro, press and hold the power button until the LED lights turn off. Once it is powered off, wait a few moments before proceeding. Turning off the drone allows you to start fresh and clear any cached data, which can often resolve issues.
By taking this simple step, you are setting yourself up for success and ensuring a smooth reset process.
Hold down the power button until the lights turn off
If you’re done flying your drone and want to turn it off, there’s a simple step you need to follow: hold down the power button until the lights turn off. It’s important to properly turn off your drone to avoid any damage or potential risks. Trying to disconnect the battery or forcefully shutting it down might result in corrupting files or damaging the drone’s systems.
Simply holding down the button until the lights turn off lets the drone fully power down and ensures that it’s ready for the next flying session. So if you’re looking to store your drone or take a break from flying, remember to follow this easy step to turn it off.
Step 2: Enter Recovery Mode
After trying out the first step and the DJI Mini 3 Pro drone is still unresponsive, it’s time to enter recovery mode. This mode allows you to reset your drone to its factory settings, but take note that it will erase all data that is stored on it such as photos, videos, and other settings. To enter recovery mode, you will need to connect your drone to your computer or mobile device and open the DJI Assistant 2 software.
After connecting, the software should detect your drone and prompt you to enter recovery mode. Follow the on-screen instructions, and the software will guide you through the process of resetting your drone. Once the process is complete, your drone will restart, and it will be just like when you got it brand new.
Remember, use the DJI Assistant 2 software for a successful reset of your DJI Mini 3 Pro drone.
Hold down the power and the function button simultaneously
Entering recovery mode on a device can feel intimidating at first, but it’s actually quite easy once you know how. To enter recovery mode, start by holding down the power and function buttons at the same time. You’ll need to hold them down for a few seconds until the screen changes and a menu appears.
This is recovery mode! From here, you can perform a variety of functions like resetting your device, clearing the cache, or updating the software. It’s important to note that not all devices have the same recovery mode process, so it’s best to check your device’s manual or online resources to ensure you’re doing it correctly. By entering recovery mode, you can troubleshoot issues with your device and get it back in working order in no time.
The lights will blink fast and continuously
Entering into Recovery Mode is essential for resolving various issues with your electronic device, but it can be tricky if you haven’t done it before. The lights on your device will blink rapidly and continuously, indicating that you’re on the right track. To enter into Recovery Mode, you need to press and hold down the buttons on your device until you see the logo appear on the screen.
Once the logo appears, release the buttons and your device should enter into the Recovery Mode. Remember, it’s essential to follow the proper procedure and be patient during this process as it might take some time. Additionally, it is wise to have a backup of your data and files in case any issues arise.
By entering into Recovery Mode, you can fix glitches, remove unwanted files, and restore your device to its optimal performance. So, if you’re facing any technical issues with your device, don’t forget to enter Recovery Mode and solve your problems effortlessly.
Step 3: Connect the Drone to Your Device
If you’re having trouble connecting your DJI Mini 3 Pro drone to your device, a simple reset may be the solution. To reset your drone, locate the small reset button on the drone itself. Using a small object like a pin or paper clip, press and hold the button for several seconds until the lights on the drone flash rapidly.
Next, turn off your device’s Bluetooth and turn it back on again. Once you’ve done that, turn on your drone and wait for the LED lights to stop flashing. Then, navigate to your device’s Bluetooth settings and connect to the drone.
With a successful connection, you’ll be ready to start flying your DJI Mini 3 Pro drone. It’s important to note that resetting your drone will erase any saved flight data, so make sure to back up any important information before resetting.
Use a cable to connect the drone to your computer or phone
Once your drone has finished charging, it’s time to connect it to your device. The easiest way to do this is by using a cable. Most drones come with a USB cable that you can use to connect the drone to your computer or phone.
Make sure you use the correct port on your device and plug in the cable securely. The drone should automatically connect to your device once it’s plugged in. If the drone doesn’t connect, you may need to download drivers or software specific to your drone.
Once connected, you’ll be able to access the camera on your drone and see what it’s capturing in real-time. This is also the best time to configure your drone’s settings and make sure everything is ready to fly. By connecting your drone to your device, you’ll be able to see what the drone sees and have complete control over it.
So, grab that cable and connect your drone to your device to start exploring the skies!
Step 4: Complete the Factory Reset
Now that you’ve backed up your data, checked the firmware, and deregistered the DJI Mini 3 Pro drone, it’s time to complete the factory reset. This step is crucial since it erases all the settings and personal data on your drone, restoring it to its original state. To reset DJI Mini 3 Pro drone, you’ll need to turn it on and press the power button once, then twice and hold it down until you hear beeps.
After that, you’ll see the drone’s lights flash once, indicating that it’s in factory reset mode. Once that’s done, release the power button and let the drone reset for a few moments. Once the reset is complete, you can set up your drone as if it were new and start enjoying it all over again.
Remember to re-register your drone and set up all the necessary settings before flying it again. So, go ahead and reset your DJI Mini 3 Pro drone with ease and confidence, knowing that all of your personal data is safe and secured.
Download DJI Assistant 2 from the DJI website
If you’re experiencing issues with your DJI drone or simply want to start fresh, performing a factory reset may be necessary. In order to complete the factory reset, you will need to download DJI Assistant 2 from the DJI website. This software allows you to connect your drone to your computer and access its settings.
Once downloaded, connect your drone to your computer using a USB cable and open DJI Assistant From there, navigate to the “Factory Reset” option and follow the prompts. This process will wipe all data from your drone and restore it to its original factory settings.
It’s important to note that this cannot be undone, so make sure you have a backup of any important data before proceeding. By completing a factory reset, you can troubleshoot any issues with your drone or start fresh with a clean slate.
Open DJI Assistant 2 and choose the option to reset the drone
To complete the factory reset of your DJI drone, the next step is to open DJI Assistant 2 and choose the option to reset the drone. DJI Assistant 2 is a software application that allows you to manage and update your DJI drone and other DJI products. Once you have launched the software, connect your drone via USB cable to your computer and power it on.
The software will automatically detect your drone and show its details on the screen. To reset your drone, click on the “Factory Reset” button, which can usually be found in the “Tools” section of the software. This will erase all data and settings on your drone, including flight logs, calibration settings, and firmware updates.
Remember to backup any important data before proceeding with the factory reset. Now that you have completed the factory reset, your DJI drone is returned to its original factory settings, just like it was when you first bought it.
Step 5: Calibrate and Update
If you’re experiencing issues with your DJI Mini 3 Pro Drone, calibrating and updating the firmware may solve the problem. To calibrate your drone, first ensure that it is on a level surface. Then, open the DJI Fly app and go to the main settings.
From there, select “Sensors” and then “Calibrate.” Follow the on-screen instructions to calibrate the drone’s sensors. Once complete, check if the issue has been resolved.
If not, updating the firmware may be necessary. Connect your drone to the DJI Fly app and go to the firmware update section. Make sure that you have a stable internet connection and sufficient battery life for the update to complete.
Follow the on-screen instructions to update the firmware. This should fix any software-related issues with your DJI Mini 3 Pro Drone. If the problem persists, consider seeking professional assistance or contacting DJI support.
Remember to always reset your DJI Mini 3 Pro Drone to its factory settings when troubleshooting to ensure a clean slate for calibration and updates.
Calibrate your compass and GPS before use
When it comes to using a compass and GPS, calibration is key. Without accurately calibrated devices, your hiking or camping trip could take a turn for the worse. Luckily, calibrating your compass and GPS is a simple process that can save you a headache down the line.
Before heading out on any outdoor adventure, take some time to properly calibrate both devices. You’ll want to ensure that your compass is aligned with true north, and your GPS is updated with the latest maps and software. This will ensure that you’re able to navigate effectively and safely, no matter where your journey takes you.
By taking the time to calibrate and update your gear, you’ll be able to confidently enjoy your outdoor experiences without any worries. So, before you hit the trails, take a moment to calibrate your compass and GPS, and set yourself up for a successful adventure.
Update firmware for optimal performance
Updating the firmware of your device is essential in keeping it up-to-date and operating at its optimal performance level. Not only can it improve the overall functionality of your device, but it can also fix any bugs or glitches that may occur. When calibrating and updating your device, be sure to follow the manufacturer’s instructions carefully.
Skipping this crucial step could result in slower processing speeds, decreased battery life, and reduced efficiency. Think of it like tuning a car engine – without proper maintenance and care, the engine won’t perform at its best. As you move through the calibration and updating process, remember that patience is key.
It’s better to take your time and ensure everything is done correctly instead of rushing through and missing important steps. When you’re finished, you can rest assured that your device is ready to continue functioning at its best. So don’t forget this vital step – update your firmware today!
Conclusion
In conclusion, resetting your DJI Mini 3 Pro drone is like hitting the refresh button on your device. Just like a computer, your drone can sometimes experience glitches or performance issues that can be solved by taking a moment to reset and start fresh. So, if you want to reach new heights with your drone’s performance, don’t hesitate to hit that reset button and soar away with ease and confidence!”
FAQs
How do I reset my DJI Mini 3 Pro drone?
To reset your DJI Mini 3 Pro drone, press and hold the power button for 10 seconds.
What should I do if my DJI Mini 3 Pro drone is not responding to the remote controller?
If your DJI Mini 3 Pro drone is not responding to the remote controller, try resetting both the drone and the remote controller. Make sure that they are properly synced and within range.
How can I update the firmware on my DJI Mini 3 Pro drone?
To update the firmware on your DJI Mini 3 Pro drone, connect it to the DJI Fly app and follow the instructions on the screen. Make sure that the drone has at least 50% battery life before updating the firmware.
How can I troubleshoot connection issues with my DJI Mini 3 Pro drone?
If you are experiencing connection issues with your DJI Mini 3 Pro drone, make sure that the drone and the remote controller are properly synced and within range. Check for any obstacles that may be interfering with the signal, such as buildings or trees. You can also try resetting both the drone and the remote controller.