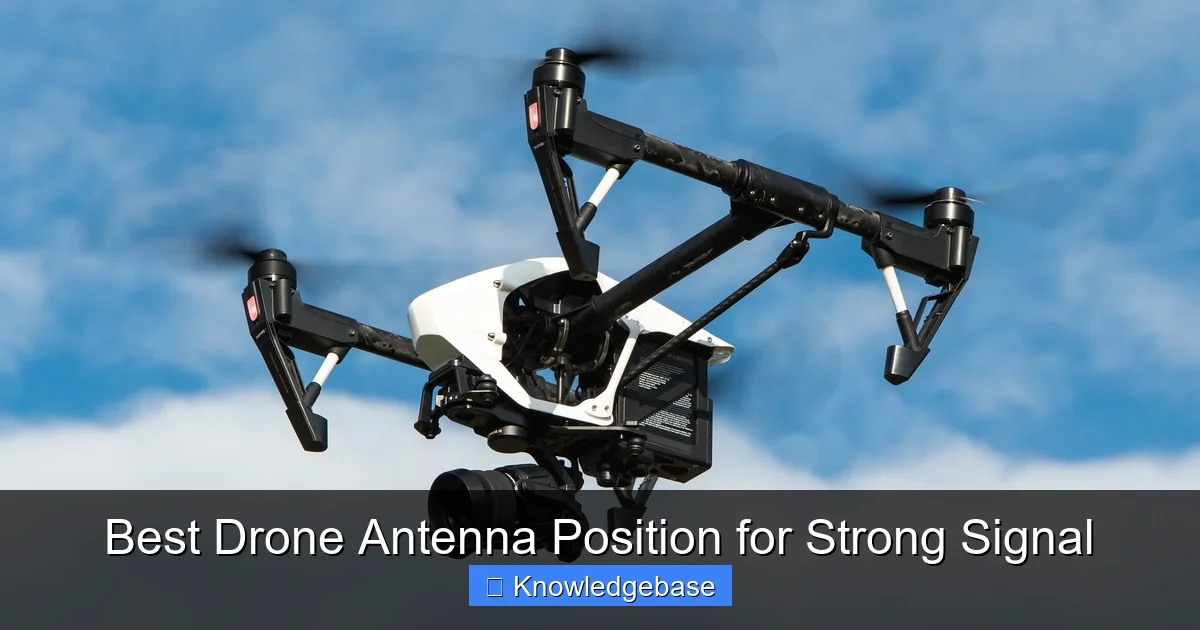
Featured image for this comprehensive guide about drone antenna position for best signal
Image source: esl-tree.com
In the exhilarating world of drone piloting, where gravity is merely a suggestion and the sky is your playground, there’s one invisible thread that connects you intimately to your aerial machine: the signal. A strong, stable signal isn’t just a convenience; it’s the lifeline that ensures precise control, crystal-clear video feeds, and ultimately, the safe return of your valuable drone. Yet, many pilots overlook one of the most critical factors influencing this connection: drone antenna position for best signal.
Imagine soaring through breathtaking landscapes, only to experience a sudden drop in video quality or, worse, a momentary loss of control. These heart-stopping moments often stem from suboptimal antenna placement. It’s a common misconception that simply having “good” antennas is enough. In reality, how those antennas are positioned – both on your drone and on your ground station – can dramatically impact range, reliability, and immunity to interference. Understanding and optimizing your drone antenna position is not just for professional long-range pilots; it’s fundamental for every enthusiast seeking a smoother, safer, and more enjoyable flight experience.
This comprehensive guide will demystify the science behind drone communication and equip you with actionable strategies to achieve the best drone antenna position, ensuring you unlock the full potential of your UAV. We’ll delve into the intricacies of radio frequency (RF) signals, explore the nuances of antenna types, and provide practical tips for both your airborne and ground-based equipment. Get ready to transform your understanding of drone communication and elevate your flying prowess to new heights.
Quick Answers to Common Questions
Why is drone antenna position so important for signal quality?
Your **drone antenna position for best signal** directly impacts your range, reliability, and video clarity. Proper placement minimizes signal loss and interference, keeping your drone connected safely.
How should I generally orient my drone’s antennas for the strongest signal?
For optimal results, aim to have your drone’s antennas pointed perpendicular to your ground station antenna. This ensures the radiation patterns overlap effectively, giving you the **best drone antenna position for strong signal**.
Should my drone’s antennas be perfectly straight or angled?
Often, a slight V-shape or angling the antennas at about 45 degrees can provide better signal diversity and reduce dead spots, improving your overall **drone antenna position for best signal**. Avoid having them perfectly parallel and too close together.
Does it matter if the antennas are near other drone components?
Yes, absolutely! Try to keep your antennas clear of carbon fiber, batteries, or other electronics that can block or interfere with the signal. An unobstructed **drone antenna position for best signal** is crucial for clear communication.
What’s a common mistake people make with their drone antenna position?
A frequent error is letting antennas lie flat against the drone body or pointing directly at the ground or sky. Always aim for a clear line of sight and an optimal **drone antenna position for best signal** relative to your receiver.
📋 Table of Contents
- The Crucial Role of Your Drone’s Communication System
- The Science of Signal: Why Antenna Position is Paramount
- Optimizing Drone Antenna Placement: On-Board Strategies
- Mastering Your Ground Station: RC Transmitter and Goggles Antenna Tactics
- Advanced Techniques and Troubleshooting for Peak Performance
- Beyond Position: A Holistic Approach to Drone Signal Management
The Crucial Role of Your Drone’s Communication System
Before we dive into positioning, it’s essential to grasp the basics of how your drone communicates with your remote controller and, for FPV pilots, how it transmits video back to your goggles or monitor. This invisible link is orchestrated by a sophisticated system of transceivers and, critically, their antennas. Understanding these components is the first step towards optimizing your drone antenna position for best signal.
Learn more about drone antenna position for best signal – Best Drone Antenna Position for Strong Signal
Image source: globe-net.com
Understanding Frequencies: 2.4GHz vs. 5.8GHz
Most consumer and hobby drones operate on specific radio frequencies, primarily 2.4 GHz and 5.8 GHz. Each frequency band has distinct characteristics that affect signal range, penetration, and resistance to interference.
| Antenna Configuration / Position | Typical Signal Performance (Relative) | Advantages & Key Considerations |
|---|---|---|
| **Bottom-Mounted, Vertical** (e.g., pointing downwards) | Good (Line-of-Sight), Moderate (Overhead) | Minimizes obstruction from drone body when flying away or at a distance. Can be susceptible to ground interference when close to the surface. |
| **Top-Mounted, Vertical** (e.g., pointing upwards) | Good (Overhead), Moderate (Distance) | Beneficial when the drone frequently flies above the operator. Can be obstructed by battery, GPS modules, or other top-mounted components. |
| **Horizontal** (e.g., parallel to drone body) | Fair (Directional), Prone to Nulls | Can provide strong signal in specific horizontal directions but suffers from severe signal “nulls” directly above/below the antenna. Not ideal for omnidirectional. |
| **Angled / V-Dipole** (e.g., two elements at ~90-120° apart) | Very Good (Balanced Omnidirectional) | Reduces the common signal nulls found with purely vertical or horizontal orientations, offering more consistent coverage in a sphere. |
| **Diversity System** (2+ antennas, varied angles) | Excellent (Most Robust & Reliable) | Utilizes multiple antennas, often placed at different orientations (e.g., vertical + angled), to minimize signal drops and mitigate multipath interference by selecting the strongest signal. |
- 2.4 GHz: This frequency band offers better penetration through obstacles (like trees or light buildings) and generally provides a longer control range due to its longer wavelength. However, it’s a very crowded band, also used by Wi-Fi, Bluetooth, and many other devices, making it more susceptible to interference. Many control links, especially for larger camera drones, utilize 2.4 GHz.
- 5.8 GHz: This band offers a wider bandwidth, which is ideal for transmitting high-quality, low-latency video feeds (common in FPV racing and freestyle drones). Its shorter wavelength means it’s less prone to interference from 2.4 GHz devices, but it struggles with obstacle penetration and typically has a shorter effective range.
Knowing which frequency your drone uses for control and video helps you anticipate signal behavior and make informed decisions about RC antenna placement and flight paths.
Anatomy of a Drone Antenna
Antennas are transducers that convert electrical signals into radio waves and vice-versa. While they come in various shapes and sizes, their fundamental purpose remains the same. Key antenna characteristics include:
- Gain: Measured in dBi, gain indicates how effectively an antenna converts power into radio waves in a particular direction. Higher gain usually means a longer range in a specific direction but a narrower beamwidth.
- Polarization: Refers to the orientation of the electric field of the radio wave. It can be linear (vertical or horizontal) or circular (Right Hand Circularly Polarized – RHCP, or Left Hand Circularly Polarized – LHCP). Mismatched polarization between transmitting and receiving antennas can lead to significant signal loss.
- Radiation Pattern: This describes how an antenna radiates or receives RF energy in different directions. Some antennas are omnidirectional (radiate in all directions), while others are directional (focus energy in a specific direction).
The type of antenna on your drone (and ground station) plays a huge role in its performance, but even the best antenna can underperform if its drone antenna position is not optimized.
The Science of Signal: Why Antenna Position is Paramount
Understanding the “why” behind optimal antenna placement involves a basic grasp of radio wave propagation. It’s not magic; it’s physics. Several phenomena directly influence your signal strength and quality, making your drone antenna position a critical factor.
Learn more about drone antenna position for best signal – Best Drone Antenna Position for Strong Signal
Image source: leisureanswers.com
Line of Sight (LOS) and the Fresnel Zone
The golden rule for robust radio communication, especially with drones, is to maintain a clear Line of Sight (LOS) between your transmitting and receiving antennas. Any physical obstruction – trees, buildings, hills, or even your own body – can attenuate (weaken) or block the signal entirely.
Beyond direct LOS, there’s also the concept of the Fresnel Zone. Imagine an invisible, football-shaped ellipse extending between your drone’s antenna and your ground station antenna. For maximum signal strength, at least 60% of this zone should be clear of obstructions. Obstacles within the Fresnel Zone, even if they don’t directly block LOS, can cause phase shifts and reflections, leading to signal degradation.
Actionable Tip: Always prioritize flying in areas with clear LOS. For longer-range flights, consider scouting the area for potential obstructions within the Fresnel Zone before takeoff. Elevate your ground station antenna where possible.
Polarization Matching: A Hidden Gem
We briefly mentioned polarization, but its importance for your drone antenna position for best signal cannot be overstated. If your drone uses a linearly polarized antenna (e.g., a simple dipole) and your ground station uses a linearly polarized antenna, they must be oriented in the same plane (both vertical or both horizontal) for optimal signal transfer. If one is vertical and the other horizontal, you could experience a signal loss of up to 20 dB, which is substantial!
For FPV video, most pilots use circularly polarized antennas (CPAs), typically RHCP. This is because CPAs are less susceptible to multipathing interference (reflections off surfaces) and provide a more consistent signal regardless of the drone’s orientation. However, it is absolutely crucial that BOTH the transmitting antenna on the drone and the receiving antenna on your goggles/ground station are of the SAME circular polarization (e.g., both RHCP). Mixing RHCP and LHCP will result in almost complete signal loss.
Actionable Tip:
- For linear antennas: Ensure both drone and ground station antennas are oriented identically (e.g., both perfectly vertical).
- For circular antennas (FPV): Always match polarization (RHCP to RHCP, LHCP to LHCP).
Multipathing and Signal Interference
Radio waves don’t always travel directly from point A to point B. They can bounce off surfaces like the ground, buildings, water, or even metal objects. When these reflected waves arrive at the receiver slightly out of phase with the direct wave, they can interfere with each other, either constructively (strengthening the signal) or destructively (weakening or canceling it out). This phenomenon is called multipathing.
Destructive multipathing is a major cause of signal degradation, especially in urban environments or near large reflective surfaces. Your drone antenna position can either exacerbate or mitigate this problem. Keeping antennas clear of reflective surfaces on the drone itself and on the ground helps.
Actionable Tip: Avoid flying low over highly reflective surfaces like metal roofs, large bodies of water, or dense urban canyons, as these areas are prone to severe multipathing. For drones, orienting antennas away from large carbon fiber frames or batteries can also help reduce reflections.
Optimizing Drone Antenna Placement: On-Board Strategies
Now, let’s get practical. How you mount and position the antennas on your drone directly impacts its ability to send and receive signals effectively. This is where strategic drone antenna position truly makes a difference.
Physical Separation and Orientation
The golden rule for antennas on your drone is to keep them as far apart from each other and from other electronic components as possible. This minimizes electromagnetic interference (EMI) from the drone’s own systems (ESCs, motors, flight controller, video transmitter) which can generate significant RF noise.
- Control Link Antennas (e.g., 2.4 GHz receiver antennas): Many modern drones use diversity receivers with two antennas. Position these antennas at a 90-degree angle to each other (e.g., one vertical, one horizontal, or a ‘V’ shape). This “diversity” helps ensure that if one antenna’s signal is momentarily blocked or experiencing a null (a point of minimal signal), the other antenna can still pick up a strong signal. Ensure they are clear of carbon fiber (which can block signals) and battery packs.
- Video Transmitter (VTX) Antennas (e.g., 5.8 GHz FPV antennas): These should always be placed to have an unobstructed view of the sky, especially towards the direction you expect to fly. Mounting them on a flexible pigtail (SMA/RP-SMA extension) often allows for better positioning, away from the drone’s body. If using a circularly polarized antenna (like a “cloverleaf” or “pagoda”), ensure it’s oriented vertically to maintain consistent signal in most flight attitudes, as the radiation pattern is generally toroidal (donut-shaped) with the null directly above and below the antenna.
Actionable Tip: Utilize 3D printed mounts to elevate antennas above the drone’s frame and separate them. Aim for at least 1-2 inches of separation between antennas if possible, and away from noisy electronics. For diversity receiver antennas, a 90-degree angle is ideal for robust signal reception.
Avoiding Obstruction and Interference Sources
Carbon fiber, commonly used in drone frames, is an excellent conductor and will block radio signals. Never place an antenna directly against or underneath a carbon fiber plate. Similarly, large batteries, GPS modules, HD cameras, and even wires carrying high current can act as signal blockers or sources of interference.
- Keep Clear of Metal/Carbon Fiber: Ensure your antennas have a clear line of sight, even from the drone’s own components. Mount them on plastic standoffs or extensions.
- Isolate from EMI: Place antennas away from ESCs, motors, and high-current wires. If possible, use shielded cables for sensitive signal lines.
Actionable Tip: Before permanent mounting, do a range check with your antennas in different tentative positions to identify any dead zones or significant signal drops caused by the drone’s internal components. Visually inspect the antenna’s ‘view’ from all angles.
Antenna Type Matters: Omnidirectional vs. Directional
The choice of antenna type on your drone is primarily driven by your flight style and desired range. Most common drones use omnidirectional antennas on board, but it’s worth understanding the difference.
Omnidirectional Antennas (e.g., dipole, cloverleaf, pagoda):
- Pros: Radiate and receive signals in all horizontal directions, making them ideal for agile FPV flying where the drone’s orientation changes rapidly. Easier to set up.
- Cons: Lower gain compared to directional antennas, resulting in shorter maximum range.
Directional Antennas (e.g., patch, helical – more common on ground stations):
- Pros: High gain, enabling much longer range and better penetration in a specific direction.
- Cons: Must be constantly aimed at the drone. Not practical for on-drone use for most flight styles.
For most drone setups, especially FPV, you’ll be using omnidirectional antennas on the drone. The focus then shifts to proper orientation and placement to maximize their inherent properties.
Here’s a quick comparison of common FPV antenna types and their characteristics:
| Antenna Type | Pattern (Typical) | Polarization | Best On-Drone Use Case | Pros | Cons |
|---|---|---|---|---|---|
| Dipole (Linear) | Toroidal | Linear (Vertical/Horizontal) | Basic RC, Short-Range Video | Simple, lightweight, low cost | Prone to multipathing, limited range, orientation critical |
| Cloverleaf (CP) | Omnidirectional (Sphere-like) | RHCP / LHCP | General FPV, Freestyle, Racing | Good all-around coverage, reduced multipathing | Slightly larger than dipole, more fragile designs |
| Pagoda (CP) | Omnidirectional (Sphere-like) | RHCP / LHCP | General FPV, Freestyle, Racing | Excellent axial ratio, durable, good all-around coverage | Slightly larger than dipole |
| ImmersionRC Stubby (CP) | Omnidirectional (Sphere-like) | RHCP / LHCP | Compact FPV, Racing | Extremely compact, durable | Slightly less gain than larger CPAs, less flexible positioning |
Mastering Your Ground Station: RC Transmitter and Goggles Antenna Tactics
The drone’s antennas are only half the equation. Your ground station – your remote controller and FPV goggles/monitor – also requires careful antenna setup. Optimizing your ground station’s RC antenna placement is just as crucial for maintaining a strong and reliable link.
Transmitter Antenna Position: The Pilot’s Role
Your remote controller’s antenna is your primary link to the drone. Even if your drone’s antennas are perfectly positioned, a poorly aimed or obstructed transmitter antenna will lead to signal loss. Most RC transmitters come with an omnidirectional dipole antenna, which means it radiates its strongest signal perpendicular to its length, with “nulls” directly off the ends.
- Vertical Orientation: For most flight scenarios, hold your transmitter with the antenna oriented vertically. This maximizes the signal radiating horizontally, covering a wide area as your drone flies around.
- Avoid “Pointing”: Never point the tip of your RC antenna directly at your drone. You’d be aiming the null of the antenna’s radiation pattern, resulting in the weakest signal.
- Clear Line of Sight: Keep your RC antenna clear of your body, especially your head. Your body is largely water and will absorb RF signals, acting as an effective blocker. Try to hold the controller in a way that the antenna is elevated and has an unobstructed view of the drone.
Actionable Tip: When flying, maintain a vertical orientation of your transmitter antenna. If your drone is far away, slightly angle your body or the transmitter so the broadside of the antenna is facing the drone, avoiding pointing the tip at it.
Goggle Antennas: Diversity and Orientation
FPV goggles typically feature “diversity” receivers, meaning they have two antenna inputs. The receiver constantly switches to the antenna receiving the stronger signal. This is a massive advantage for maintaining video quality, but only if you use it effectively.
- Mix and Match: A common and highly effective strategy is to use one omnidirectional circularly polarized antenna (e.g., a cloverleaf or pagoda) and one high-gain directional circularly polarized antenna (e.g., a patch or helical antenna).
- The omnidirectional antenna provides good coverage for close-range, agile flying.
- The directional antenna is for longer-range flights and cutting through minor interference, but it requires you to aim your head (and thus the antenna) at the drone.
- Aiming Directional Antennas: If using a patch or helical antenna, you must constantly aim your head (and therefore the antenna) in the general direction of your drone. This takes practice but can significantly extend your range and improve video clarity.
- Separation: Ensure your goggle antennas aren’t touching or too close to each other, especially if they are different types.
Actionable Tip: Invest in a good diversity receiver setup for your FPV goggles. Start with a solid omnidirectional and add a directional antenna as your skills and flight range increase. Practice keeping your head aimed at the drone, especially when flying at the limits of your range.
The Power of Antenna Upgrades
While this post focuses on position, it’s worth noting that upgrading your stock antennas can yield significant improvements. Manufacturers often include basic antennas to keep costs down. Investing in higher quality, well-tuned antennas from reputable brands (e.g., Lumenier, ImmersionRC, VAS) can dramatically boost your signal strength and resilience to interference, complementing your efforts in optimal drone antenna position.
Actionable Tip: Research and read reviews before upgrading. Ensure your new antennas are the correct frequency (2.4 GHz for control, 5.8 GHz for video) and polarization (e.g., RHCP) for your specific setup. Pay attention to connector types (SMA vs. RP-SMA) to ensure compatibility.
Advanced Techniques and Troubleshooting for Peak Performance
Even with perfect antenna positioning, challenges can arise. Here, we delve into more advanced techniques and troubleshooting tips to ensure you maintain a strong signal and a stable connection throughout your flights.
Understanding RSSI and Telemetry Data
Many modern flight controllers and remote controllers provide valuable telemetry data, including RSSI (Received Signal Strength Indicator). RSSI is a numerical representation of the strength of the signal being received by your drone’s receiver. Monitoring RSSI in real-time (often displayed in your OSD or on your transmitter screen) is an invaluable tool for:
- Pre-flight Checks: Before taking off, you can walk around your flight area with your drone on the ground (motors disarmed!) to check for dead spots or areas with unusually low RSSI.
- In-flight Monitoring: Keep an eye on your RSSI during flight. A steady drop indicates you’re reaching the limits of your range or encountering increasing interference. A sudden, sharp drop could signal a serious issue like an antenna becoming dislodged.
- Antenna Position Validation: Experiment with different drone antenna positions on the ground and observe how RSSI changes. This provides empirical data to support your positioning decisions.
Actionable Tip: Configure your OSD to display RSSI if possible. Learn what “safe” RSSI values are for your specific setup (e.g., -60 dBm is excellent, -90 dBm is often critically low). Set up an audible RSSI warning on your transmitter if available.
Environmental Factors Affecting Signal
Beyond physical obstructions and your antenna setup, several environmental factors can significantly impact your signal:
- Weather: Heavy rain, fog, and dense clouds can attenuate RF signals, especially at higher frequencies like 5.8 GHz. Lightning activity can also cause severe electromagnetic interference.
- Electromagnetic Noise: Power lines, cellular towers, Wi-Fi hotspots, industrial machinery, and even large solar flares can generate RF noise that interferes with your drone’s signal. Urban areas are typically “noisier” than open fields.
- Time of Day: Certain frequencies can be more affected by atmospheric conditions and solar activity, though this is more pronounced in long-wave radio than typical drone frequencies. However, crowded Wi-Fi bands (2.4 GHz) can be more congested during peak usage hours.
Actionable Tip: Check weather forecasts for adverse conditions. Be aware of your surroundings; if you’re flying near power lines or cell towers, expect potential interference. If experiencing inexplicable signal issues, try flying at a different location or time of day.
Pre-Flight Checks and Best Practices
Consistency is key to a reliable signal. Incorporate these checks into your pre-flight routine:
- Antenna Connection: Always ensure all antenna connectors (on drone, VTX, receiver, goggles, transmitter) are tightly secured. A loose connection is a prime culprit for poor signal.
- Physical Inspection: Visually inspect all antennas for damage (bent elements, cracked housings, frayed cables). Replace any damaged antennas immediately.
- Cable Management: Ensure antenna cables are not pinched, stretched, or routed too close to noisy electronics. Use zip ties or heat shrink to secure them properly.
- Power On Sequence: Power on your remote controller first, then your drone. This ensures the control link is established before the drone initializes.
- Range Check: Perform a low-power range check as per your manufacturer’s instructions to confirm basic functionality before committing to a full flight.
Actionable Tip: Develop a consistent pre-flight checklist that includes antenna inspection and signal checks. This routine will prevent many common signal-related issues.
Beyond Position: A Holistic Approach to Drone Signal Management
While drone antenna position for best signal is undoubtedly a critical factor, achieving truly robust and reliable communication requires a holistic approach. It’s the culmination of intelligent design, careful setup, informed piloting, and continuous learning.
The journey to mastering your drone’s signal begins with understanding the fundamental principles of radio waves and the specific characteristics of your equipment. From meticulously orienting your drone’s diversity antennas to strategically aiming your ground station’s directional antennas, every decision contributes to the strength and clarity of your link. Recognizing the impact of obstacles, interference, and environmental conditions allows you to mitigate risks and make smarter in-flight adjustments.
By integrating knowledge of antenna types, polarization matching, and real-time telemetry data like RSSI, you empower yourself to troubleshoot effectively and push the boundaries of your drone’s capabilities safely. Remember, a strong signal isn’t just about flying further; it’s about flying with confidence, ensuring uninterrupted video, and maintaining precise control over your valuable aircraft.
So, take these actionable tips, apply them diligently, and observe the tangible improvements in your drone’s performance. The sky awaits, and with optimized drone antenna position, your connection will be stronger, your flights smoother, and your aerial adventures more exhilarating than ever before. Happy flying!
Frequently Asked Questions
What is the optimal drone antenna position for the best signal?
Generally, orienting your drone’s antennas in a “V” or “L” shape, with one vertical and one horizontal, provides good omnidirectional coverage. This diversity helps maintain a strong link as the drone changes orientation during flight, ensuring the best signal reception.
How does antenna orientation affect drone signal strength and reliability?
Antenna orientation directly impacts the signal’s polarization and ability to reach the receiver. Misaligned drone antennas can lead to significant signal loss, reduced range, and intermittent connections, even with the drone relatively close.
Does the type of drone antenna (omnidirectional vs. directional) influence its ideal position?
Yes, absolutely. Omnidirectional antennas, like whip antennas, radiate in all directions and benefit from diverse “V” or “L” placement for optimal coverage. Directional antennas require precise aiming towards the receiver for the best signal, so their position needs to be carefully considered for line of sight.
Should I consider obstacles or other components when determining the best drone antenna position?
Definitely. Always ensure your drone antennas have a clear line of sight and are not blocked by the drone’s frame, batteries, or other electronics. Metallic parts, in particular, can significantly obstruct the signal, so placement away from them is crucial for a strong and reliable signal.
How important is the drone controller antenna position for maintaining a strong signal?
The controller antenna position is just as vital as the drone’s for maintaining a strong signal. Always point your controller’s antenna directly at the drone and ensure it has an unobstructed view. Avoid pointing the tip of an omnidirectional antenna at the drone, as this is often its weakest point.
What are some quick tips to improve my drone’s signal strength if I’m experiencing issues with antenna position?
Beyond proper V-shape placement, ensure your drone antennas are clean, undamaged, and securely connected. Regularly inspect for bends or fraying, as damaged antennas will severely degrade your signal. If possible, elevate both your drone and controller to reduce ground interference and maintain a clear line of sight for the best signal.


