If you’re a drone enthusiast who wants to take your flying experience to the next level, adding first-person view (FPV) to your drone is a game-changer. FPV provides an immersive view that makes you feel like you’re flying with the drone, giving you a unique and unforgettable perspective. But how do you add FPV to your drone? Don’t worry, it’s not complicated.
This blog post will guide you step-by-step on how to add FPV to your drone, including the equipment you need, how to set it up, and tips for an enjoyable FPV experience. So, put on your goggles and get ready to soar through the skies like never before!
Introduction
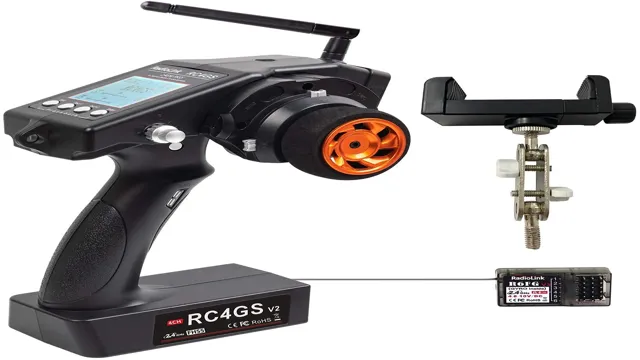
Are you ready to take your drone flying to the next level? Adding FPV (First Person View) to your drone can give you a whole new perspective and enhance your flying experience. To start, you will need an FPV camera and transmitter, as well as a receiver and display for your goggles or monitor. Mount the camera on your drone, wiring it to the transmitter, and connect the transmitter to the drone’s power source.
Then, set up your receiver and display, securing your goggles or monitor to your controller or using a separate holder. Finally, adjust your camera settings for optimal FPV, such as adjusting camera angle and focus. With your new FPV setup, you will be able to see what your drone sees in real-time and take your flying game to the next level.
Why add FPV to your drone?
Drones are remarkable inventions that have taken the world by storm. They can fly high up in the sky to capture visuals and videos that were previously impossible to obtain. However, with the addition of FPV (First Person View) technology to these devices, an entirely new dimension has been opened up.
FPV allows drone pilots to see through the camera mounted on the drone and experience the flight in real-time, as if they were right there in the cockpit. Adding FPV to a drone provides a thrilling and immersive experience that takes the whole flying experience to a new level. It’s no surprise that FPV has become a popular addition in the drone world, providing the pilot with a unique perspective and customization options that enhance their overall flying experience.
Getting Started
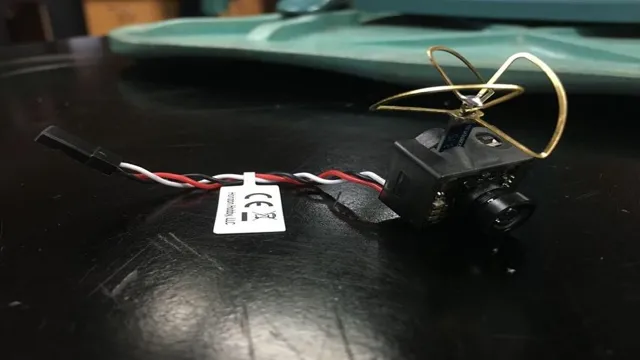
Adding FPV (First Person View) to your drone is a great way to get an immersive flying experience. However, it can seem a bit daunting to get started. The first step is to choose a camera and a video transmitter.
The camera should be small and lightweight yet produce high-quality video. The video transmitter will send the video feed from the camera to the goggles or monitor. Next, you will need to install the camera and transmitter on your drone.
This can involve soldering wires, so it’s essential to be comfortable with electronics. Once everything is installed, turn on your drone and goggles or monitor and tune in to the video feed. Congratulations, you’ve just added FPV to your drone! Now you can fly like a bird and experience the world from a whole new perspective.
Choosing a compatible camera and transmitter
When it comes to choosing a compatible camera and transmitter for your setup, it can be quite overwhelming. With the multitude of options available, it’s important to consider a few key factors before making a decision. Firstly, you’ll want to ensure that the camera and transmitter are both compatible with each other.
This means checking for matching frequencies and compatible connectors. It’s also important to consider the range of the transmitter and the resolution of the camera. The range will determine how far you can fly your drone, and the resolution will affect the quality of your imagery.
Ultimately, you’ll want to find a combination that meets your specific needs and budget. By doing thorough research and consulting with experts in the field, you can find the camera and transmitter that’s just right for you and your drone.
Selecting the right goggles or monitor
When selecting the right goggles or monitor for your needs, it’s important to consider a few key factors. Firstly, you need to think about your specific use case. Are you going to be using your goggles or monitor for racing, freestyling, or something else entirely? This will impact the features you need to prioritize.
Secondly, you want to ensure that the goggles or monitor you choose are comfortable to wear, with a good fit and adjustable straps. This will prevent discomfort during extended use. Lastly, you need to think about the technical specifications of the goggles or monitor, such as resolution, field of view, and latency.
These factors will determine the quality of your video feed, and impact your overall experience. By taking the time to consider these key factors, you can make an informed decision and choose the right goggles or monitor for your needs.
Installation
Are you excited to add FPV to your drone? It’s a great way to experience the world from a new perspective. The process of adding FPV to your drone may seem daunting at first, but don’t worry, it’s not as complicated as it may seem. The first step is to choose a suitable FPV camera and transmitter.
Make sure the camera fits your drone and can capture high-quality footage. Then, you’ll need to install the camera and transmitter on the drone. It’s essential to properly mount them, so they are secure and do not shift during flight.
Next, you’ll need to connect the camera and transmitter to the video transmitter on your drone and adjust the frequency channel so you can receive a clear image on your FPV goggles. Finally, it’s crucial to test your FPV system before flying your drone. With a bit of patience and attention to detail, adding FPV to your drone will be a fun and rewarding experience.
Mounting the camera and transmitter
Installing a camera and transmitter for a drone is an essential step in capturing high-quality aerial footage. Mounting the equipment securely is crucial to prevent it from falling off mid-flight. The first step is to determine the appropriate location to place the camera and transmitter.
Usually, it’s best to mount the camera and transmitter towards the front of the drone for better balance. Next, you will need to use a secure mounting bracket and screws to attach the camera and transmitter to the drone’s body. It’s important to make sure that the camera and transmitter are level and aligned with the drone’s center of gravity.
This will prevent any unwanted vibrations or movements that could affect the quality of the footage. Finally, double-check that all connections are secure and properly connected before powering on the equipment. With the camera and transmitter securely mounted, you can now take to the skies and capture stunning aerial footage.
Connecting the camera and transmitter to the drone
When it comes to connecting the camera and transmitter to your drone, it isn’t as complicated as it may sound. First, locate the port on your camera where the transmitter will connect. Then, connect the transmitter to the camera by plugging it into the port.
Next, locate the port on your drone where the transmitter will connect. Usually, it will be located on the bottom of the drone. Insert the transmitter into the port, taking care not to damage it.
Once it’s connected, turn on your camera and transmitter and check for a signal. You should now be able to view the footage from your camera in real-time on a screen or monitor. Remember to double-check your connections before takeoff, as a loose or faulty connection could cause your drone to crash.
By following these simple steps, you can easily connect your camera and transmitter to your drone and capture stunning aerial footage.
Calibration
Adding FPV to a drone can be an exciting venture for drone enthusiasts. However, it requires proper calibration to ensure optimal video transmission and avoid interference. Calibration begins with selecting the right video transmitter and camera with compatible frequencies.
Next, you’ll need to power up the video transmitter first before the camera to avoid burnout. Positioning the camera and transmitter on the drone also influences signal strength, so ensure that both are mounted securely and in optimal positions. Additionally, you may need to adjust the antenna to ensure maximum signal strength.
Remember to test and adjust the video settings to get the best video quality. With proper calibration and testing, adding FPV to your drone can provide an exhilarating new experience.
Adjusting camera angle and focus
When it comes to capturing the perfect shot, adjusting your camera’s angle and focus can make all the difference. Calibration is the key to getting it right. As you prepare to take your shot, take a look at your camera’s settings and make sure they’re optimized for your environment.
Are you shooting in low light or bright sunlight? Adjust accordingly. Once you’ve honed in on your settings, take the time to focus your camera lens. Make sure your subject is crisp and clear.
A well-calibrated camera is essential for producing high-quality photos that truly capture the moment. So take the time to adjust your settings and focus, and you’ll be well on your way to capturing some truly amazing shots.
Setting up OSD and other display options
Calibrating your OSD and display settings is essential to ensure that your monitor is projecting the most accurate and high-quality image possible. Calibration involves adjusting contrast, brightness, and color, among other settings, to match your personal preferences or the requirements of your work. It can be done manually or with the help of calibration software or hardware.
A properly calibrated monitor not only improves the overall visual experience but also reduces eye strain, which is especially important if you use your monitor for long periods. Remember, even the best quality monitor may not be set up to its full potential, and calibration is the key to unlocking its full potential. So take the time to calibrate your OSD and display settings, and you’ll be amazed at the difference it will make to your overall viewing experience.
Flying with FPV
Looking to add FPV (First Person View) to your drone? It’s easier than you might think! While many drones come with FPV capabilities built-in, it’s still possible to add it to your existing drone with a simple upgrade. You’ll need an FPV camera, a video transmitter, an FPV monitor or headset, and some basic soldering skills. The camera is mounted on the drone and sends video to the transmitter, which then sends it to your monitor or headset.
The monitor or headset allows you to see what the drone sees in real-time, giving you a thrilling first-person flying experience. FPV flying adds a whole new level of excitement to drone flying and is definitely worth trying out!
Safety considerations and best practices
When it comes to flying with FPV (First Person View), there are a few safety considerations and best practices that you should keep in mind. Firstly, always make sure that you are flying in a safe and legal area. Check your local laws and regulations to ensure that you are not breaking any rules or endangering anyone.
Secondly, it’s important to always maintain visual line of sight with your drone. This means that you should never fly too far away or out of your sight. Additionally, consider wearing a spotter vest to help you keep an eye on your drone while you are flying.
Finally, always make sure to carry a first aid kit with you in case of any accidents or injuries. By following these safety tips and best practices, you can ensure that you have a safe and enjoyable time flying with FPV.
Tips for improving your FPV experience
If you’re looking to enhance your FPV (First Person View) flying experience, there are a number of tips you should consider. Firstly, it’s important to have a comfortable and well-fitted pair of goggles or screen to ensure maximum visibility and minimal distractions. Additionally, make sure to adjust your camera angle to help you see obstacles and adjust your flying accordingly.
Understanding the different flying modes, such as acro and horizon, can also help to improve your control and maneuvers. Lastly, practice makes perfect – find a safe and open space to fly in, and consistently fly your FPV drone to improve your skills. By implementing these tips, you’ll be on your way to enjoying a more seamless and fulfilling FPV experience.
Conclusion
Congratulations, you have officially upgraded your drone game by adding FPV! Now you can soar through the skies like a bird, seeing the world in a whole new way. By following these steps, you have proved that adding FPV to your drone is not rocket science, but it does take careful planning and execution. With a little bit of research and the right equipment, you have unlocked a whole new level of drone flying.
So put on your goggles, grab your controller, and get ready to experience the thrill of FPV! Who needs wings when you have a drone?”
FAQs
What is FPV in drone?
FPV stands for First-Person View. It is a system that allows a user to see what a drone sees through a camera mounted on the drone.
How can I add FPV to my drone?
You can add FPV to your drone by mounting a camera on your drone and using an FPV transmitter to send the video feed to your FPV goggles.
What are the benefits of using FPV on a drone?
FPV allows you to see what your drone sees in real-time, which can help you navigate in challenging flight conditions, capture better aerial footage, and experience the thrill of flying your drone from a first-person perspective.
Do I need a special drone to use FPV?
No, you do not need a special drone to use FPV. You can mount a camera and FPV transmitter on most consumer-grade drones. However, it is important to ensure that your drone is capable of carrying the additional weight and that it is compatible with your chosen FPV system.