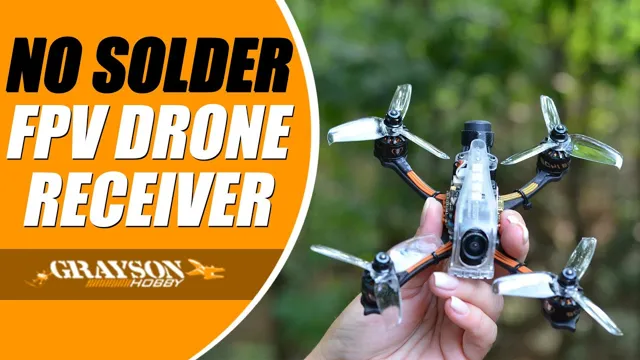
Do you want to take your FPV drone flying experience to the next level? Adding a receiver may just be the key! The receiver is an essential part of any drone, as it makes it possible for your drone to communicate with your controller and fly smoothly. However, adding a receiver might seem like a daunting task at first. In this blog post, we’ll break it down into simple steps and explain the basics of what you need to know to add a receiver to your FPV drone.
Whether you’re a beginner or an expert, you’ll be able to take your FPV drone flying to new heights once you’ve successfully installed a receiver. So, fasten your seatbelts and get ready to learn!
What You Will Need
If you want to add a receiver to your FPV drone, there are a few things you will need. First and foremost, you will need a compatible receiver that matches the frequency of your transmitter. It’s important to note that not all receivers will work with all transmitters, so make sure that you do your research before making a purchase.
You will also need a soldering iron and some solder to attach the receiver to the drone’s flight controller. Additionally, you may need some wire to connect the receiver to the flight controller, depending on your specific setup. Once you have all of the necessary components, you can begin the process of installing the receiver onto your drone and configuring it to work with your transmitter.
With a little bit of patience and some careful attention to detail, you’ll have your drone up and running with a new receiver in no time.
Receiver
If you are looking to set up a home theater system, a receiver is an essential component. It acts as the hub of your home entertainment system, connecting all of your audio and video sources and routing the signals to your speakers and display. To get started, you will need a quality receiver that can handle the audio and video formats you plan to use.
Look for one that is compatible with the devices you already own or plan to buy. You will also need a set of speakers, which can be designed for the front, center, and rear channels. Some receivers come with built-in speakers, but these may not provide the sound quality you desire.
Lastly, consider investing in a subwoofer for added bass. With these components in place, you can enjoy high-quality sound and video from the comfort of your own home.
Soldering Iron and Solder
When it comes to electronics, one of the most essential tools you will need is a soldering iron and solder. Soldering is the process of bonding two or more metal components using a specially formulated metal alloy called solder. It is a crucial skill that every electrical enthusiast should master.
To begin, you will need a soldering iron and a spool of solder. A good soldering iron should have adjustable temperature control, a comfortable grip, and interchangeable tips. It’s important to choose the right type of solder for the job, as there are different alloys and thicknesses available.
For electronic projects, a 60/40 tin-lead solder with a diameter of 0.8mm is the standard choice. When using a soldering iron, it’s important to follow safety procedures, such as using a soldering mat, wearing heat-resistant gloves, and working in a well-ventilated area.
With practice and the right tools, you can quickly become proficient in soldering and tackle a wide range of electronic projects.
Wire Cutters and Strippers
When it comes to electrical work, having the right tools is essential. Wire cutters and strippers are two of the most commonly used tools in this field. It is vital to ensure that your wire cutters and strippers are of good quality so that you can work with efficiency safely.
You will want to look for tools with sharp blades, comfortable handles, and a sturdy build. Wire cutters are used to cut wires to the required length. These tools come in various shapes and sizes, from small wire cutters for fine wire to heavy-duty cutters for thick cables.
It is crucial to use the appropriate wire cutter for the thickness of the wire you are working with to avoid damaging the tool. Wire strippers, on the other hand, are used to remove insulation from the wire without damaging the inner wire. They come in various sizes and can strip various wire thicknesses.
Strippers have adjustable settings, so you can set them to the wire size you want to strip. Having the right tools for electrical work is not only a matter of efficiency but also safety. Using inappropriate tools can lead to accidents, damage to devices or equipment, or worse, electrical shocks.
So invest in high-quality wire cutters and strippers that meet safety standards to ensure that you can work safely and efficiently.
Step-by-Step Guide
If you’re looking to add a receiver to your FPV drone, no worries, it’s actually pretty simple. First, you’ll need to get the right receiver for your drone’s controller. Next, you need to get a clean power source for your receiver, like a BEC or voltage regulator.
You’ll also need to attach your antenna to your receiver, which can be done using a coaxial cable or an SMA connector. Once the receiver is installed, you’ll need to set it up in your flight controller. This involves connecting it to your FC and mapping the channels, so make sure to read the instructions for your specific FC and receiver.
Once everything is connected and set up, you should be good to go! Just make sure to test everything out before taking your drone for a spin. With these simple steps, you’ll be up and running with your new receiver in no time.
Identify the Flight Controller
When it comes to identifying the flight controller, it can be a daunting task for beginners. However, a step-by-step guide can help simplify the process. Firstly, you need to locate the flight controller on your drone, which is typically found in the center of the body.
It’s a small circuit board with various components, including the gyroscopes, accelerometers and processor. Secondly, you need to check the make and model of the flight controller. This information can be found on the product manual or online.
Lastly, you can use a multimeter to confirm if the flight controller is functioning correctly. By following these steps, you can identify your flight controller and ensure that it’s working appropriately. Remember, your flight controller is the brain of your drone, and it’s essential to keep it well-maintained to prevent any mishaps during your flights.
Determine the Receiver Connection Points
When it comes to determining the connection points for your receiver, there are a few things to keep in mind. First, you need to identify the type of receiver you have and what inputs and outputs are available. This will help you determine what cables and adapters you may need to connect it to your other devices.
Next, consider the placement of your receiver in relation to your other components. You want to make sure that you have adequate space and access to the necessary ports. Additionally, think about the type of audio and video signals you will be transmitting and whether you need to use any special settings or configurations.
By taking these factors into account, you can ensure that you have a smooth and functional setup that delivers high-quality audio and video. And with the right cables and adapters, you can easily connect your receiver to all of your other devices, including your TV, speakers, and media players. Whether you’re a movie buff or an audiophile, having a well-connected receiver can make all the difference when it comes to enjoying your favorite content.
Solder the Receiver Wires
Soldering is an essential aspect when it comes to building a wireless receiver. To do it, you will need to have a soldering iron, a spool of solder, and a steady hand. First, you’ll want to identify which wires belong to the receiver and which wires belong to the power source.
Once you’ve done that, strip off the insulation from the wires, ensuring that they have enough exposed area to make a proper connection. Hold the wire against the receiver, and touch it with the tip of the soldering iron. Add a bit of solder to the connection point, allowing it to melt and flow onto the wire’s surface.
Be careful not to overdo it, as this can cause the connection to fail. Once you’re happy with the connection, give it a quick tug to ensure that it’s secure. Repeat the process for all remaining wires, taking care not to mix them up and connecting them to the wrong point on the receiver.
Properly soldering the receiver wires will ensure that they are securely connected, allowing for the wireless device to function effectively.
Connect the Receiver to Flight Controller
Connecting the receiver to the flight controller is a crucial step in building a drone. It allows the drone to receive signals from the remote controller and relays them to the flight controller. To connect the receiver, first, you need to locate the receiver ports on the flight controller.
These ports can be labeled as RC or RX. Next, plug the provided cable into the corresponding port on both the receiver and the flight controller. It’s important to ensure that you plug the wire in the correct orientation.
Be careful not to force the plug as that might damage the port. Once the wire is securely plugged in, mount the receiver in a safe location on the drone, preferably away from the power distribution board and any motors. Finally, bind the receiver to the remote controller according to the manufacturer’s instructions.
This process may differ depending on the receiver and the controller used. Always consult the manufacturer’s manual for detailed instructions. By following this step-by-step guide, connecting the receiver to the flight controller should be a breeze.
Calibrate the Receiver
Adding a receiver to an FPV drone can seem like a daunting task, but it’s actually quite straightforward if you take the time to calibrate it correctly. Once you’ve installed the receiver, you need to connect it to your transmitter to make sure the controls are working correctly. You can do this by plugging the receiver into your drone and turning on your transmitter.
Then, you’ll need to go into your transmitter’s settings and select the receiver you want to use. Make sure to carefully follow the instructions provided with your receiver to ensure everything is connected properly. Once your receiver is connected, you’ll need to calibrate it to make sure it’s working correctly.
This involves checking and adjusting the signal strength and range of your receiver to ensure the controls are responsive and accurate. Calibration is an essential step to ensure a smooth and safe flying experience. With a bit of patience and attention to detail, you can add a receiver to your drone like a pro!
Bind the Receiver to the Transmitter
Calibrating the receiver is a crucial step in binding it to the transmitter. Calibration ensures that there is a proper connection between the two devices, and the receiver can receive signals from the transmitter accurately. Start by turning on both devices and placing them near each other.
Then, connect the receiver to your computer and open the calibration software. Follow the instructions on the screen, which will usually involve moving the sticks and switches on the transmitter in specific patterns. Once the calibration is complete, the receiver will be bound to the transmitter, and you can start using them together.
Calibrating the receiver can be compared to tuning an instrument. Just like an out-of-tune guitar can produce unpleasant sounds, a poorly calibrated receiver can lead to incorrect signals being sent, affecting the performance of your RC vehicle. So, taking the time to calibrate the receiver can make all the difference in how well your vehicle moves and performs.
With a properly calibrated receiver and transmitter, you can enjoy the full range of movements and functionalities of your RC vehicle.
Check Receiver Channels in Betaflight
Checking the receiver channels in Betaflight is essential to ensure that your drone operates smoothly and safely. However, before delving into the process, it’s important to calibrate the receiver. This process ensures that the receiver can determine the exact position of the stick on the transmitter and translate that into accurate movement for your drone.
Calibration is a simple process that involves powering on both the transmitter and the drone, accessing the calibration menu in Betaflight, and following the on-screen instructions. Once you’ve calibrated your receiver, you can check the channels in Betaflight by accessing the receiver tab and moving each stick on your transmitter. Check that each channel corresponds with the correct stick movement, and make any necessary adjustments.
This will ensure your drone responds correctly to your control inputs and help prevent crashes or other mishaps. Remember, calibration and channel checking should be done before every flight, so make it a regular part of your pre-flight routine. With proper calibration and channel checking, you can enjoy a safer and more enjoyable flying experience.
Conclusion
Adding a receiver to your FPV drone may seem like a daunting task, but fear not, intrepid pilots. With a steady hand and some basic know-how, you too can become the master of your quadcopter’s flight domain. So go forth, fellow aviators, and let your drones soar to new heights with the aid of a trusty receiver.
Happy flying!”
FAQs
What type of receiver do I need for my FPV drone?
The type of receiver needed for your FPV drone will depend on the brand and model of your drone, as well as your transmitter. Make sure to check compatibility before purchasing a receiver.
How do I install a receiver on my FPV drone?
The exact installation process will vary based on your drone and receiver. Generally, you will need to locate the receiver bay on your drone, connect the receiver to the flight controller, and bind the receiver to your transmitter.
How far can my FPV drone receiver pick up signals?
The range of your FPV drone receiver will depend on factors such as the strength of your transmitter and any obstacles in the environment. Generally, you can expect to maintain a stable signal within a few hundred meters.
What should I do if my FPV drone receiver is not picking up a signal?
First, make sure that your transmitter and receiver are properly paired and that your battery is charged. If you are still having issues, try moving to a different location or adjusting the antennas on your transmitter and receiver.


