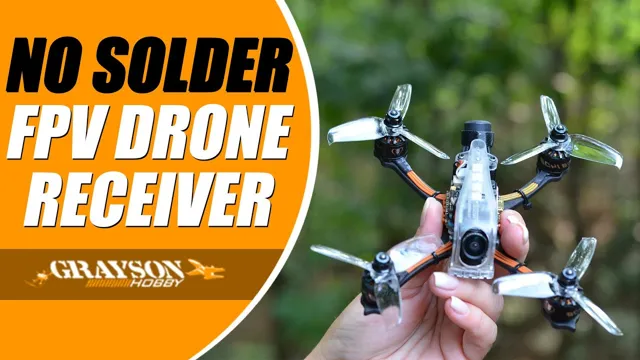
So, you’ve finally got your hands on an FPV drone and can’t wait to take it to the skies. But before you can start flying, you need to make sure it’s properly set up. And one crucial component of a well-functioning drone is the receiver.
Adding a receiver to your FPV drone is an important step to ensure you can receive signals from your transmitter and fly your drone properly. But with all the technical jargon and complicated instructions out there, it can be overwhelming to figure out how to do it. Think of adding a receiver to your drone like giving it a set of ears.
Without ears, your drone can’t hear your commands properly, and it won’t be able to fly as smoothly as it should. But with the right receiver, you can ensure your drone can pick up on your signals and respond accordingly. In this blog, we’ll be breaking down the steps you need to take to add a receiver to your FPV drone.
We’ll be covering everything from choosing the right receiver for your needs to installing it into your drone. By the end of this guide, you’ll be equipped with the knowledge and skills you need to take your drone-flying experience to the next level. So, buckle up and let’s get started!
Understanding the FPV Drone Receiver
Adding a receiver to your FPV drone is an integral part of creating a successful drone build. A receiver is the module that receives a radio signal from your remote controller and passes it onto the flight controller. The flight controller then translates the signal and controls the drone’s motors accordingly.
When choosing a receiver for your build, it’s important to consider factors like range, compatibility, and number of channels needed. It’s also essential that your receiver is bound to your remote controller correctly to prevent any mishaps during flight. With a little bit of research and patience, adding a receiver to your FPV drone can be a straightforward process.
Types of Receivers
The FPV drone receiver is an essential component that allows the drone pilot to control the drone remotely. There are different types of receivers available in the market, and it’s essential to understand the features of each to choose the right one for your drone. When it comes to receivers, the most common types are PWM, PPM, and SBus.
PWM is the most straightforward type, but it has limited functionality, making it suitable for simple drones. PPM receivers are more advanced, and they can send multiple channels over a single wire, making them popular among pilots who want more control over their drone. SBus receivers are the most advanced, allowing pilots to get real-time telemetry data from their drone, which is essential for advanced aerial photography and videography.
In conclusion, when choosing an FPV drone receiver, it’s crucial to consider your drone’s capabilities, your flying style, and your budget to make an informed decision and get the most out of your drone.
Compatibility with Your Drone
FPV drone receiver When it comes to flying your FPV drone, one of the most important components to consider is the receiver. The receiver is what allows your drone to communicate with your remote control, receiving signals and translating them into commands that the drone can understand. Without a proper FPV drone receiver, your drone won’t be able to perform as it should, and you risk losing control and crashing.
It’s important to choose a receiver that is compatible with your drone’s specific make and model, as well as with your chosen remote control. When choosing a receiver, consider factors like range, interference, and channel availability to ensure a seamless flying experience. With the right FPV drone receiver, you can enjoy precise control and high-quality video transmission for a top-notch flying experience.
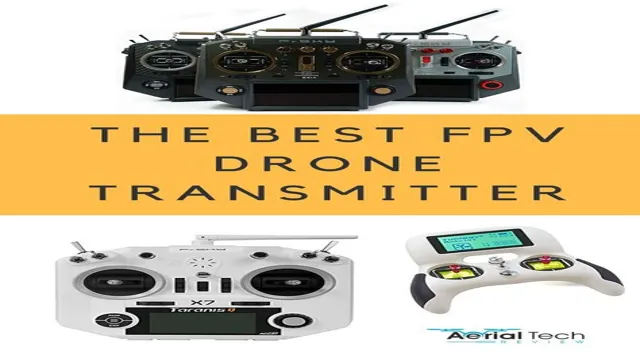
Choosing the Right Receiver
Adding a receiver to your FPV drone is an essential step in maximizing its capabilities and enjoying a smooth flying experience. The receiver acts as the “ears” of your drone, picking up signals from your remote controller and translating them into flight patterns. There are various types of receivers available for FPV drones, with varying degrees of range, latency, and compatibility.
To choose the right receiver for your drone, consider factors such as your drone’s make and model, your preferred transmitting frequency, and the type of antennas you have. Some of the popular receiver brands include FrSky, FlySky, and Spectrum, but it’s always best to do your research before investing in one. Remember, the receiver is a crucial component of your FPV drone and can make all the difference to your flying experience.
So, take your time to choose the right one and enjoy the thrill of FPV flying!
Considerations for Your Needs
Choosing the right receiver for your needs can be a daunting task, especially for those who are new to the world of audio equipment. There are numerous factors to consider, including the type of audio you’ll be using the receiver for, the desired sound quality you want, and compatibility with your existing equipment. Before making a purchase, it’s essential to understand the features and specifications of different receivers and how they align with your needs.
It’s also vital to consider the size and design of the receiver, as it should fit into your home setup comfortably. Ultimately, the goal is to find a receiver that meets your requirements and delivers outstanding sound quality, making your listening experience all the more enjoyable. When it comes to choosing the right receiver, it’s crucial to keep the keyword “compatibility” in mind.
The equipment you already own will play a significant role in determining which receiver is right for you, as you want to ensure that everything works together seamlessly. It’s also helpful to consider the number of channels you need, as this will affect the quality and immersion of your listening experience. For those who want to use their receiver for more than just music, features like Bluetooth connectivity and Multi-Zone support might be essential.
Overall, finding the right receiver takes time, but with thorough research, you’ll be able to narrow down your options and make an informed decision.
Budget and Price Range
When it comes to shopping for a new receiver, your budget and price range will inevitably play a significant role in your decision-making process. Fortunately, there are options available for every budget and price point. The key is to carefully consider your needs and prioritize which features are essential and which ones you can live without.
If you are on a tight budget, you might want to opt for a more basic model with fewer bells and whistles. However, if you are willing to spend a little more, you can get a receiver with better sound quality, more channels, and more advanced features. Ultimately, it’s all about finding the right balance between cost and functionality.
Regardless of your budget, be sure to do your research and read product reviews to make an informed decision. Remember, a higher price tag doesn’t always equal better quality, so don’t overspend if you don’t need to.
Preparing Your Drone for Receiver Installation
Adding a receiver to a FPV drone can seem like a daunting task, but with proper preparation, it can be done smoothly. The first step is to make sure you have all the necessary tools and equipment, including a soldering iron, heat shrink, and wiring. It’s also crucial to choose the right receiver for your drone and ensure it’s compatible with your flight controller.
Once you have the equipment ready, it’s time to dismantle your drone and locate the receiver’s installation spot. Carefully solder the receiver wires onto the flight controller, making sure to double-check each connection. Then, cover the connection points with heat shrink to protect them from damage.
After the installation process, make sure to calibrate the receiver and test it before flight to ensure everything is working correctly. In summary, adding a receiver to your FPV drone requires careful preparation and attention to detail. By following the appropriate steps and being patient, you can successfully add a receiver and enjoy a smooth, stable flying experience.
Tools Required
When preparing your drone for receiver installation, there are several tools you will need to make the process as smooth as possible. These include wire cutters, a soldering iron, heat-shrink tubing, and a multi-meter. Before beginning the installation, it’s important to check that you have all the necessary components to complete the task.
Take a moment to read through the instructions provided with the receiver to make sure you understand each step involved. It’s also a good idea to lay out the components and tools you will be using in a clear and organized manner, so you can easily access what you need. By taking these steps, you can be sure that your drone is set up correctly and ready to fly safely.
Disassembling Your Drone
When it comes to installing a receiver on your drone, the first thing you need to do is prepare your drone for disassembly. This means carefully removing the outer shell and any components that may be in the way of accessing the flight controller. Be sure to refer to your drone’s user manual to ensure you are disassembling it correctly and safely.
Once you have access to the flight controller, you can then begin installing your receiver. This process may require some soldering skills and knowledge of wiring, so be sure to have the necessary tools and resources on hand. Remember, taking your drone apart can be intimidating, but with proper preparation and care, you can install a receiver without any issues.
Take your time, follow the instructions, and before you know it, your drone will be ready to fly with a new receiver installed.
Installing Your New Receiver
Adding a new receiver to your FPV drone can be an excellent upgrade for improving your flying experience. Before you begin, make sure you have the right receiver for your drone’s flight controller. Installing a new receiver involves soldering, so it’s essential to have the proper tools and safety equipment.
First, locate the previous receiver and remove it from the drone. Next, carefully solder your new receiver into place, being sure to observe proper polarity to avoid damage to your electronics. After soldering, double-check your connections and make any necessary adjustments before powering up your drone.
Once powered, check to ensure your new receiver is working correctly by performing a range test. Finally, it’s essential to take the time to configure your new receiver within your drone’s flight controller to ensure optimal performance. With your new receiver successfully installed, you can enjoy a more reliable, connected flying experience.
Receiver Placement
If you’re looking to improve your home theater experience, installing a new receiver is an excellent place to start. One of the most crucial aspects of installing a new receiver is finding the perfect placement for it. You want to ensure that it is in an area where it can cool down and has enough ventilation.
Also, make sure it’s not too close to other electronics, as this can cause interference. Choosing an appropriate location will allow you to enjoy your new receiver to its fullest potential. When considering the placement, remember that the goal is to achieve the ideal surround sound experience, so think about where you will be sitting and how the sound will be distributed across the room.
Once you’ve found the perfect location, it’s time for the fun part – setting up the receiver. By following the manufacturer’s instructions and connecting all of your speakers to the receiver correctly, you’ll be on your way to an immersive and thrilling audio experience. So don’t hesitate – find the right placement for your new receiver today and take your home theater experience to the next level!
Wiring the Receiver to Your Drone’s Flight Controller
When it comes to installing a new receiver on your drone, wiring it to the flight controller is a crucial step that you don’t want to overlook. First, you should identify the corresponding cable on your flight controller that matches the receiver’s input. This is usually labeled with “SBUS” or “PPM” on the board.
Once you’ve located it, you can connect the corresponding wire from your receiver to the designated port on your flight controller. Make sure that you’re connecting the right wire from the receiver to the right pin on your flight controller to avoid any misconnections. After you’ve connected the wires, you’ll want to make sure that everything is secured firmly in place with zip ties or electrical tape.
With the receiver properly wired as part of your drone’s flight controller, you’re now ready to take your aircraft to the skies.
Testing Your FPV Drone with the New Receiver
When it comes to adding a receiver to your FPV drone, the process can seem daunting at first, but fear not! With a bit of patience and attention to detail, you’ll be up and running in no time. The first step is to choose a compatible receiver for your drone. There are a variety of options available in the market, so do your research and choose one that fits your needs.
Once you have your receiver, the next step is to connect it to your drone’s flight controller. This typically involves soldering wires to specific pins on the flight controller board. It’s important to double check your connections and make sure everything is secured in place before powering up your drone for its first flight with the new receiver.
Once everything is connected and secured, it’s time to power up and test your drone. Take it for a test flight and make sure the receiver is properly receiving signals from your controller. If everything checks out, congrats – you’ve successfully added a receiver to your FPV drone and expanded its capabilities!
Calibrating the Receiver
Calibrating the receiver is crucial to ensuring that your FPV drone performs optimally. Before taking your drone for a spin, it is recommended to calibrate your receiver to avoid any signal interference. This process involves adjusting the sticks on your remote control to ensure that the receiver responds accurately to the inputs provided.
Make sure to turn on your drone and transmitter before calibrating your receiver. With the help of a receiver calibration tool, you can easily calibrate your receiver in a matter of minutes. It is essential to repeat this process every time you change the components of your drone to ensure that they work seamlessly together.
By calibrating your receiver, you can avoid any potential crashes or accidents and enjoy a smooth and safe flight.
Flight Testing Your Drone
If you’re an FPV drone enthusiast, you know that the receiver is a crucial component of your drone’s flight performance. Testing your drone with a new receiver can be both exhilarating and nerve-wracking. You’re excited to see how your drone will perform with the updated technology, but at the same time, you’re worried about the possibilities of things going wrong.
That’s why it is crucial to follow a comprehensive pre-flight checklist to ensure that your drone is in top condition before the flight. Start by checking the receiver’s firmware, antenna, and wiring for any damages. Next, test the range of the transmitter with the new receiver to see if there are any dead zones.
Finally, take it out for a spin to get a feel for the new receiver’s features, such as increased sensitivity or better connectivity. By completing these steps, you’ll be confident that your drone is ready to take on new challenges with the latest technology. Happy flying!
Conclusion and Final Thoughts
In the world of FPV drones, adding a receiver can be the difference between a smooth flight or a catastrophic crash. But don’t worry, it’s not rocket science. By following these simple steps, you can seamlessly integrate a receiver and take your drone to new heights – in both senses of the word.
So, get ready to soar like an eagle, and remember – with great power comes great responsibility (to practice safety and not fly in restricted airspace). Happy flying!”
FAQs
What is a receiver in an FPV drone?
An FPV drone receiver is an electronic component that receives signals from the radio transmitter and converts them into actions, such as controlling the drone’s direction and speed.
Why would you need to add a receiver to an FPV drone?
You would need to add a receiver to an FPV drone if you want to control it using a remote controller or a transmitter instead of relying on automated flight modes.
How do you choose the right receiver for an FPV drone?
You need to choose a receiver that matches the frequency and protocol of your transmitter. You also need to consider the range, number of channels, and compatibility with your flight controller.
What are the steps to add a receiver to an FPV drone?
The steps to add a receiver to an FPV drone may vary depending on the drone’s model and brand, but generally, you need to open up the drone’s body, locate the flight controller, connect the receiver to the flight controller using a cable, and bind the receiver to the transmitter. It is crucial to follow the manufacturer’s instructions and safety guidelines to avoid damaging the drone or injuring yourself.


