As a drone enthusiast, you know that activating your DJI FPV drone is the first and most crucial step to take before soaring into the skies. The process may seem daunting at first, but fear not, as we’ve got you covered. Activating your drone is a simple and straightforward procedure that can be done in a matter of minutes.
Think of it like unleashing a beast, waiting to take off and reach new heights. All it takes is a few clicks and you’re ready to go. So, grab your drone and let’s dive into the activation process.
Are you ready to take off? Let’s get started.
Check Drone Components
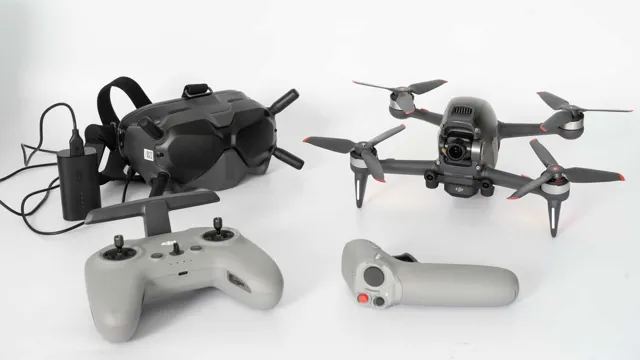
Activating a DJI FPV drone can seem like a daunting task, but it’s actually quite simple once you check all the necessary components. First, make sure that your drone’s battery is fully charged and inserted properly. Next, ensure that your controller is also charged and connected to the drone.
You can do this by connecting your phone to the controller’s USB port or by using the DJI Fly app. Once your controller is connected, turn on your drone by pressing and holding the power button until the lights turn on. Finally, check that your goggles are also charged and properly connected to the controller.
You should now be able to see the live feed from your drone’s camera and take to the skies. Don’t forget to check your local drone regulations and always fly safely and responsibly. With these simple steps, you can activate your DJI FPV drone and start experiencing the thrill of first-person flight.
Make Sure the Controller is Charged
When preparing to fly your drone, it’s important to make sure all components are working properly. One critical component to check is the controller. Ensure that it’s charged before taking off, as there’s nothing more disappointing than losing control mid-air due to a dead battery.
Along with the controller, make sure all the drone’s other components are in good condition, including the propellers, battery, and camera (if applicable). Examine the propellers closely to ensure they’re not damaged, as bent or cracked blades can affect the drone’s stability and performance. In addition, consistently inspect the battery for any signs of wear or leaks, as this can lead to a decreased flight time and even pose a safety hazard.
By taking the time to thoroughly check all components, you’ll be able to enjoy a safe and successful flight.
Check the Battery Level of the Drone
As a drone pilot, it’s always important to check the battery level of your drone before taking off. This is a crucial part of ensuring a safe and successful flight. You don’t want your drone to die mid-flight, causing it to fall out of the sky.
So, make sure to check the battery level on both your drone and your controller. Most drones come with a battery indicator light that will let you know the level of the battery. It’s essential to charge your drone fully before taking off to ensure a longer flight duration.
Also, ensure that the battery contacts are clean and free of debris. A dirty battery can cause connectivity issues or even damage the battery. In summary, always check your drone components before flying to ensure a safe and successful flight.
Connect the Controller and the Drone
If you’re looking to activate your DJI FPV drone, the first step is to connect the controller and the drone. To do this, make sure both devices are fully charged, then turn on the controller and the drone. Next, press and hold the power button on the drone until the lights start flashing.
You can then connect the drone to the controller by pressing and holding the button on the back of the controller until the lights on both devices turn green. Once they are connected, you can calibrate the drone and start flying. Remember to always follow safety guidelines and regulations when operating your drone.
By following these simple steps, you’ll be able to activate your DJI FPV drone and start enjoying all the amazing features it has to offer.
Power On the Controller and the Drone
Connecting the controller and the drone is the first step to take when you’re ready to fly. First, turn on your controller and ensure that the drone’s battery is charged and properly inserted. Some controllers may require you to install batteries to power them up.
Next, locate the power button on the drone and press it to turn it on. Similarly, the controller has a power button, usually located on the top or side, that you should press to turn it on. Once both the controller and the drone are powered up, they will search for and connect to each other via Bluetooth or Wi-Fi.
Ensure that the two devices are paired by checking the indicator lights on both the drone and the controller. After that, you can start flying! Remember, always ensure that the controller has enough battery to handle a full flight session before you start. With these simple steps, you’re ready to fly high and explore the world from a new perspective.
Link the Controller to the Drone
To fully enjoy your drone flying experience, it’s important to know how to connect your controller to your drone. First, make sure your drone and controller are both turned on and within range of each other. Then, check your drone’s user manual to see which frequency your drone uses to communicate with the controller.
Once you know the frequency, set your controller to that same frequency. Some controllers also require a calibration process before being able to connect to the drone. Follow the instructions for calibration carefully, as this ensures precise control of your drone.
Once calibrated and connected, you’re ready to take to the skies and maneuver your drone with ease. Remember to always fly with caution and abide by any local regulations or restrictions. Happy flying!
Calibrate the Drone
If you’re ready to take your DJI FPV drone for a spin, there are a few steps you need to complete before getting started. First and foremost, you’ll need to activate your drone through the DJI Fly app. This is a simple process which involves connecting your drone to the app and entering some basic information.
Once this is complete, you’ll need to calibrate your drone to ensure it is ready for flight. This involves carefully following the instructions in the DJI Fly app to level your drone and set its home point. From there, you should be ready to take off and start exploring the skies! Remember to always fly safely and follow local regulations, and have fun soaring above the clouds with your DJI FPV drone.
Compass Calibration
Compass Calibration As a drone owner, calibration is a crucial part of ensuring that your drone flies safely and accurately. One important calibration process is compass calibration, which basically involves syncing your drone’s onboard compass with the GPS system in order to ensure that it is correctly oriented. This process is particularly important if you’ve moved your drone to a new location, since the magnetic field in that area may differ from the one you had previously calibrated it to.
To calibrate your drone’s compass, you’ll need to follow the instructions provided by the manufacturer, which typically involve rotating the drone around different axes to allow it to capture the surrounding magnetic field. Once the calibration is complete, your drone will be able to fly smoothly and accurately, without any compass errors that could result in it drifting off course or flying erratically. Remember, compass calibration is a must-do if you want to fly your drone safely and accurately, so be sure to do it regularly!
IMU Calibration
IMU calibration is a crucial step in preparing your drone for flight. IMU, or Inertial Measurement Unit, is a sensor that measures changes in acceleration and rotation rates of the drone. A misaligned IMU can cause the drone to drift or fly erratically during flight, making calibration a necessary task.
Calibrating the IMU involves setting the sensor’s reference orientation to the drone’s resting state, so it can accurately measure changes in movement during flight. To calibrate the IMU, you will need to select the correct option in your drone’s software and follow the instructions carefully. During the calibration process, you will be required to hold the drone in specific orientations to allow the software to record the correct reference data.
It is essential to perform this task in a stable environment, away from any magnetic interference or radio frequencies. Once done, you should notice improved stability and responsiveness in your drone’s flight. So, before you head out to the field for your next drone flight, make sure to calibrate your IMU to ensure a smooth flying experience.
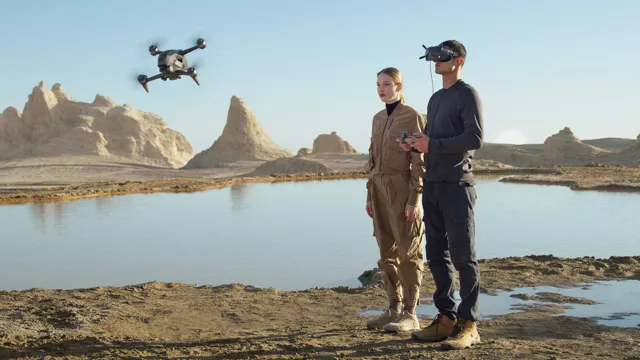
Fly Your DJI FPV Drone
If you’ve just acquired the DJI FPV Drone and are excited to explore this new drone’s features, you’ll need to activate it first. The good news is that it’s a straightforward process that won’t take too much of your time. Begin by installing the DJI Fly application, which can be found on Google Play or the App Store, depending on your device.
Once installed, switch on the drone and connect it to your smartphone or tablet’s wifi network. Open the DJI Fly app and follow the instructions to access the activation page. You’ll then be prompted to fill in your personal details and the drone’s serial number.
You can now grant permission to the app to provide you with access to the drone’s features. Finally, complete the remaining setup, such as the location and language settings, and you’ll be all set to fly your DJI FPV drone in no time! Remember, ensure you activate the drone before takeoff, as it’s mandatory to comply with regulations and fly your drone safely.
Conclusion
In conclusion, activating your DJI FPV drone is as easy as pie (or as flying a drone if you will). Just follow these simple steps carefully, and you’ll be on your way to capturing breathtaking aerial footage in no time. Keep in mind that practice makes perfect, so don’t worry if you don’t get it right on the first try.
With the right amount of patience and dedication, you’ll soon be soaring high with your DJI FPV drone, and who knows, you might even discover a new hobby or passion along the way. So buckle up, put on your goggles, and prepare for takeoff! Happy flying!”
FAQs
What is the process to activate the DJI FPV drone?
To activate your DJI FPV drone, press and hold down the power button on the aircraft until the battery level indicator lights illuminate. Make sure the remote controller is turned on and connected to the drone. Then, follow the on-screen prompts in the DJI Fly app to complete the activation process.
Do I need to register the DJI FPV drone before activating it?
Yes, you need to register your DJI FPV drone with the Federal Aviation Administration (FAA) before activating it. This is mandatory for all drones that weigh more than 0.55 lbs and less than 55 lbs. Failure to do so can result in hefty fines and penalties.
What are the system requirements to activate the DJI FPV drone?
To activate your DJI FPV drone, you need a compatible mobile device (iOS or Android) with the DJI Fly app installed. Your phone should have a minimum of 4GB RAM and run on iOS 11.0 or later or Android 7.0 or later. You’ll also need a stable internet connection for the activation process.
What should I do if my DJI FPV drone fails to activate?
If you’re having trouble activating your DJI FPV drone, make sure that your mobile device and the drone’s firmware are updated to the latest version. Check if your phone meets the system requirements stated by DJI. Restart both the drone and the remote controller, and try the activation process again. If the problem persists, consult the DJI support team for further assistance.


