Looking to take your FPV flights to the next level? Then you need the ability to connect your FPV camera to your PC! This allows you to stream live video from your drone or other FPV setup directly to your computer, giving you a whole new level of control over your flights. Not sure where to start when it comes to connecting your camera to your PC? Don’t worry, we’ve got you covered. In this blog post, we’ll walk you through everything you need to know about connecting your FPV camera to your computer, from the necessary equipment to the step-by-step process.
So grab your camera and let’s get started!
Requirements
Are you looking for a way to connect your drone FPV camera to your PC? It is a straightforward process. However, before we start, you will need some things. Firstly, you need to have a drone with a camera that supports an FPV feed.
You also need a USB or HDMI converter cable to connect your camera to your PC. Finally, ensure that your PC can support the video output from your camera. Once you have gathered all the required equipment, connecting your drone FPV camera to your PC is quite simple.
With most FPV camera drones, all you need to do is connect one end of the converter cable to your camera and the other end to your computer. Once connected, the camera should communicate with your PC, and you should be able to see the live feed from your drone’s camera on your computer. In conclusion, connecting your drone FPV camera to your PC should be a breeze with all the required equipment in place.
Remember to ensure that your drone camera is compatible with FPV feed and that your PC can support the video output. This process will unlock new possibilities, such as live-streaming your drone footage on social media or editing your footage on your computer. So what are you waiting for? Get out there and start exploring the world from a bird’s eye view!
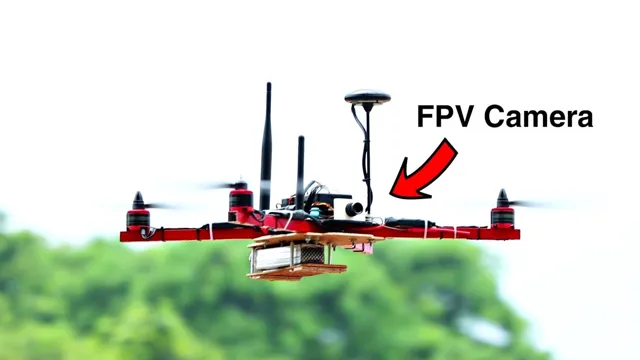
Types of FPV Cameras
When it comes to selecting a FPV camera, there are a few requirements to keep in mind. First and foremost, the camera should produce a high-quality image. A clear and vivid image is vital for a functional FPV experience.
The camera should also provide minimal latency and a high refresh rate to ensure smooth and seamless video streaming. Additionally, it should have a wide field of view for better situational awareness. Some FPV cameras come equipped with features such as image stabilization, low-light performance, and adjustable lenses to meet specific needs.
It’s essential to consider the camera’s compatibility with your drone’s power source and the transmission system. Overall, understanding the requirements and your specific needs will ensure that you select the best FPV camera for your drone.
USB Ports on Camera and PC
When it comes to transferring photos and videos from your camera to your PC, having compatible USB ports is crucial. Your camera and computer must have USB ports that are compatible with each other. For example, if your camera has a USB Type-C port but your computer only has a USB Type-A port, you won’t be able to transfer data without a USB adapter.
Additionally, if your computer’s USB ports are old and slow, it may take longer to transfer files. To ensure a smooth and quick transfer, it’s recommended to use USB 0 ports or higher.
In summary, make sure your camera and PC have the right type of USB ports and that they are up to date for efficient transfer of files.
Hardware Connection
Connecting a drone FPV camera to a PC may seem like a daunting task, but it’s actually quite simple! First, you’ll need a micro USB to USB cable to connect the camera to your computer. Once you’ve connected the cable to your camera and your PC, the camera should appear as a connected device in your computer’s device manager. From there, you can access the camera’s files, transfer data, and even live stream video directly to your computer.
Keep in mind that not all drone cameras have the same connection options, so it’s important to check your manual or manufacturer’s website for specific instructions. By properly connecting your drone FPV camera to your PC, you can easily review footage, make tweaks to your settings, and even fly your drone from the comfort of your home!
Connect FPV Camera to PC
If you’re wondering how to connect your FPV camera to your PC for live streaming or recording purposes, you’ve come to the right place. First, you’ll need to ensure that your FPV camera is compatible with your computer. Most FPV cameras come with a USB connector that can easily be plugged into your PC’s USB port.
Simply connect one end of the USB cable to your FPV camera and the other end to your computer. Make sure your camera is turned on and your PC recognizes it as a new device. Windows will typically install the necessary drivers on its own, but if not, you can download them from your camera’s manufacturer website.
Once done, you can start live streaming or recording your FPV feed using software like OBS, which is free and easy to use. By connecting your FPV camera to your PC, you can take your flying experience to the next level and share it with the world.
Check Camera is Recognized by PC
Hardware Connection One of the most crucial steps while using a camera with your PC is ensuring it’s connected properly. It’s essential to check whether your computer recognizes the camera before diving in. When it comes to hardware connection, it’s essential to ensure that your USB cable is securely plugged into the correct port.
A loose connection can cause interruptions during image or video transfer, and the output may not be as expected. If your camera has an SD card slot, ensure that it’s inserted correctly and locked in place. With proper hardware connection, your camera should appear in the device manager or file explorer.
In case it’s not, double-check to ensure that the drivers are installed, and the correct settings are enabled in your camera. By following these simple steps, you can ensure that your camera is correctly connected to your PC, allowing you to transfer images and videos without any hiccups.
Software Connection
If you’re looking to connect your FPV camera on a drone to your PC, it’s important to understand that there are multiple ways to make this happen. One method involves using a capture card or USB video capture device to convert the analog signal from your camera into a digital format that can be read by your computer. This will require some additional equipment and setup, but can provide high-quality video and low latency.
Another option is to use an HDMI output from your drone controller to feed the video signal directly into your computer. This method is simpler and more straightforward, requiring only an HDMI cable and the appropriate software on your PC. Whatever route you choose, make sure to research and test thoroughly to ensure a stable and dependable connection between your camera and computer.
With a little effort, you can unlock a range of creative and analytical possibilities for your FPV video footage.
Install Application
When it comes to installing an application, one of the most important things to consider is the software connection. This refers to the link between your device and the software, and it plays a crucial role in determining the installation process. A stable and reliable software connection can make the process quick and hassle-free, while a weak or unstable one can cause installation failures and errors.
It’s important to ensure that your software connection is strong and stable before attempting to install any new applications. You can do this by checking your internet connection and making sure that there are no issues with your device’s drivers or settings that may be affecting the connection. By taking the time to ensure a strong software connection, you can save yourself time and frustration when installing applications, ensuring that they run smoothly and without issues.
Open the Application
Opening an application can be a straightforward process, but it can get a little complicated depending on the software and your operating system. If you are using a Windows computer, you can open an application by clicking on the Start menu, searching for the program, and clicking on the icon. On a Mac, you can find the application through Spotlight Search or using the Launchpad.
Some software applications require additional steps, such as logging in or connecting to a server. When connecting to a server, it’s essential to ensure the correct server address is entered for a successful connection. Once you’ve successfully opened the application and logged in, you can start using its features and tools.
Overall, opening an application is a crucial first step in using software, and it’s essential to understand the process to make it easier and faster for you.
Connect FPV Camera to the Application
Connecting your FPV camera to the application is essential for viewing and controlling your drone’s live video feed. The first step is to download and install the software application that corresponds with your specific camera model. Once installed, connect your camera to the device using a USB cable or Wi-Fi network connection.
If using a USB cable, ensure that the camera is powered on before connecting it to the device. Once connected, launch the application and verify that the camera is recognized and connected. You can then adjust the settings and view the live video feed from your camera through the application.
It’s important to keep the software and firmware of both your camera and device up to date to ensure optimal performance and connectivity. With a simple connection process, you can easily connect your FPV camera to the application and take full control of your aerial photography experience.
Conclusion
In conclusion, connecting your drone’s FPV camera to a PC might seem like a daunting task, but it’s actually a breeze. With the right cable and software, you’ll be swooping through the skies and capturing stunning aerial footage in no time. So don’t be afraid to get your hands dirty and dive into the world of FPV connectivity.
Your drone and your viewers will thank you!”
FAQs
What are the requirements for connecting a drone FPV camera to a PC?
You will need a compatible FPV camera, a video transmitter, a USB capture device, and appropriate software on your PC.
Can I connect my drone’s FPV camera to my PC wirelessly?
Yes, you can use a Wi-Fi signal from the drone or a separate Wi-Fi module to connect wirelessly to the FPV camera.
How do I troubleshoot connection issues between my drone FPV camera and PC?
Check that all cables and connections are secure, ensure that your PC is running the correct software, and check for any firmware updates for your hardware.
Is it possible to live stream the drone’s FPV feed to my PC while recording it at the same time?
Yes, with the right software and hardware, you can stream the feed to your PC while recording it simultaneously.


