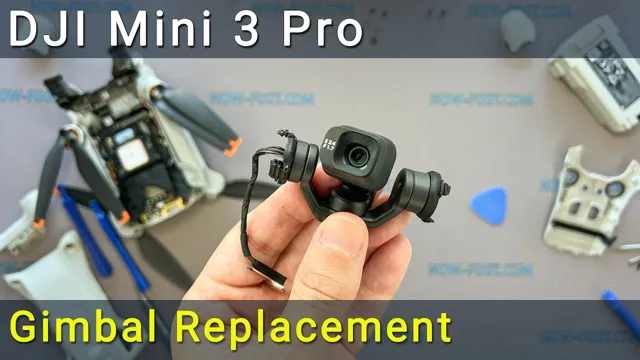
If you are a drone enthusiast or a professional aerial photographer, you might have heard about the DJI Mini 3 Pro, the latest addition to DJI’s Mini lineup. This drone is equipped with advanced features that make it an excellent choice for capturing stunning aerial shots. However, to ensure that your footage is stable and smooth, you need to calibrate the gimbal of your DJI Mini 3 Pro.
Calibrating the gimbal is a crucial step that every drone user needs to perform before taking off. This process involves adjusting the gimbal’s orientation sensors, which help stabilize the camera during flight. Without proper calibration, your footage may be shaky and blurry, making it unusable.
Fortunately, calibrating the DJI Mini 3 Pro Gimbal is a straightforward process that anyone can do. You don’t need any specialized tools or technical knowledge to make the necessary adjustments. Once you’ve aligned the sensors, your camera will stay level and stable, providing you with high-quality footage every time you fly.
In this blog, we’ll provide you with a step-by-step guide on how to calibrate the gimbal of your DJI Mini 3 Pro. Whether you’re a beginner or an experienced drone user, you’ll find our instructions easy to follow and implement. So, let’s get started and ensure that your DJI Mini 3 Pro is ready to capture stunning aerial footage!
Step 1: Ensure Gimbal is Level
When it comes to calibrating a DJI Mini 3 Pro gimbal, the first step you should take is to ensure that the gimbal is level. A gimbal that is off-balance can cause uneven shots and may not function correctly. To confirm that your gimbal is level, start by placing the drone on a flat surface.
Turn on the drone and wait for the gimbal to initialize. Once the gimbal is active, check the indicator lights on the drone to see if it is level. If the lights are steady, the gimbal is balanced and ready for calibration.
If the lights are flashing, the gimbal needs to be realigned before you can proceed with calibration. By following these simple steps, you can ensure that your DJI Mini 3 Pro gimbal is properly calibrated and ready to deliver smooth, steady shots. Don’t overlook this crucial step if you want to get the most out of your drone.
Check level using bubble level on the device
When it comes to capturing high-quality footage with a gimbal, ensuring that the device is level is critical. Luckily, it’s easy to check the level of your gimbal using a bubble level that is often available on the device. To start, turn on your gimbal and place it on a level surface.
Then, use the built-in bubble level to check whether the gimbal is perfectly level. If it’s not, adjust it accordingly until the bubble sits in the center. By taking this small step to ensure that your gimbal is level, you’ll be setting yourself up for success and capturing stunning, smooth footage every time you use it.
Make sure device is on a flat surface
When it comes to setting up your gimbal, it’s important to start with a level playing field. This means making sure your device is on a flat surface before you get started. Why is this important? Well, if your gimbal is tilted or at an angle, it can throw off the balance of your shots and make it difficult for you to get the results you want.
You don’t want to spend all that time setting up your gear, only to find out that your shots are shaky or poorly framed because your gimbal wasn’t level. So, before you do anything else, take a few extra moments to ensure that your device is stable and positioned correctly. By doing this first, you’ll set yourself up for success and be able to focus on getting those perfect shots.
Step 2: Connect to DJI Fly App
If you want to know how to calibrate the gimbal on your DJI Mini 3 Pro, the first step is to connect the drone to the DJI Fly app. This app provides you with a simple, user-friendly interface that makes it easy to calibrate your gimbal. First, ensure your drone and controller are powered on and connected to each other.
Then, open the DJI Fly app and tap on the icon for your drone. Next, choose the “Gimbal Settings” option and select “Calibrate Gimbal”. Follow the on-screen prompts to complete the calibration process.
Remember, a calibrated gimbal will improve the stability and smoothness of your drone footage, so it’s worth taking the time to do this regularly.
Turn on device and connect to app
To successfully fly your drone, you’ll need to connect to the DJI Fly App. Once you’ve turned on your drone and mobile device, open the app and connect them by following the instructions on the screen. It’s important to make sure you’re using the correct app for your drone model, as using the wrong app can cause potential issues.
The DJI Fly App is designed specifically for DJI drones and provides a range of features such as live view, automatic takeoff and landing, and GPS tracking. Once connected, you’ll be able to access all the features of your drone through the app, including adjusting camera settings, setting flight parameters, and reviewing flight logs. With this seamless connection between your device and drone, you can ensure a safe and enjoyable flying experience.
Access the Calibration menu and select Gimbal
The second step to calibrate your DJI drone’s gimbal is to connect it to the DJI Fly App. This app is essential for accessing the calibration menu and making any necessary adjustments to your drone’s settings. You can easily connect your drone to the app by first turning on the remote and drone, then opening the DJI Fly App and selecting your drone model.
Once connected, you’ll be able to access the calibration menu and select “Gimbal” to begin the process. As you calibrate your drone’s gimbal, keep in mind that it’s essential to have a stable surface and a slow, steady hand to ensure accurate measurements. By taking the time and care to properly calibrate your drone’s gimbal, you’ll be able to capture stunning aerial footage with ease and confidence, making your next drone flight a true success.
Step 3: Follow On-Screen Instructions
Calibrating your DJI Mini 3 Pro gimbal is a crucial aspect of ensuring smooth and stable shots during your drone photography sessions. However, it may seem daunting to follow the on-screen instructions when you first begin. Don’t worry, it’s actually a straightforward process! Once you’ve accessed the calibrate gimbal option in the DJI Fly app, carefully follow the instructions presented on your screen.
You may be prompted to adjust the position of the drone or gimbal in specific ways, and it’s essential to do so precisely. Once the calibration process is complete, you’ll be able to enjoy seamless and effortless footage from your drone’s camera. Pro tip: recalibrate your gimbal regularly, especially after transporting your drone to a new location.
This ensures the most accurate and reliable performance from your device.
Follow prompts to complete calibration
When you’re ready to calibrate your device, the next step is to follow the on-screen instructions. Pay close attention to the prompts and take your time to ensure the best results. Calibration is a vital step to guarantee that your device is functioning optimally by correcting any inaccurate readings.
Completing the calibration process will enable you to get accurate and reliable data readings. Remember that calibration is not a one-time event; it should be done regularly, depending on the manufacturer’s recommendation or usage conditions. Neglecting to calibrate your device can lead to misleading data, which can affect the performance and accuracy of the device.
Therefore, it’s crucial to follow the on-screen prompts carefully and complete the calibration process as instructed. By doing so, you’ll ensure that your device is operating consistently and accurately, and you can rely on it for your data needs.
Make any necessary adjustments
As you proceed through the installation process, it’s important to keep an eye out for any on-screen instructions that may pop up. These instructions can help guide you in making any necessary adjustments to ensure that the installation goes smoothly. For example, you may need to grant permission for the software to access certain files or folders on your computer.
Or, you may need to select a specific language or location. These adjustments may seem small, but they can make a big difference in the overall success of the installation. By following these instructions carefully, you can avoid any potential glitches or errors that may arise.
So, take your time and don’t rush through the process – it could save you a lot of time and frustration in the long run.
Step 4: Test and Adjust if Necessary
Now that you’ve completed the calibration process for your DJI Mini 3 Pro gimbal, it’s important to test out its functionality and make any necessary adjustments. Start by attaching your camera to the gimbal and turning it on. Test the stability of the gimbal by moving it around and checking if the camera stays level.
If there are any issues, you may need to make adjustments to the balance of the gimbal or the motor strength settings. It’s important to pay close attention to any vibrations or wobbling as these can affect the quality of your footage. Once you’ve tested and adjusted as necessary, take your gimbal out for a test run.
Try filming different types of shots, such as smooth pans or tracking shots, and pay attention to how the gimbal performs. Don’t be afraid to make further adjustments if needed to ensure that your footage is as smooth and stable as possible. With a properly calibrated gimbal, you’ll be able to take your filming to the next level and capture stunning footage every time.
Monitor device in flight for smooth gimbal motion
One critical step in achieving smooth gimbal motion during a drone flight is to monitor your device while it’s in the air. Testing your drone with a payload before your actual shoot allows you to get a feel for how it’s going to behave and lets you pinpoint any potential issues. Monitoring your drone with a reliable tracking app helps you know what’s happening with your aircraft in real-time.
With this information, you can adjust settings such as exposure and monitor the drone’s altitude, speed, and battery levels. This technique enables you to compensate for any flight conditions and control the gimbal more accurately, resulting in more stable and smoother footage. Overall, testing and adjusting your drone before a shoot is a crucial step towards obtaining high-quality aerial footage that meets your needs and meets your client’s expectations.
Calibrate again if necessary for optimal performance
When it comes to calibration, the job isn’t done until you’ve tested and adjusted the equipment. Even if you followed the calibration procedure to the letter, there’s a chance that your equipment won’t be performing optimally. That’s why it’s crucial to test it after calibration and make any necessary adjustments.
This step is often overlooked, but it can make all the difference in the accuracy and precision of your measurements. By testing the equipment, you’ll be able to identify any deficiencies or inconsistencies in its performance. Depending on the results of your test, you may need to recalibrate certain elements or make other adjustments.
Don’t skip this step if you want to ensure that your equipment is performing as it should. It’s an essential part of the calibration process.
Conclusion
Calibrating your DJI Mini 3 Pro gimbal is the key to achieving the perfect shot. It’s like finding balance in life: if you don’t take a moment to adjust your perspective and align your actions, things might go sideways. So, just like a yogi adjusting their downward dog, take the time to recalibrate your gimbal and find that perfect balance.
Happy shooting!”
FAQs
What is gimbal calibration?
Gimbal calibration is the process of ensuring that the camera stabilizer is properly adjusted to prevent shaky and blurry videos. It helps to maintain the smooth functioning of the gimbal and ensures the camera’s stability.
How do I calibrate my DJI Mini 3 Pro gimbal?
To calibrate your DJI Mini 3 Pro gimbal, first, ensure that the camera is properly attached to the drone and is powered on. Then, go to the DJI Fly App, click on the settings icon, and select the ‘Advanced Settings’ option. Under the gimbal tab, select ‘calibrate gimbal’, and follow the on-screen instructions to complete the process.
How often should I calibrate my DJI Mini 3 Pro gimbal?
It is a good practice to calibrate your gimbal before the first flight and after every firmware update. However, if you notice any errors or abnormalities in the gimbal’s performance, it is recommended to recalibrate it immediately.
What should I do if my DJI Mini 3 Pro gimbal is still unstable after calibration?
If your DJI Mini 3 Pro gimbal is still unstable after calibration, ensure that the camera is securely attached to the drone and that the drone is stable. If the problem persists, try resetting the gimbal by pressing and holding the power button for five seconds, and then try calibrating it again. If the issue still persists, contact DJI customer support for further assistance.