Are you the proud owner of a DJI Mini Pro 3 drone? If so, you know that this mini drone packs a punch when it comes to performance. This drone is the perfect balance of size, weight, and features, making it a popular choice for drone enthusiasts. However, with all this power comes the need for frequent charging.
In this blog post, we will explore the best ways to charge your DJI Mini Pro 3 drone, ensuring it’s always ready for your next adventure. So, buckle up, and let’s dive into the world of DJI Mini Pro 3 drone charging.
Check the Battery Level
One important step when learning how to charge your DJI Mini Pro 3 drone is to check the battery level before you begin. It’s essential to know how much power your drone has left to avoid any surprises mid-flight. To check the battery level, press and release the power button on the battery.
The LED indicator lights will show you how much power is left. Four green lights mean that the battery is fully charged, while one or two lights mean that the battery needs charging. It’s crucial to charge your drone’s battery fully before every flight to ensure you get maximum flight time and don’t run the risk of your drone shutting down mid-flight.
Charging the DJI Mini Pro 3 is a straightforward process, but keeping the battery level in mind is crucial to get the most out of your drone flying experience.
Press Power Button to Check Battery Level
Checking the battery level on your device is a crucial task, and it can be done effortlessly by pressing the power button. In most cases, the battery level of your device is displayed on the screen as soon as you press the power button. However, if the battery level isn’t displayed, you can open the notification panel to check it.
If the battery level is lower than usual, you can take necessary actions to conserve battery life, such as closing unnecessary apps, turning off any connectivity features that you’re not using, or reducing the brightness level of your screen. Keeping your device’s battery healthy is essential to ensure that it lasts for a long time. By following a few tips and tricks and monitoring the battery level regularly, you can keep your device running all day long without having to worry about charging it frequently.
Connect Charging Cable
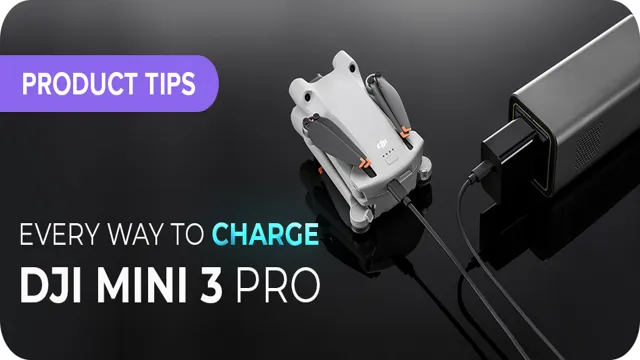
If you’re wondering how to charge your DJI Mini Pro 3, the first step is to connect the charging cable to your drone and the power source. The Mini Pro 3 comes with a USB Type-C cable, which you can use to charge your drone using a power bank or wall adapter. To connect the cable to your drone, look for the USB Type-C port on the side of your drone and plug in the smaller end of the cable.
Once you’ve connected the cable to your drone, plug the larger end into your power source. Make sure that your power source is reliable and delivers the necessary voltage to charge your drone efficiently. Once your drone is plugged in, it will usually take about
5-2 hours to fully charge. It’s recommended that you charge your drone before every flight to ensure that you have enough battery life to complete your mission safely.
Use the Included USB-C Cable
One of the most common mistakes people make when charging their devices is not using the included charging cable. If you have recently purchased a device that comes with a USB-C cable, it’s highly recommended that you use it to charge your device. The included cable is specifically designed to work with your device and provides the optimal charging experience.
Using a different cable, even if it’s a USB-C cable, can lead to slower charging times, or in some cases, damage to your device’s battery. When it comes to charging your device, save yourself the hassle and potential damage by always using the included USB-C cable. Not only will it provide a more efficient charging experience, but it will also ensure the longevity of your device’s battery.
So next time you need to charge your device, don’t overlook the importance of using the included cable!
Attach Charging Hub
If you’re wondering how to charge your DJI Mini Pro 3, the first step is to attach the charging hub. This small device comes included with your drone and is essential for safely charging the battery. To attach it, simply insert the hub into the battery compartment on the bottom of the drone.
The hub should snap into place securely, and the LED lights on top will light up to indicate that it’s ready to charge. From there, you’ll need to connect the hub to a power source using the USB cable that also came with your drone. You can plug it into your laptop, a USB wall adapter, or any other device with a USB port.
Once the hub is connected to power, the battery will start to charge automatically. It’s important to note that the DJI Mini Pro 3’s battery is not removable, so you’ll need to charge it using the hub each time.
Attach Hub to Bottom of Mini Pro 3
If you’re looking for a seamless way to charge your Mini Pro 3, attaching the charging hub is the perfect solution. To attach the hub to the bottom of your Mini Pro 3, simply line up the pins on the charging hub with the pins on the drone and snap it into place. You’ll know it’s secure when you hear a click.
Once attached, you’ll be able to charge your Mini Pro 3’s battery in no time. It’s a quick and easy process that ensures you won’t have to worry about running out of battery mid-flight. So, the next time you’re planning to take your Mini Pro 3 out for a spin, make sure you attach the charging hub first.
Connect Charging Hub to Power Source
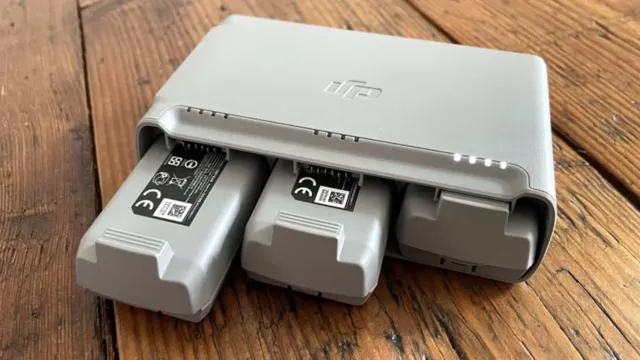
If you’re wondering how to charge your DJI Mini Pro 3, it’s a quick and straightforward process. Start by connecting the included charging hub to a power source using the included USB-C cable. The charging hub can be powered by any 5V USB power source, such as a wall adapter or power bank.
Once the charging hub is connected to power, insert the batteries into the hub’s battery compartments. The LED lights on the hub will indicate the battery’s charge level and will turn from red to green once fully charged. The charging hub can charge up to three batteries at once, making it easy to keep your drone in the air for longer periods.
Always make sure to use the included charging hub when charging your DJI Mini Pro 3 batteries to ensure optimal performance and safety. With this simple process, you can have your drone up and ready to capture stunning footage in no time.
Use Included Power Adapter or USB Port
If you have a charging hub and want to use it to charge your devices, you have two options for powering it up. The first option is to use the included power adapter, which can be plugged into a standard electrical outlet. This is the easiest and most straightforward way to power your charging hub, and it ensures that you will always have enough juice to charge your devices.
The second option is to use a USB port, such as the one on your computer or laptop. This can be a convenient option if you’re on the go and don’t have access to an electrical outlet. However, it’s important to note that using a USB port may not provide as much power as the included power adapter, and it may take longer to fully charge your devices.
Ultimately, the choice between the two options will depend on your specific needs and preferences. If you need quick and reliable charging, the power adapter is the way to go. If you need portability and flexibility, a USB port may be a better choice.
Regardless of which option you choose, make sure to properly connect your charging hub to avoid any mishaps or potential damage to your devices.
Monitor Charging Status
If you’re wondering how to charge your DJI Mini Pro 3 properly, there are a few things to keep in mind. First, you’ll want to make sure you’re using the right charging cable and power source. DJI recommends using a USB-C cable and a power source with an output of 5V/3A.
Once you’ve plugged everything in, you’ll want to monitor the charging status to ensure everything is going smoothly. You can do this by checking the LED lights on the aircraft. When the battery is charging, the lights will blink slowly.
Once the battery is fully charged, the lights will stay solid. It’s important to never tamper with or modify the charging equipment, as this could lead to damage or safety hazards. By following these simple steps, you’ll be able to charge your DJI Mini Pro 3 safely and effectively.
Charging Indicator Light will Blink Red
If you’re wondering what’s going on with your device’s charging status and its indicator light, the key here is to monitor it closely. A blinking red light could indicate that your battery is low and requires immediate charging. This is especially true if you’re using your device extensively or if you’re running multiple applications simultaneously.
It’s best to plug it in and let it charge fully to prolong its battery lifespan. But keep in mind that a flashing red light could also mean that your device is malfunctioning, or there’s a connection issue with the charging cable. In such cases, it’s best to unplug it and try another charging cable or seek professional help.
Remember to be vigilant with your device’s charging status to ensure its optimal performance and longevity.
Charging Complete
If you’re wondering how to charge your DJI Mini Pro 3, don’t worry – it’s a simple process! First, make sure you have the correct charging cable for your drone. Connect one end of the cable to the charging port on the drone and the other end to a power source, like a wall outlet or USB port. The drone will indicate that it is charging, either with a light or via the DJI Fly app.
Once the battery is fully charged, the indicator will change to show that the charging is complete. It’s important to note that you should only use the official DJI charging cable to avoid damage to your drone’s battery. And if you’re planning on storing your drone for an extended period of time, it’s best to charge the battery to around 50% to maintain its health.
With these tips, you’ll be charging your DJI Mini Pro 3 like a pro in no time!
Indicator Light will Stay Green
If you’re someone who always forgets to unplug your devices, then you may have come across this situation where you left your phone or laptop charging overnight, and when you woke up in the morning, it was fully charged. But how would you know if your battery has reached its full capacity? There’s a simple indicator that helps you figure it out. When you plug your device into a charger, a light typically appears, indicating that the device is charging.
When the battery reaches full capacity, the indicator light will stay green. This means you can safely unplug your device from the charger, and it will have enough power to last the entire day. The reason behind this is that most chargers today have a feature called “trickle charging,” which controls the amount of electricity that’s flowing into the battery.
When the battery is about 80% full, the charger begins to slow down the charging process so that the battery doesn’t overheat or overcharge. This is done to ensure that the battery lasts longer and doesn’t get damaged due to excessive charging. So, the next time you’re charging your device, keep an eye on the indicator light.
When it stays green for a few minutes, you can unplug your device and be assured that your battery has reached its full capacity and is ready to be used. It’s a simple yet effective way to ensure that your battery lasts longer and your device doesn’t get damaged due to overcharging.
Conclusion
Now that you know how to charge your DJI Mini Pro 3, you can stay powered up and ready to take on the skies like a pro. So put down those candles, stop chanting incantations, and simply plug in your charger. It may not be as exciting as magic, but it’s definitely the safest and most efficient way to juice up your drone and get it ready for its next high-flying adventure.
Happy flying!”
FAQs
What are the charging options for DJI Mini Pro 3?
DJI Mini Pro 3 can be charged through its USB-C port, a USB wall adapter, or a power bank.
How long does it take to fully charge DJI Mini Pro 3?
It takes approximately 90 minutes to fully charge DJI Mini Pro 3 using a USB wall adapter.
Can DJI Mini Pro 3 be charged while in use?
Yes, DJI Mini Pro 3 can be charged while in use, as long as it is connected to a power source.
Is it safe to charge DJI Mini Pro 3 with a power bank?
Yes, it is safe to charge DJI Mini Pro 3 with a power bank as long as the power bank meets the minimum requirements for output current and voltage. It is recommended to use a power bank with a capacity of at least 5000mAh and an output voltage of 5V/2A.
How do I know when DJI Mini Pro 3 is fully charged?
DJI Mini Pro 3’s charging status can be checked through its LED lights. When the battery is charging, the LED lights will blink in sequence. When the battery is fully charged, all the LED lights will remain solid.