
Ready to take your DJI Mini 3 Pro drone to new heights? Whether you’re a seasoned pro or just taking your first flight, it’s important to ensure your drone is properly calibrated to avoid any unexpected issues or malfunctions during flight. One of the key calibration processes is the IMU calibration, which adjusts the drone’s internal sensors and ensures accurate and stable flight. In this blog post, we’ll dive into everything you need to know about DJI Mini 3 Pro IMU calibration, including why it’s important, when to calibrate, and how to do it properly.
So buckle up, and let’s get started on your next epic drone adventure!
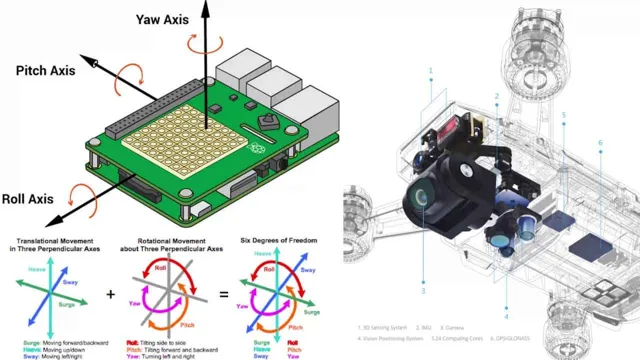
What is IMU calibration?
IMU calibration is a vital process for any drone operator, especially those who fly the DJI Mini 3 Pro. IMU stands for Inertial Measurement Unit, and it’s responsible for measuring the drone’s movement, orientation, and acceleration. Over time, the IMU sensors can drift, which can lead to inaccurate flight data and unstable flights.
To prevent this, you need to calibrate the IMU regularly. This involves placing the drone on a level surface and following a series of instructions in the DJI Fly app. The app will guide you through the steps, which involve moving the drone in various directions and positions to allow the IMU to recalibrate itself.
It’s a simple process that takes just a few minutes, but it’s essential for maintaining your drone’s stability and ensuring accurate flight data. So, if you’re a DJI Mini 3 Pro owner, make sure you calibrate the IMU regularly to keep your drone flying safely and smoothly.
Heading Three: Explanation of IMU and calibration
IMU calibration is an essential process for ensuring accurate measurements on an inertial measurement unit (IMU). An IMU consists of several sensors, including accelerometers, gyroscopes, and magnetometers, and is often used in robotics, aerospace, and drones. Calibration involves adjusting the sensors to compensate for any biases or errors, and it is crucial for reliable data interpretation.
Calibration is typically done by collecting data from the sensors when the IMU is in a stable position, such as on a calibration table or in a static environment, and then using algorithms to calculate calibration parameters. These parameters are then used to correct any inaccuracies in subsequent measurements. Calibration can affect the accuracy, resolution, and stability of the IMU, making it an essential part of using an IMU in any application.
When calibrating an IMU, it is important to follow the manufacturer’s instructions and perform regular recalibration to ensure consistent and reliable results.
Why is IMU calibration important for the DJI Mini 3 Pro?
IMU calibration is a critical component of ensuring the DJI Mini 3 Pro operates correctly and accurately gathers flight data. IMU stands for Inertial Measurement Unit, and essentially, it is the device responsible for detecting movement and orientation in the drone. When the IMU isn’t calibrated correctly, it can significantly impact the Mini 3 Pro’s performance, making it more difficult to control and increasing the likelihood of crashes.
Calibrating the IMU involves ensuring that the drone is level and free from any outside interference. It may seem inconvenient to add an extra step to your pre-flight routine, but taking the time to calibrate the IMU can be the difference between a successful and safe flight, or a costly crash. By ensuring the IMU is calibrated correctly, you can fly your DJI Mini 3 Pro with confidence and peace of mind, knowing that your drone is working to its full potential.
So next time you’re getting ready to take off, be sure to take a few extra minutes to calibrate the IMU. Your Mini 3 Pro (and your wallet) will thank you for it.
Heading Three: Explaining the negative implications of not calibrating the IMU
IMU calibration Why is IMU calibration important for the DJI Mini 3 Pro? Failing to calibrate the IMU can lead to negative implications for this drone. The IMU (Inertial Measurement Unit) is responsible for measuring motion in three dimensions and helps to stabilize and maintain the drone’s orientation in the air. If the IMU is not calibrated correctly, the drone can experience erratic behavior, such as drifting or tilting during flight, which can cause crashes or damage to the drone.
Additionally, incorrect IMU calibration can lead to inaccurate data readings and poor performance of the drone, such as decreased battery life and reduced flight range. Therefore, it is crucial to ensure that the DJI Mini 3 Pro’s IMU is calibrated correctly before each flight to ensure a safe and stable flying experience.
How to calibrate the IMU on DJI Mini 3 Pro?
IMU calibration is an essential process for ensuring the DJI Mini 3 Pro’s stability and accuracy of flight. IMU stands for Inertial Measurement Unit, which is a sensor that measures the drone’s orientation and movement. Calibrating the IMU is a simple but crucial step that should be done before every flight to ensure the drone performs at its best.
To calibrate the DJI Mini 3 Pro, start by finding an open and flat surface away from any electromagnetic interference. Next, turn on the drone, go to settings, and select the IMU calibration option. Follow the on-screen instructions and ensure the drone is held steady while the calibration is taking place.
Once the calibration is complete, restart the drone, and it’s ready to take off! Regularly calibrating the IMU on the DJI Mini 3 Pro will ensure it remains stable and reliable, allowing you to enjoy flying the drone with peace of mind.
Heading Three: Step-by-step guide on IMU calibration process
If you own a DJI Mini 3 Pro, it’s important to know how to calibrate the IMU. The IMU, or Inertial Measurement Unit, is responsible for measuring the drone’s acceleration, orientation, and angular velocity. Calibration is necessary to ensure the accuracy of these measurements, which is critical for the drone’s stability in flight.
The calibration process involves setting the drone in a stable position, ensuring no interference from nearby objects, and following the step-by-step instructions provided in the DJI Fly app. The app will guide you through tilting and rotating the drone to calibrate the IMU. It’s important to follow the instructions carefully and avoid any sudden movements that may disrupt the calibration process.
Once the calibration is complete, your DJI Mini 3 Pro will be ready for a safe and stable flight. Keep in mind that calibration should be performed regularly, especially if the drone has been exposed to extreme temperature changes or sustained any damage. So, don’t forget to keep your drone’s IMU calibrated for the best flying experience!
Tips for successful calibration
If you’re looking to ensure accurate and stable flight with your DJI Mini 3 Pro, calibrating its IMU (inertial measurement unit) is crucial. Here are some tips for successful calibration: First, ensure that your Mini 3 Pro is on a stable surface, with no movement or vibration. Next, make sure that the calibration process is done in an environment with minimal interference from other electronic devices.
Follow the DJI Mini 3 Pro user manual for the proper IMU calibration process. The calibration process may take a few minutes, but it is important to be patient and allow the Mini 3 Pro sufficient time to calibrate. Once calibration is complete, check the values in the DJI Fly app to ensure they are within the acceptable range.
It is also important to recalibrate the IMU if the Mini 3 Pro has been dropped or undergone any significant physical impact. By following these tips, you can ensure that your DJI Mini 3 Pro is calibrated to provide reliable and stable flight performance.
Heading Three: List of tips to follow
When it comes to calibration, there are a few tips that can help ensure success. Firstly, make sure to read the manufacturer’s instructions carefully. This will give you a good understanding of what is required of you and how to carry out the calibration process.
Secondly, ensure that the calibration equipment is in good working condition before starting. This will prevent any errors or inaccuracies during the process. Thirdly, choose an appropriate environment for calibration, one that is free of any interferences or disturbances that could affect the accuracy of the calibration.
Fourthly, take your time and be patient during calibration. Rushing through the process could lead to inaccuracies that could have consequences down the line. Lastly, make sure to perform regular calibrations to ensure that your equipment is always accurate and in good working condition.
These tips will help to ensure that your calibration is successful every time. So, always keep them in mind and stay on top of your calibration game to avoid any mishaps or unwanted surprises.
Conclusion
In conclusion, calibrating the IMU on your DJI Mini 3 Pro is like giving your drone a therapeutic spa treatment. Just as we need to stretch and relax our muscles after a workout, your drone’s IMU needs to be calibrated to ensure maximum performance. By taking the time to perform this essential maintenance, you can help your Mini 3 Pro fly like a champ and capture stunning footage with ease.
So, don’t skip your drone’s spa day – give it the gift of an IMU calibration today!”
Heading Three: Recap of importance and steps to IMU calibration
When it comes to calibrating your IMU, taking the necessary steps can make all the difference. An accurately calibrated IMU can ensure more precise data collection and better results overall. Firstly, start by ensuring that your IMU is on a level surface and in an environment with minimal electromagnetic interference.
Next, make sure the firmware is up-to-date and any hardware is properly installed. From there, follow the manufacturer’s instructions for calibration, which typically involves rotating the IMU in multiple axes and recording the data. These steps may seem simple, but they are crucial to ensure the IMU is calibrated correctly.
Remember, a poorly calibrated IMU can result in inaccurate data and potentially costly mistakes. So take the time to properly calibrate your IMU and handle any issues promptly. Your data and results will thank you for it!
FAQs
What is IMU calibration and why is it important for DJI Mini 3 Pro?
IMU calibration stands for Inertial Measurement Unit calibration which is done to ensure that the drone’s sensors are accurately measuring its movement. It is important to calibrate the IMU of DJI Mini 3 Pro to avoid any flight issues and ensure stable flight.
How frequently should I calibrate the IMU of DJI Mini 3 Pro?
DJI suggests calibrating IMU only when you have updated the firmware, crashed the drone, or moved to a completely new location. However, if you feel that the flight performance of your drone is not as expected, you can calibrate the IMU.
What is the process of IMU calibration for DJI Mini 3 Pro?
The process of IMU calibration for DJI Mini 3 Pro involves going to the DJI Fly app and selecting ‘Calibrate IMU’ under the ‘Advanced Settings’ option. Then, follow the on-screen instructions to complete the calibration process.
What should I do if I face any issues during the IMU calibration of DJI Mini 3 Pro?
If you face any issues during the IMU calibration of DJI Mini 3 Pro, such as the drone not being stable during the process, you can try to calibrate in a different location with fewer magnetic or electrical interferences. If the issue persists, you can contact DJI customer support for assistance.