Featured image for this comprehensive guide about what is drone kit?
Image source: images.pexels.com
The sky has always captivated humanity, a canvas for dreams, exploration, and now, for innovation. In recent years, that innovation has taken flight in the form of drones. What was once a niche hobby for tech enthusiasts has blossomed into a global phenomenon, touching industries from filmmaking and agriculture to package delivery and search and rescue. While many are familiar with ready-to-fly (RTF) drones that come pre-assembled and ready for immediate use, there’s a growing segment of the drone community that finds immense satisfaction in understanding their flying machines from the ground up: the builders.
For these individuals, the journey begins not with a sleek, pre-packaged drone, but with a box of components, wires, and screws – a drone kit. But what exactly is a drone kit? Is it just a collection of parts, or is it a gateway to a deeper understanding of flight, electronics, and engineering? In essence, a drone kit is an unassembled set of all the necessary components required to construct a fully functional unmanned aerial vehicle (UAV).
This comprehensive guide will demystify the world of drone kits, breaking down their components, exploring the benefits and challenges of building your own, and providing actionable advice on how to choose and assemble the perfect kit for your needs. Whether you’re a curious beginner looking to dip your toes into drone technology or an experienced hobbyist seeking ultimate customization, understanding the intricacies of a drone kit is the first step towards building your very own flying marvel.
Quick Answers to Common Questions
What exactly *is* a drone kit?
A drone kit is essentially a package of all the components you need to assemble your own drone from the ground up. Think of it as a DIY project that results in your very own flying machine!
Why choose a drone kit over a ready-to-fly drone?
Opting for a drone kit allows you to deeply understand how drones work, customize components, and often save money in the process. There’s a real sense of accomplishment flying something you built yourself!
Do I need to be an expert to build a drone kit?
Not at all! Many drone kits are designed with beginners in mind, providing clear, step-by-step instructions that make the assembly process a fantastic learning experience. You’ll gain valuable insights into drone mechanics.
What kind of parts typically come in a drone kit?
A standard drone kit usually includes the frame, motors, propellers, flight controller, Electronic Speed Controllers (ESCs), and often a battery and remote control. Some advanced drone kits might even include a camera!
Who would benefit most from getting a drone kit?
Drone kits are perfect for hobbyists, educators, students, and anyone curious about drone technology, engineering, and the joy of building. It’s an excellent way to dive deeper than just flying a pre-made device.
📋 Table of Contents
- Decoding the Basics: What Exactly is a Drone Kit?
- The Essential Components of a Typical Drone Kit
- The Advantages and Disadvantages of Building Your Own Drone Kit
- Navigating the Market: Choosing the Right Drone Kit for You
- The Build Process: From Box to Sky
- Future-Proofing Your Drone Kit & Beyond
- Conclusion: Your Journey into the Sky
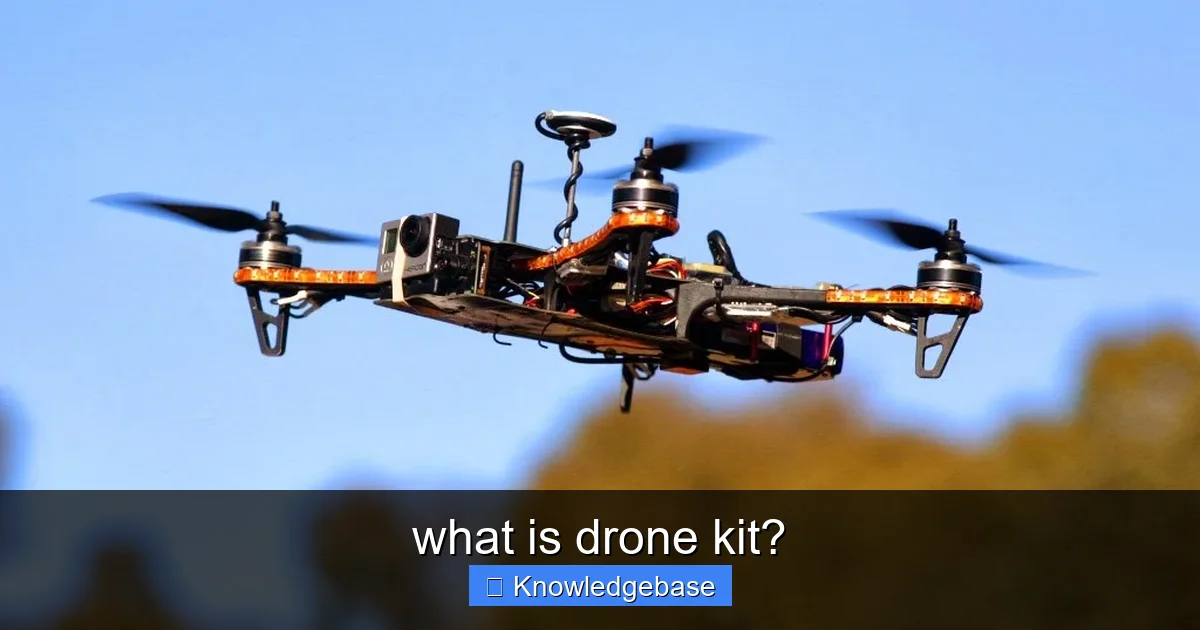
Decoding the Basics: What Exactly is a Drone Kit?
At its core, a drone kit is a DIY project in a box. Unlike their ready-to-fly counterparts, which offer immediate gratification, drone kits provide the unique experience of assembling the drone yourself. This hands-on approach allows builders to gain invaluable knowledge about each component, how they interact, and the fundamental principles that govern drone flight.
Learn more about what is drone kit? – what is drone kit?
Image source: hitechxyz.in
The concept of a drone kit spans a wide spectrum, catering to various skill levels and intended uses. From simple educational models designed to teach basic electronics to complex, high-performance racing or cinematic platforms, there’s a drone kit for almost every aspiration. The common thread among all these kits is the opportunity to be intimately involved in the creation process.
| Kit Element | Description & Function | Common Varieties / Key Considerations |
|---|---|---|
| **Overall Concept** | A package containing all essential parts (minus typically battery/controller) to assemble a functional drone from scratch. | **Target Audience:** Hobbyists, educators, users wanting customization. **Benefit:** Learning experience, cost-effective for specific builds. |
| **Frame** | The structural backbone that holds all other components together, determining the drone’s size and layout. | **Types:** X-frame, H-frame, stretched X (for racing). **Materials:** Carbon Fiber (lightweight, durable), Plastic (beginner-friendly, cheaper). |
| **Motors & ESCs** | Brushless motors provide thrust. Electronic Speed Controllers (ESCs) regulate power to motors based on flight controller commands. | **Motor kV Rating:** Indicates RPM per volt (e.g., 2300kV for racing). **ESCs:** Rated by amperage (e.g., 20A-60A+), should match motor draw. |
| **Flight Controller (FC)** | The “brain” of the drone. It processes sensor data (gyro, accelerometer) and user inputs to stabilize and execute flight commands. | **Firmware:** Betaflight, ArduPilot, Cleanflight. **Features:** Integrated PDB, OSD, barometer, compass. **MCU:** F4, F7 (processing power). |
| **Radio Receiver (Rx)** | Receives control signals from the user’s remote control (transmitter) and translates them for the flight controller. | **Protocols:** SBUS, IBUS, CRSF (Crossfire), ELRS (ExpressLRS). **Frequency:** Predominantly 2.4GHz for consumer drones. **Range:** Typically 0.5 km to 5+ km. |
| **FPV System (Optional)** | Allows First-Person View flying. Includes a camera and Video Transmitter (VTX) on the drone, sending live video to goggles/monitor. | **Types:** Analog (lower latency, cheaper) vs. Digital (HD quality, higher cost). **Frequency:** 5.8GHz common. **VTX Power:** 25mW to 1000mW+ (affects range). |
Types of Drone Kits and Their Appeal
When diving into the world of drone kits, you’ll often encounter several classifications. Understanding these can help you choose the right starting point:
- Almost-Ready-To-Fly (ARF) Kits: These are arguably the most common type of drone kit. An ARF kit typically includes the frame, motors, electronic speed controllers (ESCs), and a flight controller. What’s often missing are the battery, charger, receiver, and transmitter (radio controller). They require significant assembly, wiring, and configuration, making them perfect for those who want a true building experience without having to source every single part individually.
- Plug-N-Play (PNP) Kits: Similar to ARF, but often with more components pre-soldered or pre-assembled. You might just need to add your receiver, battery, and connect a few major components. These still offer a good learning curve but reduce some of the more tedious aspects of building.
- Bind-N-Fly (BNF) Drones: While not strictly ‘kits’ in the traditional sense, BNF drones come fully assembled with a receiver already installed. The ‘bind’ part means you just need to bind it to your existing radio transmitter. These are great for people who already have a radio controller and want to skip the build entirely, but still want to save a little money compared to RTF.
- Do-It-Yourself (DIY) from Scratch: This is the ultimate form of a drone kit, where you source every single component individually. This path offers unparalleled customization but demands the highest level of technical knowledge and patience. It’s often chosen by experienced builders who have specific performance goals in mind.
- Educational/STEM Kits: These drone kits are designed specifically for learning. They often come with clear instructions, robust designs, and sometimes even programming challenges to help students understand robotics, coding, and aerodynamics.
Why Choose a Drone Kit Over a Pre-Built Drone?
The decision to opt for a drone kit is often driven by several compelling factors:
- Deeper Understanding: Building a drone from a drone kit provides an unparalleled educational experience. You learn about electronics, aerodynamics, software, and problem-solving, which are skills applicable far beyond drones.
- Customization: A drone kit allows you to handpick or modify components to suit your specific needs. Want a faster FPV racer? Swap out the motors. Need longer flight times for cinematic shots? Upgrade the battery and props. The possibilities are endless.
- Repairability: When you’ve built it, you know how to fix it. Understanding each part makes troubleshooting and replacing damaged components much easier and often more cost-effective than sending a pre-built drone for repair.
- Cost Savings: While not always the case, building from a drone kit can sometimes be cheaper than buying a comparable RTF drone, especially if you’re willing to invest time in sourcing parts.
- Sense of Accomplishment: There’s immense satisfaction in watching something you’ve built with your own hands take flight. It’s a personal connection to the technology that a ready-made drone can’t quite replicate.
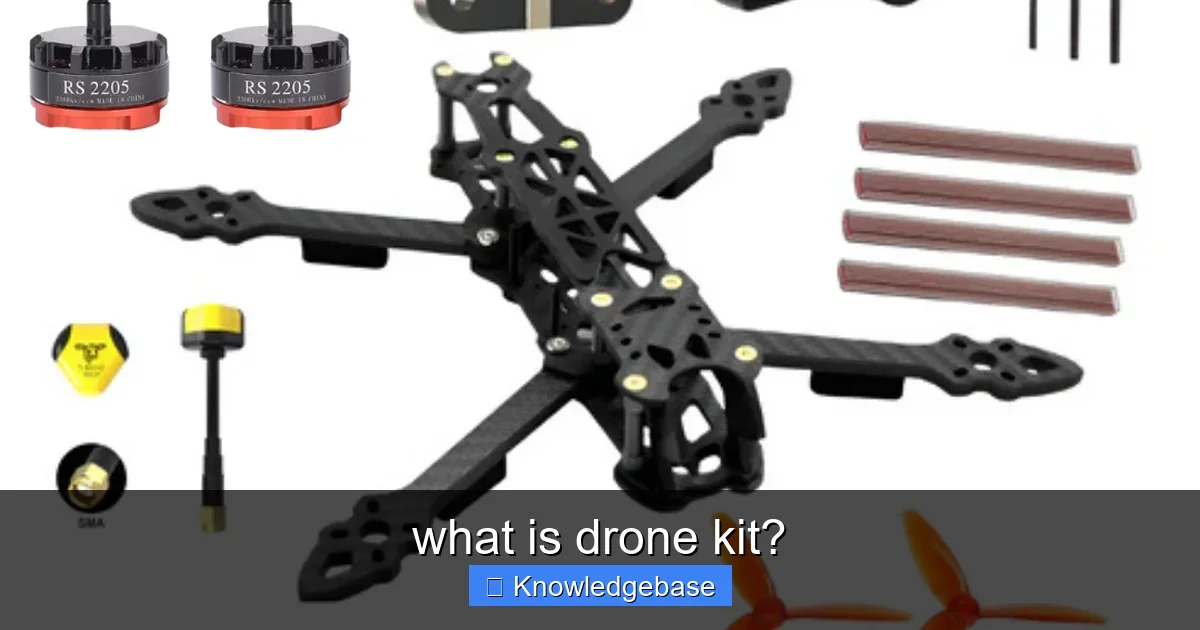
The Essential Components of a Typical Drone Kit
A drone kit is a symphony of interconnected parts, each playing a crucial role in bringing your aerial creation to life. While specific components may vary slightly depending on the kit’s purpose (e.g., racing vs. photography), the core elements remain largely consistent. Understanding these parts is fundamental to the building process and to future maintenance or upgrades.
Learn more about what is drone kit? – what is drone kit?
Image source: 1.bp.blogspot.com
- Frame: This is the skeleton of your drone, providing structure and mounting points for all other components. Frames come in various shapes (X, H, Stretch-X, Dead Cat) and materials (carbon fiber, plastic, aluminum). Carbon fiber is popular for its strength-to-weight ratio. The frame size (e.g., 5-inch, 7-inch) often dictates the propeller size and overall drone capability.
- Motors: The muscles of the drone. Most modern drones use brushless motors, prized for their efficiency and power. Motors are specified by their size (e.g., 2306) and KV rating (e.g., 1700KV), which indicates revolutions per minute per volt. Higher KV generally means faster spin and more power for smaller props, while lower KV is better for larger props and longer flight times.
- Electronic Speed Controllers (ESCs): These act as the brain for each motor, translating commands from the flight controller into the precise power adjustments needed to spin the motors at desired speeds. ESCs come individually or as a 4-in-1 unit, which integrates all four ESCs onto a single board, simplifying wiring.
- Flight Controller (FC): This is the true brain of the drone. The FC processes sensor data (gyroscopes, accelerometers), interprets commands from your radio receiver, and sends instructions to the ESCs to keep the drone stable and flying as intended. Popular firmware includes Betaflight, ArduPilot, and INAV.
- Propellers: The wings of your drone, converting motor rotation into thrust. Propellers are defined by their diameter and pitch (e.g., 5040 means 5-inch diameter, 4-inch pitch). Material (plastic, carbon fiber), blade count (2-blade, 3-blade), and design all impact flight characteristics.
- Battery (LiPo): The power source, usually Lithium Polymer (LiPo) batteries. Key specifications include voltage (e.g., 4S, 6S – indicating cell count), capacity (mAh), and C-rating (discharge rate). Choosing the right battery is crucial for flight time and performance.
- Transmitter (Tx) & Receiver (Rx): The link between you and your drone. The transmitter is your handheld radio controller, and the receiver is a small component on the drone that catches its signals. Common protocols include ExpressLRS (ELRS), Crossfire (CRSF), and FrSky.
- FPV Gear (First Person View): For an immersive flying experience, an FPV system is essential. This typically includes:
- FPV Camera: Captures the drone’s perspective.
- Video Transmitter (VTX): Broadcasts the camera’s video feed wirelessly.
- Antenna: For both VTX and receiver, optimizing signal strength.
- FPV Goggles/Screen: Worn by the pilot to view the real-time video feed.
- Power Distribution Board (PDB) / Stack: Often integrated into modern flight controllers (as a ‘stack’ with the FC), a PDB distributes power from the battery to the ESCs, FC, VTX, and other components, ensuring stable and clean power delivery.
- Wiring, Connectors & Fasteners: Essential for connecting all the components, securing them, and ensuring a tidy, reliable build. This includes XT60 connectors for the battery, various smaller connectors, heat shrink, zip ties, and screws.
- Deep Technical Understanding: There’s no better way to learn how a drone works than to put it together yourself. You’ll understand the function of every wire, chip, and motor. This knowledge is invaluable for troubleshooting and future upgrades.
- Unparalleled Customization: A drone kit gives you the freedom to choose components that precisely match your performance goals, whether it’s for speed, agility, stability, or flight time. You’re not limited by manufacturer choices.
- Easier Repairs and Upgrades: Since you know the internal layout, diagnosing and fixing issues becomes significantly easier. Replacing a damaged motor or upgrading an ESC is straightforward when you’re familiar with the build.
- Cost-Effectiveness (Potentially): While the initial investment in tools might be a factor, building a drone from a drone kit can sometimes be more economical than buying a similarly spec’d pre-built model, especially for high-performance setups.
- Sense of Accomplishment: The pride of seeing a drone you assembled from individual components take to the skies is immense and unmatched by merely flying an off-the-shelf product.
- Community Engagement: The DIY drone community is vibrant and supportive. Building from a drone kit often leads to engaging with forums, online groups, and local clubs, enriching your hobby.
- Time-Consuming Process: Building a drone kit, especially for a beginner, can take many hours spread across several days or weeks. It requires patience and dedication.
- Requires Technical Skills: Basic soldering skills are almost always a must. You’ll also need to learn about wiring diagrams, firmware configuration, and various electronic principles.
- Potential for Errors and Frustration: Mistakes happen – a wrong solder joint, a miswired component, or incorrect firmware settings can lead to malfunctions or even damage parts. Troubleshooting can be a source of frustration.
- Initial Tool Investment: You’ll need essential tools like a good soldering iron, multimeter, wire cutters, heat shrink gun, and various small hand tools, which add to the initial cost.
- Lack of Manufacturer Warranty on Complete Build: While individual components may have warranties, the assembled drone does not typically come with a comprehensive warranty from a single manufacturer. Any issues are your responsibility to fix.
- Safety Risks: Improper wiring or configuration can lead to short circuits, fires (especially with LiPo batteries), or uncontrolled flight, posing safety risks to property and people.
- Hobbyists and Enthusiasts: Those who enjoy tinkering, learning, and the satisfaction of building.
- Students and Educators: Perfect for STEM education, teaching principles of engineering, electronics, and programming.
- Budget-Conscious Builders: Individuals looking to get more performance for their money, or who enjoy the hunt for deals on individual components.
- Customization Seekers: Pilots who want a drone precisely tailored to their flying style or specific mission.
- Repair-Oriented Individuals: Those who prefer to fix their own equipment rather than relying on external services.
- Your Skill Level:
- Beginner: Look for drone kits explicitly marketed for beginners. These often feature pre-soldered components, clear instructions, and durable parts that can withstand crashes. Educational kits are also a great start.
- Intermediate: If you have some soldering experience and a basic understanding of electronics, you can explore ARF or PNP kits that require more assembly and configuration.
- Advanced: Experienced builders might opt for component-level sourcing or complex FPV racing/cinematic kits that offer maximum customization and performance.
- Intended Use:
- FPV Racing: Prioritize lightweight frames, powerful motors, high-refresh-rate FPV cameras, and durable components.
- Freestyle Flying: Similar to racing but often with slightly larger frames for better flight characteristics and robust designs to handle tricks and crashes.
- Cinematic/Photography: Focus on stable flight controllers, vibration-dampening frames, dedicated camera mounts (GoPro), and GPS for advanced flight modes and return-to-home features.
- Learning/Education: Look for kits with modular designs, detailed manuals, and possibly open-source flight controllers that allow for programming experiments.
- Long-Range Exploration: Requires larger frames, efficient motors and propellers, high-capacity batteries, and reliable long-range radio and video systems.
- Budget:
- Entry-Level Kits: Can range from $100-$300, often smaller or simpler builds.
- Mid-Range Performance Kits: Typically $300-$600, offering a good balance of performance and features.
- High-End/Specialized Kits: Can easily exceed $600, especially for large cinematic or long-range setups.
Remember to factor in the cost of tools (soldering iron, multimeter, etc.) if you don’t already own them.
- Community Support & Documentation:
A well-supported drone kit from a reputable brand (e.g., iFlight, GEPRC, Diatone, Apex, Nazgul) will have extensive online resources, build guides, and active community forums. This is invaluable when you encounter issues or need advice.
- Availability of Spare Parts:
Drones crash! Ensure that common wear-and-tear parts like arms, motors, and propellers are readily available for your chosen drone kit.
- Frame Size (e.g., 5-inch): Refers to the maximum propeller size the frame can accommodate.
- Motor KV: RPM per volt; higher KV for speed, lower KV for torque and efficiency.
- Battery (S-rating, mAh, C-rating): ‘S’ is cell count (voltage), ‘mAh’ is capacity (flight time), ‘C-rating’ is discharge rate (power delivery).
- Flight Controller Firmware: Betaflight (FPV), ArduPilot (autonomous), INAV (navigation).
- Read the Manual: Thoroughly go through the instructions provided with your drone kit. If none are provided, search for online build guides or videos for your specific kit or similar setups.
- Gather Tools: Ensure you have all necessary tools. A good soldering iron with various tips, solder, flux, a multimeter, wire cutters/strippers, precision screwdrivers, heat shrink tubing, zip ties, double-sided tape, and safety glasses are essential.
- Organize Components: Unpack everything and lay out components logically. Familiarize yourself with each part before you start.
- Power Up Safely: For safety, use a smoke stopper (a simple circuit that prevents damage in case of a short circuit) when first powering up your completed drone.
- Frame Assembly: Start by putting together the main frame. Ensure all screws are tightened securely, but don’t overtighten carbon fiber components.
- Motor Mounting: Attach the motors to the frame arms using the provided screws. Pay attention to motor direction, though this can be reversed in software later.
- ESC Installation: Mount the ESCs (either individual or 4-in-1) to the frame or stack. Solder the motor wires to the ESC pads. Triple-check your soldering for clean, strong connections.
- Flight Controller (FC) Mounting: Mount the FC onto the frame, typically on soft-mounting standoffs to reduce vibrations. Connect the ESC signal wires, power wires, and ground wires to the FC.
- FPV System Installation: Mount the FPV camera to the frame. Connect the camera’s power and video out wires to the VTX. Mount the VTX and its antenna securely, ensuring the antenna has clear line of sight.
- Receiver Installation: Mount your radio receiver and connect its power, ground, and signal wires to the flight controller. Ensure the receiver antennas are mounted safely and away from propellers, ideally at 90-degree angles for optimal signal.
- Power Connections: Solder the main battery lead (XT60 connector) to the appropriate pads on the PDB or FC. Connect any other components like LEDs or buzzers.
- Final Checks: Before applying power, visually inspect all solder joints for shorts, ensure all wires are correctly routed, and components are securely fastened. Use your multimeter to check for any shorts between positive and negative battery terminals.
- Firmware Flash: Update the flight controller to the latest stable firmware.
- Motor Direction Check: Configure motor directions to ensure they spin correctly (inward for multirotors). This can often be done in the ESC configuration software (e.g., BLHeliSuite).
- Radio Binding & Setup: Bind your radio transmitter to the receiver on the drone. Calibrate your stick endpoints in the FC software.
- Sensor Calibration: Calibrate the accelerometer and gyroscope on the FC.
- Failsafe Setup: CRITICAL! Configure your failsafe settings so that if the drone loses signal, it either lands gently, returns to home (if GPS is installed), or disarms its motors. Never skip this step.
- PID Tuning (Optional for Beginners): For advanced performance, you can adjust PID (Proportional-Integral-Derivative) values, but stock settings are often good enough for initial flights.
- Double-check all connections and propeller tightness.
- Ensure propellers are installed in the correct orientation for lift.
- Remove propellers for initial power-up and motor testing.
- Perform your first flight in a safe, open area, away from people and obstacles.
- Start with a gentle hover to check stability.
- Better Motors: Upgrade to more powerful or efficient motors for increased speed, thrust, or longer flight times.
- Advanced Flight Controller: Install an FC with more processing power, integrated sensors (like barometer for altitude hold), or different firmware capabilities.
- High-Resolution FPV Camera: Improve your FPV feed with a camera offering better low-light performance or higher resolution.
- Long-Range Radio Module: Extend your control range by upgrading your radio transmitter and receiver to systems like ExpressLRS or Crossfire.
- GPS Module: Add GPS for features like return-to-home, position hold, and pre-programmed flight paths.
- Digital FPV System: Transition from analog FPV to digital systems like DJI FPV for crystal-clear video quality.
- Propeller Experimentation: Try different propeller sizes, pitches, and blade counts to fine-tune flight characteristics.
- Drone Not Arming: Check arming switches in your radio, failsafe settings, motor protocols, and ensure no pre-arm conditions (like low battery voltage) are active.
- Unstable Flight/Oscillations: Could be loose propellers, bent motor shafts, excessive vibrations (check soft-mounting), or PID tuning issues.
- Lost Video Signal: Check VTX power, antenna connection, VTX channel, and ensure FPV goggles are on the correct frequency.
- Loss of Control: Immediately check failsafe settings and receiver binding. Ensure your radio isn’t experiencing interference.
- One Motor Not Spinning: Inspect the motor, ESC, and wiring for that specific motor. It could be a damaged motor, a faulty ESC, or a bad solder joint.
- Inspect After Every Crash: Check for bent props, loose screws, damaged frame components, or pinched wires.
- Clean Components: Remove dirt, dust, and grass from motors, frame, and electronics.
- Check Solder Joints: Periodically inspect solder connections for cracks or corrosion.
- Propeller Management: Replace bent or nicked propellers immediately, as they can cause vibrations and reduce efficiency.
- Battery Care: Follow LiPo battery safety guidelines for charging, discharging, and storage to maximize their lifespan and prevent hazards.
The Advantages and Disadvantages of Building Your Own Drone Kit
Embarking on the journey of assembling a drone kit is a rewarding experience, but like any intricate hobby, it comes with its own set of pros and cons. Weighing these factors is crucial before you commit to your first build.
Advantages of a Drone Kit Build:
Disadvantages of a Drone Kit Build:
Who is a Drone Kit For?
A drone kit is ideal for:
Navigating the Market: Choosing the Right Drone Kit for You
With a plethora of options available, selecting the perfect drone kit can feel daunting. However, by considering a few key factors, you can narrow down your choices and find a kit that aligns with your skills, budget, and aspirations.
Key Factors to Consider:
Understanding Drone Kit Specifications
Familiarize yourself with common drone terminology:
Do your research, read reviews, watch build videos, and don’t hesitate to ask questions in drone forums before making your purchase. The right drone kit will be a balance of challenge, reward, and functionality.
The Build Process: From Box to Sky
Once you’ve chosen your ideal drone kit, the real adventure begins: the build itself. This process, while seemingly complex, can be broken down into manageable steps. Patience, attention to detail, and a methodical approach are your best tools.
1. Pre-Assembly: Preparation is Key
2. Assembly: Step-by-Step Construction
3. Configuration & Calibration: Bringing it to Life
This is where software meets hardware. You’ll typically connect your FC to a computer via USB and use configuration software (e.g., Betaflight Configurator, Mission Planner).
4. First Flight: Safety First!
Before your maiden voyage:
Future-Proofing Your Drone Kit & Beyond
The journey with your drone kit doesn’t end after the first flight. One of the greatest advantages of building your own drone is the ability to adapt, upgrade, and troubleshoot it over its lifespan. This ensures your drone remains relevant, performs optimally, and continues to provide enjoyment.
Upgrades and Modifications
As your skills evolve or new technologies emerge, you can easily enhance your drone:
Troubleshooting Common Issues
Knowing your build inside and out is invaluable for troubleshooting. Common issues include:
Utilize online resources, community forums, and flight controller blackbox logs (if available) for diagnosis.
Maintenance Tips
Regular maintenance ensures longevity:
The Evolution of Drone Kit Technology
The drone industry is constantly evolving, with new technologies emerging regularly. Flight controllers become more powerful, ESCs more efficient, and FPV systems offer higher resolution and lower latency. Staying engaged with the community, reading tech news, and attending events will keep you informed about the latest advancements and inspire your next build or upgrade.
Here’s a quick look at how different drone kits cater to various users and their typical attributes:
| Kit Type / Component | Target User | Key Features | Price Range (Estimate) | Difficulty Level |
|---|---|---|---|---|
| Beginner FPV Racing Drone Kit | New FPV pilots, learners | Durable frame, pre-soldered options, basic FPV gear, easy-to-follow instructions | $150 – $350 | Easy to Moderate |
| Intermediate Freestyle Drone Kit | Experienced FPV pilots, freestyle enthusiasts | Stronger motors, advanced FC, high-res FPV camera, robust frame for tricks | $300 – $600 | Moderate |
| Cinematic/Long-Range Drone Kit | Filmmakers, explorers | GPS, advanced flight modes, heavier lift capacity, larger frame, dedicated camera mounts | $500 – $1200+ | Moderate to Hard |
| Educational STEM Drone Kit | Students, educators, tinkerers | Focus on programming, modular design, safety features, often open-source software | $100 – $400 | Easy |
Conclusion: Your Journey into the Sky
The world of drone kits is a vast and exciting frontier, offering more than just a means to fly. It’s an immersive experience that blends engineering, electronics, software, and the pure joy of creation. From meticulously soldering connections to calibrating flight parameters, every step in building a drone kit deepens your understanding and appreciation for these incredible machines.
Choosing to build your own drone from a drone kit empowers you with unparalleled customization, significant learning opportunities, and the invaluable ability to repair and upgrade your aircraft. While it demands patience and a willingness to learn new skills, the rewards far outweigh the challenges. The satisfaction of seeing your hand-built creation soar through the sky is a unique and deeply fulfilling experience that ready-to-fly drones simply cannot match.
Whether your dream is to race through gates, capture breathtaking aerial footage, or simply understand the magic behind flight, a drone kit provides the perfect launchpad for your aspirations. So, take the leap, embrace the challenge, and embark on your own drone-building journey. The sky awaits your command, and with a drone kit, you’re not just a pilot – you’re a creator.
🎥 Related Video: FPV For Beginners, Fun for the Whole Family! Makerfire Armor Blue Bee FPV Starter Drone Kit #fpv
📺 Makerfire
For someone who loves drones, this may be the perfect gift. You can find it here: …
Frequently Asked Questions
What is a drone kit, essentially?
A drone kit is a collection of components, parts, and sometimes tools, that allows you to assemble your own drone from scratch. It provides all the necessary pieces, like the frame, motors, propellers, flight controller, and battery, along with instructions to guide the construction process.
Why would I choose a drone kit over a ready-to-fly drone?
Opting for a drone kit offers a deeper understanding of drone mechanics and provides a valuable hands-on learning experience. It also allows for greater customization and repairability, as you’ll know every part of your drone intimately.
What components are typically included in a standard drone kit?
A typical drone kit includes the drone frame, motors, electronic speed controllers (ESCs), propellers, a flight controller, a battery, and a charger. Depending on the kit, it might also contain a remote controller, receiver, and FPV (First Person View) camera system.
How challenging is it to assemble a drone kit?
The difficulty of assembling a drone kit varies greatly depending on its complexity and your prior experience with electronics or model building. Entry-level kits often come with clear instructions and pre-soldered components, making them manageable for beginners, while advanced kits may require soldering and more technical expertise.
Do all drone kits come with everything I need to fly, including a remote control?
Not all drone kits are “complete” in the sense of including every single item for flight. While most kits provide the drone’s core components, some may require you to purchase a separate remote controller (transmitter), receiver, or even a battery and charger. Always check the product description carefully to understand what is included.
Can I upgrade or customize my drone after building it from a drone kit?
Absolutely! One of the main advantages of a drone kit is the potential for future upgrades and customization. You can easily swap out components like motors, flight controllers, or add FPV gear to enhance performance or add new capabilities as your skills and interests evolve.


