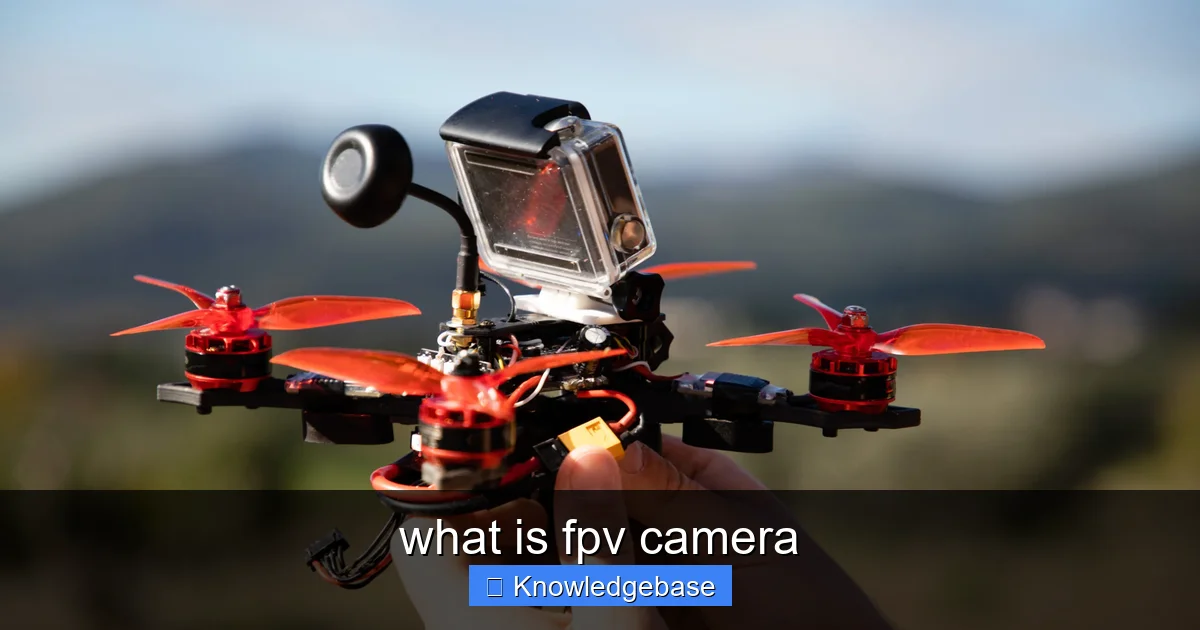
Featured image for this comprehensive guide about what is fpv camera
Image source: fpv-drone.co.jp
Ever wondered what it’s like to truly fly, not just observe from afar? Imagine soaring through the air, ducking under branches, and navigating tight spaces with the precision and perspective of a bird. This breathtaking experience is made possible by a crucial piece of technology: the FPV camera. For many, the term “drone camera” brings to mind high-resolution cinematic footage, but a first-person view camera is an entirely different beast, designed not for recording Hollywood-esque visuals, but for delivering an immediate, immersive, and thrilling flight experience.
Welcome to the electrifying world of First-Person View (FPV) drones! Whether you’re an aspiring drone racer, a freestyle enthusiast, or simply curious about what makes these nimble machines tick, understanding the heart of the system—the FPV camera—is paramount. This isn’t just any camera; it’s your eyes in the sky, transmitting live video feeds directly to your goggles or monitor, allowing you to feel as though you’re sitting right in the cockpit of your drone. Without a reliable, low-latency FPV camera, the magic of truly immersive flight simply wouldn’t exist.
In this comprehensive guide, we’ll dive deep into everything you need to know about what is FPV camera. We’ll explore its unique purpose, break down its components, compare different types, and arm you with the knowledge to choose, set up, and optimize the perfect vision system for your drone. Get ready to uncover the secrets behind the small but mighty device that transforms remote control flying into an exhilarating extension of your own senses. Let’s peel back the layers and illuminate the path to mastering your FPV flight experience.
Quick Answers to Common Questions
What is what is fpv camera?
what is fpv camera refers to essential knowledge and techniques that can significantly improve your understanding and results.
Why is what is fpv camera important?
Mastering what is fpv camera provides practical benefits and helps you achieve better outcomes in various situations.
How does what is fpv camera work?
what is fpv camera involves specific methods and approaches that deliver effective results when applied correctly.
When should I use what is fpv camera?
You can apply what is fpv camera techniques whenever you need to improve your approach or achieve better results.
What are the benefits of what is fpv camera?
Learning what is fpv camera offers numerous advantages including improved efficiency, better results, and practical applications.
📋 Table of Contents
- What Exactly is an FPV Camera? Unpacking the Core Concept
- Anatomy of an FPV Camera: Components and Their Roles
- Types of FPV Cameras: Finding Your Perfect Match
- Key Features and Specifications to Consider When Choosing an FPV Camera
- Setting Up and Optimizing Your FPV Camera for Peak Performance
- The Future of FPV Cameras: Digital Dominance and Beyond
What Exactly is an FPV Camera? Unpacking the Core Concept
At its heart, an FPV camera is a specialized video camera designed to provide a real-time, live video feed from a drone or RC vehicle to a pilot wearing FPV goggles or looking at an external monitor. Unlike the sophisticated, high-definition cameras used for aerial photography and videography, the primary goal of an FPV camera is not cinematic quality, but rather immediate visual feedback, low latency, and robust performance under diverse conditions. It’s the essential interface that bridges the gap between pilot and machine, creating an unparalleled sense of presence.

Learn more about what is fpv camera – what is fpv camera
Image source: petapixel.com
Think of it this way: a typical consumer drone might boast 4K recording capabilities and advanced stabilization. An FPV camera, however, prioritizes a crystal-clear, instantaneous image transmission above all else. This focus on speed and clarity is critical because FPV pilots often fly at high speeds, through complex environments, and perform intricate maneuvers that demand split-second reactions. Any delay in the video feed, known as latency, can lead to disorientation or even a crash. Therefore, every aspect of an FPV camera‘s design, from its sensor to its processing unit, is optimized to minimize this delay.
| Key Characteristic | Description/Importance | Typical FPV Values/Comparison | Impact on Pilot Experience |
|---|---|---|---|
| Latency | The delay between the camera capturing an image and it appearing in the pilot’s goggles. | Ultra-low (5-20 ms for analog); Higher for digital (20-60 ms) | Crucial for precise control, especially in fast-paced racing and acrobatic flying. |
| Resolution | The number of pixels or TV lines (TVL) in the camera’s image output. | Analog: 600TVL, 800TVL, 1200TVL; Digital: 720p, 1080p | Higher detail allows for better obstacle identification and immersion, particularly in digital systems. |
| Field of View (FOV) | The extent of the observable world seen at any given moment by the camera. | Typically 120°-170° (Diagonal) for wide-angle lenses. | Wider FOV provides greater situational awareness and a heightened sense of speed. |
| Aspect Ratio | The proportional relationship between an image’s width and its height. | 4:3 (Traditional FPV, often “taller”); 16:9 (Modern FPV, more cinematic) | Matching the aspect ratio of your goggles prevents image distortion and improves viewing comfort. |
| Low Light Performance | A camera’s ability to produce a clear and usable image in dim lighting conditions. | Measured in Lux (e.g., 0.001 Lux for excellent low light); Varies by sensor. | Enables flying in diverse environments like dawn, dusk, or heavily shaded areas without loss of visibility. |
Beyond a Regular Camera: Key Distinctions
- Low Latency: This is arguably the most critical feature. While a regular camera can have hundreds of milliseconds of delay, a good FPV camera aims for single-digit milliseconds. This ensures the pilot sees what’s happening *now*, not a fraction of a second ago.
- Wide Field of View (FOV): Most FPV cameras offer a very wide FOV, often between 120 and 170 degrees. This “fish-eye” perspective gives pilots a broader sense of their surroundings, which is crucial for situational awareness and navigating obstacles at speed.
- Durability: FPV drones, especially those used for racing or freestyle, are prone to crashes. Consequently, FPV cameras are built to be remarkably robust, often encased in lightweight yet strong materials like aluminum or tough plastics.
- Lightweight and Compact: To minimize overall drone weight and maintain agility, FPV cameras are designed to be incredibly small and light, often weighing just a few grams.
- Optimized for Flight Conditions: These cameras excel in handling rapid changes in light, such as flying from bright sunlight into shadow, thanks to features like Wide Dynamic Range (WDR).
The “First-Person View” Experience
The “first-person view” experience is transformative. Instead of watching your drone from the ground, you become one with it. This creates a deep connection and allows for a level of control and immersion that traditional line-of-sight flying cannot match. Whether you’re navigating a dense forest, threading a needle through a race gate, or performing acrobatic flips and rolls, the responsive visual feedback from your FPV camera is what makes it all possible. It’s not just about seeing; it’s about feeling the flight, making the FPV camera not just a component, but the very window to this exhilarating world.
Anatomy of an FPV Camera: Components and Their Roles
To truly understand what is FPV camera, it helps to break down its essential components. Despite their small size, these cameras pack sophisticated technology into a tiny package, each part playing a vital role in delivering that crucial live video feed. Knowing these components will empower you to make informed decisions when upgrading or troubleshooting your setup.
Learn more about what is fpv camera – what is fpv camera
Image source: dpreview.com
Lens: The Eye of the Drone
The lens is the first point of contact for light entering the FPV camera. Its focal length determines the camera’s field of view (FOV). Common focal lengths for FPV lenses include 2.1mm, 2.3mm, and 2.5mm. Shorter focal lengths (e.g., 2.1mm) result in a wider FOV, offering a more panoramic view but potentially introducing more “fish-eye” distortion. Longer focal lengths provide a narrower, less distorted view but reduce peripheral vision. Most FPV pilots prefer a wide FOV for better situational awareness during high-speed flight.
Sensor: Capturing the Light
Behind the lens lies the sensor, which converts incoming light into electrical signals. The two primary types of sensors found in FPV cameras are:
- CCD (Charge-Coupled Device): Historically, CCD sensors were the gold standard for FPV due to their excellent image quality in various lighting conditions, superior WDR (Wide Dynamic Range), and minimal “jello” effect (rolling shutter artifacts). They generally handle quick transitions from dark to light areas very well.
- CMOS (Complementary Metal-Oxide-Semiconductor): Modern CMOS sensors have significantly improved, often matching or even surpassing CCDs in terms of low-light performance and image clarity. They are generally less expensive, consume less power, and are more compact. While older CMOS sensors were notorious for rolling shutter, newer global shutter CMOS sensors or advanced rolling shutter compensation have largely mitigated this issue.
The sensor size also plays a role, with common sizes like 1/3″ or 1/2.8″ affecting light gathering capabilities and overall image quality.
Image Processing Unit (ISP): Making Sense of the Data
The ISP is the brain of the FPV camera. It takes the raw data from the sensor and processes it into a usable video signal. This involves a range of tasks:
- White Balance: Adjusting colors to appear natural regardless of lighting.
- Exposure Control: Managing brightness levels to prevent over or underexposure.
- Noise Reduction: Cleaning up grainy images, especially in low light.
- Wide Dynamic Range (WDR): Crucial for FPV, WDR helps the camera simultaneously expose for very bright and very dark areas in the same frame, preventing blown-out highlights or crushed shadows.
- Latency Optimization: The ISP is meticulously designed to process data with minimal delay, ensuring that the video feed is as close to real-time as possible.
Case & Mounting: Protection and Integration
The camera’s internal components are protected by a lightweight yet durable case, often made of plastic or aluminum alloy. This case also typically includes mounting points (e.g., screw holes, tabs) that allow the FPV camera to be securely attached to the drone’s frame. The form factor of the case often dictates the camera’s compatibility with different drone frames, which brings us to the various types of FPV cameras available.
Types of FPV Cameras: Finding Your Perfect Match
The world of FPV cameras isn’t one-size-fits-all. Manufacturers have innovated to create a range of sizes and form factors, each tailored to specific drone builds and flying styles. Understanding these distinctions is key to choosing the right FPV camera for your needs, ensuring it physically fits your frame and performs optimally for your intended use.
Standard Size FPV Cameras (Full Size)
- Dimensions: Typically around 28x28mm or 32x32mm.
- Use Case: These are the traditional workhorses, often found on larger racing or freestyle drones (5-inch and up). Their larger size allows for larger sensors and more robust internal components, often resulting in superior image quality and better low-light performance.
- Pros: Excellent image quality, often more features, good durability.
- Cons: Heavier and larger, not suitable for smaller builds.
Mini FPV Cameras
- Dimensions: Roughly 22x22mm.
- Use Case: A popular choice for 3-inch to 5-inch drones, offering a good balance between performance and size/weight. Many pilots find this size to be a sweet spot for freestyle and racing.
- Pros: Good performance, lighter than standard cameras, wide compatibility.
- Cons: Slightly smaller sensor than standard, potentially minor trade-offs in low-light.
Micro FPV Cameras
- Dimensions: Around 19x19mm.
- Use Case: Ideal for smaller builds like 2-inch to 3-inch toothpick drones, cinewhoops, or lightweight freestyle setups where every gram counts. They are designed to be incredibly compact and light.
- Pros: Very light and small, perfect for micro builds.
- Cons: May have slightly reduced low-light performance or resolution compared to larger cameras due to smaller sensors.
Nano FPV Cameras
- Dimensions: As tiny as 14x14mm.
- Use Case: Exclusively for the smallest drones, such as Tiny Whoops (65mm, 75mm) and other micro-quadcopters. These are the smallest and lightest FPV cameras available.
- Pros: Extremely light, enable ultra-small drone builds.
- Cons: Significant compromises in image quality and low-light performance are common.
Hybrid/HD FPV Cameras (for recording and FPV)
- Description: These cameras attempt to combine the low-latency FPV feed with the ability to record high-definition video onboard. Examples include the Caddx Vista/Nebula Pro (for DJI Digital FPV System) or standalone units like the Caddx Peanut.
- Use Case: For pilots who want to capture high-quality footage without adding a separate action camera (like a GoPro). Often seen on cinematic FPV drones or freestyle builds where recording is a priority.
- Pros: Two-in-one solution, saves weight compared to carrying a dedicated action camera.
- Cons: Can have slightly higher latency than dedicated analog FPV cameras, often more expensive, and the recorded quality might not match a dedicated action camera.
Choosing the right size of FPV camera depends heavily on your drone’s frame and your flying style. A Nano camera on a 5-inch freestyle drone might look out of place and offer sub-optimal performance, just as a Standard camera would be too heavy and large for a Tiny Whoop. Always check your frame’s camera mount compatibility before making a purchase.
Key Features and Specifications to Consider When Choosing an FPV Camera
Selecting the perfect FPV camera is about more than just size. A myriad of technical specifications influence performance, and understanding them will allow you to tailor your choice to your specific flying style and environment. Here’s a breakdown of the most crucial factors:
Latency: The Need for Speed
As discussed, latency is the delay between what the camera sees and what you see in your goggles. For fast-paced FPV flying, lower latency is always better. Analog FPV systems typically offer the lowest latency (often under 10ms), while digital systems have made significant strides, now offering competitive latency (e.g., DJI O3 Air Unit at 30ms or less) that is often imperceptible to many pilots. Always look for cameras optimized for minimal processing delay.
Field of View (FOV): See More, Fly Better
The FOV dictates how much of the scene your FPV camera captures. A wider FOV (e.g., 150-170 degrees) provides excellent peripheral vision, which is crucial for obstacle avoidance and spatial awareness, especially in freestyle and racing. However, a very wide FOV can introduce a “fish-eye” distortion. Some pilots prefer a slightly narrower FOV for a more natural look, typically around 120-130 degrees. This is a personal preference, but generally, wider is better for dynamic FPV flying.
Aspect Ratio: 4:3 vs. 16:9
This refers to the shape of the image produced by the FPV camera. Your choice here should match the aspect ratio of your FPV goggles or monitor:
- 4:3 (Standard Definition): A squarer image. Many older or entry-level FPV goggles are 4:3. Pilots who prefer this often feel it gives them more vertical information, which can be useful for seeing gates or obstacles above/below their immediate focus.
- 16:9 (Widescreen): A rectangular, cinematic image. Most modern FPV goggles support 16:9, especially digital systems. This aspect ratio provides more horizontal information, which is excellent for high-speed cruising or wide-open spaces.
Some newer cameras offer switchable aspect ratios (4:3/16:9) to cater to different goggle setups, offering maximum flexibility.
TV Lines (TVL) & Resolution: Clarity vs. Practicality
For analog FPV cameras, resolution is often measured in TV Lines (TVL), typically ranging from 600TVL to 1200TVL. Higher TVL generally means a sharper image, but there’s a practical limit imposed by the analog video receiver and goggles. Most modern analog cameras are 1200TVL, offering excellent clarity for the analog system. Digital FPV cameras, on the other hand, boast true digital resolutions, often ranging from 720p to 1080p, delivering significantly higher fidelity.
Sensor Type: CCD vs. CMOS (Detailed Comparison)
While we touched on this earlier, the sensor type greatly influences image quality and performance:
| Feature | CCD Sensor | CMOS Sensor |
|---|---|---|
| Image Quality | Excellent, historically preferred for FPV clarity and color accuracy. | Modern CMOS rivals or surpasses CCD, especially in newer generations. |
| Low Light Performance | Generally good, consistent. | Older CMOS struggled; newer CMOS excels, often with less noise. |
| Wide Dynamic Range (WDR) | Historically superior, handling high contrast scenes very well. | Greatly improved, often on par with or better than CCD in modern cameras. |
| Rolling Shutter / “Jello” | Virtually absent (global shutter). | Historically a problem, but advanced designs and global shutter options have mitigated this. |
| Power Consumption | Higher. | Lower. |
| Cost | Often slightly higher. | Generally more cost-effective. |
| Size/Weight | Can be slightly larger/heavier. | More compact and lighter. |
Today, high-quality CMOS cameras are often the preferred choice due to their advancements and versatility.
Low Light Performance: Day, Night, and Everything In Between
If you plan on flying at dawn, dusk, or indoors, a camera with good low-light performance is essential. Look for specifications like lux ratings (lower is better) and reviews that praise a camera’s ability to maintain a clear, usable image in challenging lighting conditions.
WDR (Wide Dynamic Range): Handling Brightness Extremes
WDR is incredibly important for FPV. It helps the camera manage scenes with extreme differences in brightness – think flying out from under a bridge into bright sunlight, or through a sun-dappled forest. A good WDR prevents parts of your image from being completely black (crushed shadows) or completely white (blown-out highlights), giving you a more balanced and usable picture.
Mounting Options & Size Compatibility
Always double-check that your chosen FPV camera‘s form factor (standard, mini, micro, nano) is compatible with your drone frame’s camera mount. Many frames are designed for specific camera sizes, and while adapters exist, it’s best to get a native fit.
Durability & Lens Protection
Given the nature of FPV flying, crashes are inevitable. A robust camera case and a protected lens are crucial. Many cameras come with an aluminum bracket or a durable plastic housing. Consider adding a TPU lens guard for extra protection against impacts and scratches.
By carefully evaluating these features against your budget and flying style, you can select an FPV camera that will provide a truly outstanding and reliable first-person view experience.
Setting Up and Optimizing Your FPV Camera for Peak Performance
Once you’ve chosen the perfect FPV camera, the next step is to integrate it seamlessly into your drone and fine-tune its settings for the best possible flight experience. Proper setup and optimization are crucial for reliability, clear video, and ultimately, a more enjoyable flight.
Wiring Your FPV Camera: A Step-by-Step Guide
Wiring an FPV camera is relatively straightforward, but precision is key. Most cameras require three basic connections:
- Video Out (Yellow Wire): Connects to the video input of your Video Transmitter (VTx). This is how the video signal travels from the camera to the VTx, which then broadcasts it to your goggles.
- Ground (Black Wire): Connects to a ground pad on your VTx or Flight Controller (FC). It provides a common reference point for electrical signals.
- Voltage In (Red Wire): Connects to a regulated voltage source. Most FPV cameras operate on 5V-17V, with some supporting wider ranges. Always check your camera’s specifications and ensure you’re providing the correct voltage, usually from your VTx or a dedicated 5V BEC (Battery Eliminator Circuit) on your Flight Controller.
Always double-check your wiring diagrams for both your FPV camera and VTx before soldering to prevent damage. Incorrect voltage can instantly fry your camera.
OSD (On-Screen Display) Integration
Many modern FPV cameras can be integrated with your drone’s OSD (On-Screen Display) system, which typically runs on the Flight Controller. This allows crucial flight data like battery voltage, flight time, current draw, and even GPS coordinates to be superimposed directly onto your FPV video feed. To enable this, the video signal usually passes from the camera to the FC’s OSD pad, and then from the FC’s OSD video out to the VTx. This setup provides vital information that enhances situational awareness during flight.
Adjusting Camera Settings (Brightness, Contrast, Sharpness, WDR)
Most advanced FPV cameras come with an OSD menu that allows you to adjust various image parameters using either a small joystick controller (often included) or by configuring it through your flight controller’s Betaflight OSD menu. Key settings to tweak include:
- Brightness & Contrast: Fine-tune these for optimal visibility in your typical flying conditions.
- Sharpness: Adjust to make details clearer, but avoid over-sharpening, which can introduce artifacts.
- WDR (Wide Dynamic Range): Enable or adjust the level of WDR to help the camera handle rapid light changes effectively. This is incredibly important for FPV flying, especially when transitioning between bright and dark areas.
- Exposure Mode: Choose between modes like ‘Auto,’ ‘Backlight Compensation (BLC),’ or ‘Highlight Compensation (HLC)’ depending on your environment.
- Day/Night Mode: Some cameras allow you to force a black and white ‘Night’ mode for better contrast in very low light.
Experiment with these settings in your usual flying spots to find what works best for your eyes and environment. A well-tuned camera can significantly improve your confidence and performance.
Mounting Best Practices
- Secure Mount: Ensure your FPV camera is mounted securely with no wobble. Any movement will introduce vibration and ‘jello’ into your video feed.
- Optimal Angle: Most FPV pilots angle their cameras upwards (camera tilt) to compensate for the forward pitch of the drone during aggressive flight. The faster you fly, the more tilt you generally need. This is a personal preference and can be adjusted with camera mounts or by physically tilting the camera within its bracket.
- Clear View: Make sure no part of your drone frame, propellers, or antenna is obstructing the camera’s view.
Protecting Your Investment: Lens Guards and Cases
Given the high-impact nature of FPV, protecting your FPV camera is vital. Consider:
- Lens Protectors: Small TPU (Thermoplastic Polyurethane) guards can be printed or purchased to shield the lens from direct impact.
- Robust Casing: Many frames offer additional protection around the camera. Ensure your camera’s casing is durable enough to withstand minor bumps.
A well-set-up and protected FPV camera is a happy FPV camera, leading to countless hours of enjoyable and immersive flight.
The Future of FPV Cameras: Digital Dominance and Beyond
The landscape of FPV cameras is evolving rapidly, driven by relentless innovation and a demand for higher fidelity and performance. While analog systems have long been the backbone of FPV, the industry is unequivocally shifting towards digital, promising a future of unprecedented clarity and capabilities.
Analog vs. Digital FPV Systems: A Paradigm Shift
For decades, analog video transmission (via a VTx and receiver feeding into FPV goggles) was the only practical way to achieve low-latency FPV. Analog FPV cameras are simple, lightweight, and incredibly reliable, providing an instant, albeit somewhat grainy and prone-to-interference image. This has been the staple for drone racing and freestyle due to its minimal latency.
However, the advent of digital FPV systems has begun a true revolution. Systems like DJI FPV (now DJI O3 Air Unit), HDZero, and Walksnail Avatar are introducing high-definition, digitally encoded video feeds. These systems transmit significantly clearer, sharper images with richer colors and far less interference than analog, fundamentally changing the FPV experience. The associated digital FPV cameras are specially designed to integrate with these advanced systems.
HDZero, DJI O3 Air Unit, Walksnail Avatar: The New Breed
These systems represent the cutting edge of FPV camera technology and video transmission:
- DJI O3 Air Unit: Known for its exceptional image quality (up to 1080p) and robust transmission range, the O3 Air Unit features a powerful integrated camera that records onboard HD footage while simultaneously transmitting a high-quality FPV feed with competitive latency. It’s a game-changer for cinematic FPV and long-range flying.
- HDZero: Designed with racers and low-latency enthusiasts in mind, HDZero focuses on delivering an incredibly fast, near-analog latency HD experience. Its FPV camera modules are specifically optimized for speed and clarity, often supporting both 4:3 and 16:9 aspect ratios.
- Walksnail Avatar: Another strong contender in the digital FPV space, Walksnail offers excellent image quality, range, and latency, providing a compelling alternative to both DJI and HDZero. Their FPV cameras are compact and robust, catering to a wide range of drone builds.
The core difference with these digital systems is that the FPV camera is no longer a standalone component merely outputting an analog signal; it’s often an integrated part of a sophisticated digital ecosystem, working in tandem with the air unit to process and transmit high-definition data.
Innovations on the Horizon
The future promises even more exciting developments for FPV cameras:
- Lower Latency Digital: Expect continuous improvements in digital system latency, further blurring the lines between analog and digital speed.
- Enhanced Low Light Performance: Cameras will likely become even more adept at flying in challenging light conditions, potentially opening up new avenues for night flying.
- Global Shutter CMOS: As global shutter CMOS technology becomes more affordable and miniaturized, the “jello” effect will become a relic of the past for all FPV cameras, leading to smoother, clearer footage even during aggressive maneuvers.
- Integrated AI Features: We might see rudimentary AI capabilities, such as advanced image stabilization, object recognition for autonomous flight aids, or dynamic exposure adjustments based on flight patterns.
- Modular and Smaller Designs: As components shrink, FPV cameras will become even more compact and versatile, fitting into an even wider range of micro and nano drones without sacrificing performance.
The rapid advancements in digital FPV are making the hobby more accessible, visually stunning, and exciting than ever before. While analog FPV cameras will likely remain a popular, cost-effective option for a while, the march towards digital dominance is undeniable, promising a breathtaking visual experience for all FPV enthusiasts.
The journey through the intricate world of FPV cameras reveals them to be far more than just miniature eyes for your drone. They are sophisticated pieces of engineering, meticulously designed to provide an unparalleled real-time immersive experience that is the very essence of FPV flight. From the low-latency analog workhorses that have defined the hobby for years to the cutting-edge digital systems offering breathtaking HD clarity, each FPV camera plays a pivotal role in connecting pilot and machine.
We’ve unpacked what is FPV camera, explored its critical components, navigated the various types and their ideal applications, and delved into the crucial specifications that dictate performance. We’ve also armed you with actionable insights on how to properly set up and optimize your camera, ensuring you get the clearest, most responsive video feed possible. Finally, we’ve glimpsed into the exciting future, where digital innovation is continuously pushing the boundaries of what’s possible, promising even more immersive and visually stunning flights.
Whether you’re building your first tiny whoop or upgrading a high-performance racing quad, selecting the right FPV camera is a decision that will profoundly impact your flying enjoyment and skill progression. Pay attention to latency, field of view, aspect ratio, and sensor type, and always consider how the camera’s features align with your specific drone and flying style. The world of FPV is dynamic and thrilling, and with the right camera as your window, the sky truly is the limit.
So, go forth, explore the skies, and experience the exhilaration of first-person flight. What’s your favorite FPV camera, and why? Share your insights and experiences in the comments below – we’d love to hear from you!
🎥 Related Video: How-to RACE ANY RC Drone or Car w/ Tiny FPV Camera & VR Goggles!!
📺 AuthenTech – Ben Schmanke
TINY FPV CAMERAS: ▻ Micro FPV Cams on Amazon: https://amzn.to/2nDcYWO ▻ Eachine TX01: http://bit.ly/2joVgBT …
Frequently Asked Questions
What is what is fpv camera?
what is fpv camera is an important topic with many practical applications and benefits.
How can what is fpv camera help me?
Understanding what is fpv camera can improve your knowledge and provide practical solutions.


