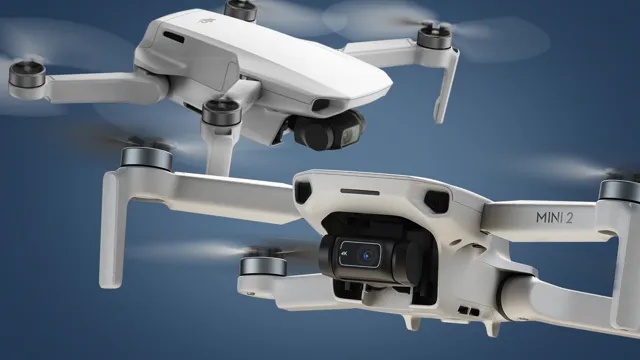
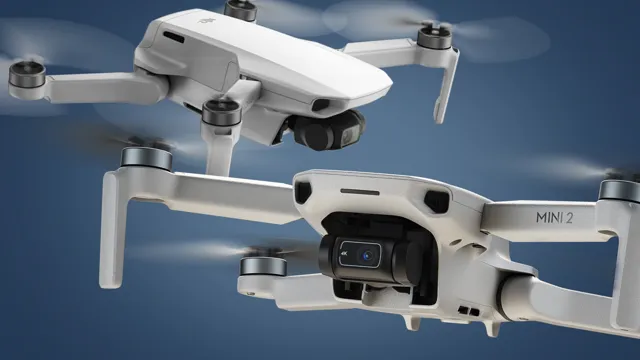
DJI Mini 3 Pro is a game-changer for drone enthusiasts who want to capture high-quality aerial footage. As a drone pilot, your experience can be enhanced by mastering your DJI Mini 3 Pro settings. With the right settings, you can achieve stunning footage that rivals professional videography.
Whether you’re a seasoned drone operator or just starting, mastering your DJI Mini 3 Pro settings is crucial. In this guide, we’ll explore the tips and tricks that can help you get the best out of your drone. So, sit tight and let’s dive into exploring the DJI Mini 3 Pro settings together.
Introduction
DJI Mini 3 Pro Settings-Everything You Need to Know When it comes to capturing stunning footage with your DJI Mini 3 Pro, knowing the right settings is vital. This compact drone is a popular choice among drone enthusiasts and is perfect for capturing stunning aerial shots. However, to get the best results, you must understand the camera settings thoroughly.
The DJI Mini 3 Pro settings allow you to customize your drone’s camera depending on different shooting situations, including aperture, shutter speed, and ISO. You can adjust these settings using the DJI Fly App, which can be downloaded on your smartphone, giving you full control over the camera. The DJI Mini 3 Pro also comes with intelligent features such as ActiveTrack and Quick Shot that make it easy to capture stunning aerial footage, even if you’re new to drones.
So, whether you’re a filmmaking professional or a hobbyist, mastering the DJI Mini 3 Pro camera settings can take your aerial shots to the next level.
Understanding the DJI Mini 3 Pro Camera Settings
The DJI Mini 3 Pro is a portable and powerful drone that comes equipped with an array of camera settings that can be confusing to navigate. However, as a drone enthusiast, it’s essential to understand these settings to capture the best possible footage. In this blog post, we’ll dive into the various camera settings of the DJI Mini 3 Pro and help you create stunning visuals that will make your aerial photography stand out.
So, let’s get started!

Metering Modes and When to Use Them
Metering modes are one of the key aspects of photography that determine the exposure of an image. Essentially, they are the way that your camera determines how much light to let in when capturing an image. There are several different types of metering modes, each with their own strengths and weaknesses depending on the situation.
Understanding these modes and when to use them can help you take better photos in a variety of different environments. In this blog post, we’ll take a closer look at each of the metering modes and examine when it makes sense to use each one. So if you want to take your photography skills to the next level, keep reading!
Advanced DJI Mini 3 Pro Settings
If you’re a seasoned drone pilot looking for advanced DJI Mini 3 Pro settings, you’re in luck. This compact drone is packed with features that can take your aerial photography and videography to the next level. One of the first things you should do is adjust the camera settings to your liking.
This includes things like adjusting the ISO, shutter speed and aperture. If you’re shooting in low light conditions, you may want to increase the ISO and decrease the shutter speed to avoid blurry photos. Another feature you may want to experiment with is the manual focus.
This will give you more control over what you want to be in focus and what you want to be blurred in the background. Finally, don’t forget to utilize the different shooting modes such as Hyperlapse and ActiveTrack to capture stunning footage. With the DJI Mini 3 Pro, the sky is truly the limit.
Manual Exposure and Its Benefits
The DJI Mini 3 Pro is a powerful drone capable of capturing stunning aerial footage that’s perfect for both hobbyists and professionals alike. One of the most advanced features of this drone is manual exposure, which allows you to take full control over the exposure settings of your shots. By adjusting the aperture, shutter speed, and ISO, you can create breathtaking footage with perfect lighting, focus, and clarity.
This feature gives you the freedom to experiment with various lighting conditions, including low-light and backlight shots, making it easier to capture stunning aerial footage even in challenging situations. So, whether you’re a professional photographer or a budding videographer, manual exposure is an essential tool that you simply can’t afford to ignore when using the DJI Mini 3 Pro. With this feature, you’ll have complete creative control over your shots, giving you the freedom to capture stunning aerial footage that’s sure to impress your audience.
Focus Settings for Sharper Images
If you’re looking to improve the sharpness of your DJI Mini 3 Pro images, there are several advanced focus settings you can utilize. One key setting is the focus peaking option, which highlights edges in your shot that are in focus, helping you to better judge the sharpness of your shot. Additionally, you can adjust your focus mode to either single or continuous, depending on whether you want to lock focus on a stationary subject or on a moving subject.
Another option is to adjust your focus area, which allows you to select a specific area of your shot to prioritize focus on. Finally, make sure to keep your aperture settings in mind, as a lower aperture number will result in a shallower depth of field, which can impact the overall sharpness of your shot. By playing around with these advanced settings, you can achieve even sharper, more impressive images with your DJI Mini 3 Pro.
White Balance Settings for Proper Color Representation
When it comes to getting proper color representation on your DJI Mini 3 Pro, White Balance settings play a crucial role. This advanced feature lets you adjust the colors in the camera based on the lighting conditions of the environment. By selecting the appropriate white balance setting, you can capture true-to-life colors that look natural and appealing.
Whether you’re shooting indoors, outdoors, or in mixed lighting conditions, there’s a white balance preset that suits your needs. So, before you start recording or taking pictures with your DJI Mini 3 Pro, don’t forget to check your white balance settings and adjust it accordingly. This simple step can make all the difference in the final look and feel of your footage or photos.
Additional Tips for DJI Mini 3 Pro Settings
In addition to the default DJI Mini 3 Pro settings, there are a few additional tips that can help you get the most out of your drone. First, it’s important to adjust your camera settings to best suit your shooting environment. This may include tweaking the exposure, white balance, or sharpness settings.
Additionally, consider using the “Point of Interest” mode to capture more dynamic footage by circling a specific subject. It’s also a good idea to familiarize yourself with the various quick shot modes, such as Dronie or Rocket, for creative and engaging shots. Lastly, don’t forget to check your aircraft’s firmware and battery levels before each flight, and always adhere to local regulations and guidelines for safe and responsible flying.
With these tips and a bit of practice, you’ll be capturing stunning aerial footage in no time with your DJI Mini 3 Pro!
Best Video Settings for Cinematic Footage
When it comes to capturing cinematic footage with your DJI Mini 3 Pro, it’s important to not only get the best video settings, but also to consider some additional tips that could really take your footage to the next level. One thing to keep in mind is to experiment with different camera angles. Try shooting from different heights and angles to add depth and dimension to your shots.
Another tip is to use ND filters to control exposure and get smoother, more cinematic footage. Additionally, make use of the wide range of camera settings available, such as shooting in 7K or 4K resolution and adjusting the white balance to suit the lighting conditions.
Don’t be afraid to play around with different settings until you find what works best for your specific situation and desired outcome. With these additional tips and the proper video settings, you’ll be able to capture stunning, cinematic footage with your DJI Mini 3 Pro.
How to Set up Gimbal and Stabilization Settings
One of the most important aspects of getting great footage with your DJI Mini 3 Pro is setting up the gimbal and stabilization settings correctly. While the Mini 3 Pro already comes equiped with great stabilization capabilities, there are still some things you can do to optimize your settings for specific shooting scenarios. For instance, increasing the gimbal tilt speed can help capture more dynamic shots, while reducing it can help create smoother, more cinematic footage.
Additionally, adjusting the sensitivity of the controls can provide you with more precise control over the gimbal and ensure that you can achieve the shots you’re looking for with ease. It’s important to experiment with various settings to find the right ones for your specific needs. Don’t be afraid to play around with different configurations until you find the perfect match!
Conclusion
The DJI Mini 3 Pro is like a chef’s knife – its performance depends on the setting. With the right settings, this drone can cook up some truly breathtaking content. Whether you prefer dynamic auto settings or want to take full control with manual settings, the Mini 3 Pro lets you customize to your heart’s content.
So set your sights high, adjust those settings, and let the Mini 3 Pro take flight!”
FAQs
What are the maximum transmission distance settings for the DJI Mini 3 Pro?
The DJI Mini 3 Pro has a maximum transmission distance of 10 kilometers when using the OcuSync 3.0 system.
How can I adjust the video resolution settings on my DJI Mini 3 Pro?
You can adjust the video resolution settings on the DJI Fly app by selecting Camera Settings, then Video, and choosing the resolution that you want to use.
What is the maximum flight time for the DJI Mini 3 Pro?
The DJI Mini 3 Pro has a maximum flight time of 31 minutes when flying in windless conditions and a fully charged battery.
Is it possible to adjust the ISO and shutter speed settings on the DJI Mini 3 Pro?
Yes, you can adjust the ISO and shutter speed settings on the DJI Fly app by selecting Camera Settings, then Advanced Shooting, and choosing the settings that you want to use.

