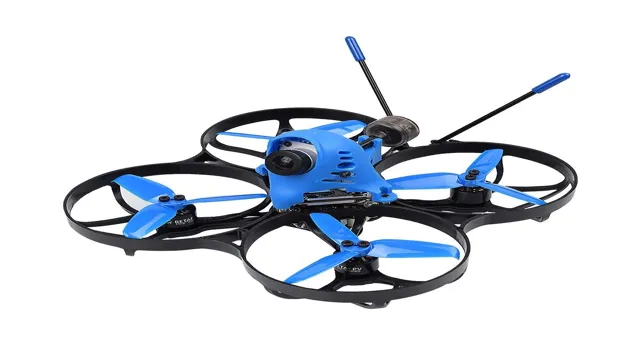
If you’re new to the world of drones, it can be overwhelming to figure out how to bind your BetaFPV drone to your controller. But fear not! Binding your drone is a crucial step to ensure it’s communicating with your controller effectively, and it’s much simpler than you might think. Think of binding your drone to your controller like pairing your phone to a Bluetooth speaker.
Just like how your phone needs to pair with the speaker to play music, your drone needs to “pair” with your controller to receive signals. Without this connection, your drone won’t be able to take off or fly properly. Luckily, BetaFPV drones come with easy-to-follow instructions to get your drone and controller paired up in no time.
You’ll need to start by powering on both your drone and controller and putting them in pairing mode. From there, it’s just a matter of following a few simple steps to establish the connection between the two devices. Once your drone is bound to your controller, you’re ready to take to the skies and explore the limits of what your BetaFPV can do.
Whether you’re racing, freestyling, or just enjoying the view, having a solidly bound drone and controller pairing is crucial to an enjoyable, safe flying experience. So take a deep breath, follow the instructions, and get ready to unleash your drone’s full potential!
Introduction
Are you looking to bind a Beta FPV drone but not sure how to do it? Binding your drone is an essential step that ensures your drone is connected properly to the transmitter and ready to take off. To bind your Beta FPV drone, start by turning on your drone and transmitter. Then, press and hold the bind button on the drone while powering it on.
After a few seconds, the LED lights on the drone will start flashing rapidly, indicating that it’s in binding mode. Next, press and hold the bind button on the transmitter until the LED light turns solid. The drone should now be connected to the transmitter, and you can test it by arming the motors and checking the flight controls.
By following these simple steps, you’ll be able to safely and easily bind your Beta FPV drone for an incredible flying experience.
What is Binding?
Binding refers to the act of tying or fastening items together to create a cohesive unit. In the printing industry, binding is used to join individual sheets of paper into a single volume or book while ensuring that the pages remain secure, intact, and in the proper order. The binding process typically involves cutting and folding the sheets, gathering them into signatures, then sewing or gluing them together.
Bindings may also include covers made from a variety of materials like hardback and paperback covers, leather, or cloth. The type of binding used is determined by factors such as the intended use of the book, its size, and the budget available. Proper binding is essential to producing high-quality books that are aesthetically pleasing, durable, and easy to use.
Why is Binding Necessary?
“Why is Binding Necessary?” Binding is a crucial process in the world of publishing, and it refers to the assembling of pages or sheets into a single volume. Without binding, books would consist of individual loose pages, making them difficult to handle and read. Binding holds the pages together in a secure and organized manner, creating a functional and durable book that can withstand daily wear and tear.
The process of binding can involve various techniques, such as sewing, gluing, stapling, or thermal binding. In addition to its practical function, binding also adds an aesthetic element to books through the design of their covers, spine, and endpapers. Bookbinding is a specialized profession that requires significant craftsmanship and attention to detail.
Overall, binding is essential in creating a well-structured book that is both functional and attractive for readers to enjoy.
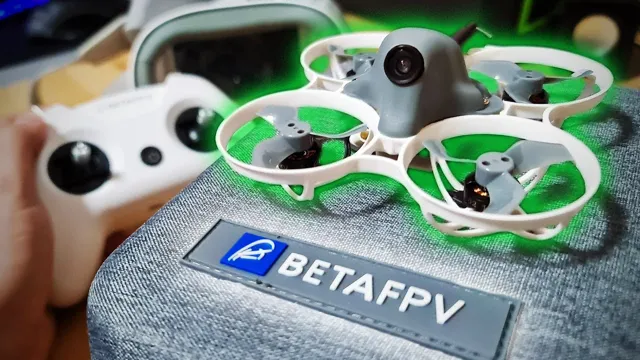
Steps to Bind BetaFPV Drone
If you are wondering how to bind your BetaFPV drone, don’t worry, it’s actually a pretty straightforward process. Firstly, you need to turn on your transmitter and navigate to the bind option. Next, you need to put your drone into bind mode.
This can typically be done by pressing and holding the bind button or by inserting a bind plug, depending on your specific drone model. Once your drone is in bind mode, you need to bring it close to your transmitter and press the bind button. The light on your transmitter should then turn solid green, indicating that your drone is now bound to your transmitter.
It’s always a good idea to check that your drone is responding correctly to your transmitter inputs before taking it for a flight. Remember, it’s important to follow the specific binding instructions for your drone model, as details may vary. With a little bit of patience, you’ll be able to bind your BetaFPV drone in no time.
Step 1: Charging the Batteries
If you want to bind your BetaFPV drone, the first step is to ensure that the batteries are charged. You don’t want your drone to run out of power in the middle of the process. To charge the batteries, you need to connect the charger to the drone’s battery.
Make sure to check the manual to ensure that you connect it properly. You’ll know the battery is charging when the charging light on the charger turns on. Depending on the drone model, it may take different amounts of time to charge fully.
Once you’ve charged your batteries, you can move on to the next step of binding your drone. Remember to always take safety precautions when charging your batteries, and never leave them unattended. By following these simple steps, you’ll be on your way to successfully binding your BetaFPV drone and taking to the skies!
Step 2: Turn On the Transmitter and the Receiver
If you’ve passed the first step of checking all the components’ readiness for binding, it’s time to move onto the next. Step 2 involves turning on both the transmitter and the receiver. It’s important to make sure both devices are switched on and ready to connect.
You’ll want to ensure that each device is charged and ready to go. Once both devices are turned on, check the manufacturer’s instructions on how to initiate the binding process. The process may differ based on the specific drone and transmitter you’re working with, so follow the instructions carefully.
Some devices may even require a precise timing sequence to initiate binding successfully, so be patient and follow the instructions to the letter. The binding process is essential for a successful flight, so be sure to take the time to complete it correctly before heading out. By following these basic steps, you can bind your BetaFPV drone quickly and safely, and get ready for an exciting and enjoyable flight experience.
Step 3: Enter Binding Mode on the Transmitter
Binding a BetaFPV drone to a transmitter is a simple process, and once it’s done, you’ll be ready to start flying. The first step is to enter binding mode on the transmitter. Different transmitters have different methods of entering binding mode, so consult your specific manual for detailed instructions.
However, in most cases, you’ll need to turn on the transmitter while holding down a specific button or switch to activate binding mode. Once you’ve entered binding mode, the transmitter will start searching for your drone.
Step 4: Enter Binding Mode on the BetaFPV Drone
To bind the BetaFPV drone, you’ll need to follow a few simple steps. The fourth step involves entering binding mode on the drone itself. This can be done by pressing and holding the bind button, usually located on the flight controller, while simultaneously powering on the drone.
Once you’ve done that, the LED lights on the drone should start flashing rapidly, indicating that it’s ready to bind with your transmitter. Now, it’s important to note that the exact process for entering binding mode can vary depending on the specific model of your BetaFPV drone. So, it’s always a good idea to consult the manufacturer’s instructions or online resources for guidance.
Once you’ve successfully entered binding mode, you’ll be able to connect your drone to your transmitter and start flying. This is a crucial step in getting your BetaFPV drone up and running, so take your time and make sure you follow the instructions carefully. With a little bit of patience, you’ll be well on your way to enjoying all the fun and excitement that a BetaFPV drone can offer.
Step 5: Wait for the Binding to Complete
BetaFPV drone, binding Once you’ve put the drone into binding mode and have your transmitter ready to go, the last step is to actually complete the binding process. This can take a few minutes, so don’t panic if it doesn’t happen immediately. Usually, the drone’s LED will stop flashing and turn solid once it’s bound to the transmitter.
Once you see that, you should be good to go! Remember that you’ll need to repeat this process any time you change your transmitter or receiver, or if you’re binding multiple drones to the same transmitter. But with a little practice, binding your BetaFPV drone will become second nature, and you’ll be able to take to the skies with ease.
Troubleshooting Tips
If you’re having trouble binding your Beta FPV drone, don’t worry – it’s a common issue that many fliers face. First, make sure you have your transmitter and receiver turned on and in close proximity to each other. Then, put your drone in binding mode by holding down the bind button on the receiver while powering it on.
Finally, initiate the binding process on your transmitter by following the manufacturer’s instructions. If your drone still isn’t binding, try moving to a different location or recalibrating your transmitter and receiver. It’s also important to check that your transmitter and drone are compatible with each other before attempting to bind them.
Remember that troubleshooting can be frustrating, but with some persistence and patience, you’ll be able to enjoy flying your Beta FPV drone in no time.
Ensure Both the Transmitter and Receiver Are On
When it comes to using wireless devices, one common issue that people often run into is the transmitter and receiver not being on at the same time. This can cause frustration and confusion, especially if you’re not sure why your device isn’t working. The first thing you should check is the power of both the transmitter and receiver, making sure they are fully charged or have fresh batteries.
If one or both devices aren’t turning on, it’s likely that they won’t be able to connect with each other. Another thing to consider is the distance between the two devices, as sometimes interference from other electronic devices or even physical objects can cause problems. By ensuring both the transmitter and receiver are on and within range of each other, you can troubleshoot this common issue and get your wireless devices working properly.
Check the Binding Protocol
When it comes to troubleshooting your network, it’s essential to check the binding protocol. The binding protocol allows different network adapters to share the same IP address, which can cause conflicts and connectivity issues if not properly configured. To ensure that your binding protocol is set up correctly, you’ll want to make sure that each adapter has a unique IP address and that the binding order is correct.
You can check your binding protocol by going to the network connections page in your control panel and selecting each adapter’s properties. From there, you’ll see the option to adjust the binding order and configure IP settings. By checking and adjusting your binding protocol, you can ensure that your network runs smoothly and efficiently without any conflicts.
Verify the Binding Was Successful
Once you have bound your document, it’s vital to ensure that the binding was successful. There are a few things to check to confirm that your document is bound correctly. Firstly, check the spine of your document to make sure it’s straight.
If it’s crooked, it could be an indication that the binding process was not done correctly. Additionally, flip through the pages to ensure that none of them have fallen out or are hanging loosely. Secondly, check the alignment of the pages to make sure they are not slanted or askew.
This could mean that the binding process was not done with precision. Lastly, give the document a small shake to see if any pages come loose. If everything sticks together, then you can be sure that the binding process worked successfully.
Remember, checking for these things will save you from any last-minute emergencies.
Conclusion
Binding a Beta FPV drone is like introducing two friends who are meant to work together. The process may seem daunting at first, but with a little patience, attention to detail, and some clear communication, you can connect these two halves and take flight towards endless possibilities. So let’s get out there, bring our Beta FPV drone and receiver together, and create some epic aerial adventures!”
FAQs
What materials do I need to bind a beta fpv drone?
To bind a beta fpv drone, you will need a compatible radio transmitter, a beta fpv drone, and a battery for the drone.
How do I bind a beta fpv drone to my radio transmitter?
To bind a beta fpv drone to a radio transmitter, first turn on the drone and put it into bind mode. Then, put the radio transmitter into bind mode and wait for the binding process to be completed.
What should I do if my beta fpv drone is not binding to my radio transmitter?
If your beta fpv drone is not binding to your radio transmitter, make sure that both the drone and the transmitter are compatible. Also, ensure that both the drone and the transmitter are in bind mode and that the channels are set correctly.
Can I bind a beta fpv drone to multiple radio transmitters?
Yes, a beta fpv drone can be bound to multiple compatible radio transmitters. However, it is important to note that only one transmitter can control the drone at a time.


