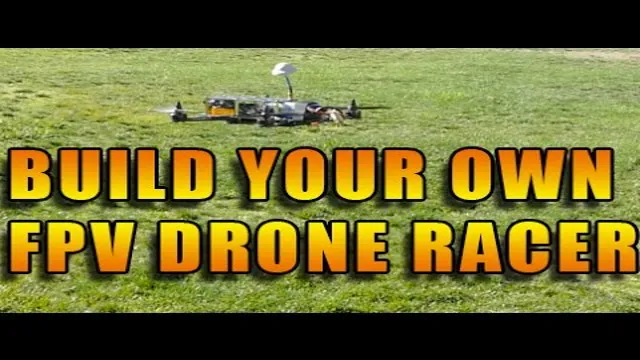
Are you looking for a new and exciting hobby? Maybe you are interested in drones and want to take your knowledge to the next level. Building your own FPV (First Person View) drone might be just the activity you need! An FPV drone allows the user to see exactly what the drone sees through a camera mounted on the drone. By wearing a pair of goggles, the user can experience the thrill of flight as if they were in the cockpit.
It’s no wonder this hobby has gained popularity in recent years, as it offers a unique and immersive experience that can’t be found elsewhere. Not only is building your own drone a rewarding and fun experience, but it also allows you to customize it to your liking. From choosing the frame and motors to selecting the camera and flight controller, everything can be tailored to your specific preferences.
It’s the perfect opportunity to learn new skills and push yourself to new heights. But where should you start? Don’t worry, there are plenty of resources available online, from tutorials to forums filled with experienced drone builders willing to offer advice. With a bit of research and the right parts, you can be well on your way to building your own FPV drone in no time.
So why wait? Start your journey into the world of FPV drones today and experience the thrill of flying like never before.
Introduction
Are you ready to take your drone hobby to the next level? Building your own FPV (First Person View) drone can provide you with an exciting and unique flying experience. However, it requires some technical and mechanical skills. To begin building your own drone, you will need a frame, motors, ESCs (Electronic Speed Controllers), a flight controller, a video transmitter, a camera, and a receiver.
It’s important to choose the right components to ensure optimal performance and compatibility. Additionally, you will need to learn how to solder and program the flight controller. Overall, building your own FPV drone can be a challenging yet rewarding experience, giving you a greater understanding and appreciation of the technology behind it.
With determination, patience, and the right resources, you can create a personalized and powerful drone to enjoy.
Why build your own?
Building your own project, whether it’s a product, website, or app, may seem like a daunting task. After all, there are countless options available on the market, and it can be difficult to make up your mind as to which one is the best fit for your needs. However, building your own product has a host of advantages over simply purchasing one.
Firstly, you have complete control over every aspect of your product’s design and functionality. This means that you can tailor your product to your specific needs rather than trying to make a generic one-size-fits-all solution work for you. Secondly, building your own project can often lead to cost savings as you don’t have to pay for added features that you don’t need.
Lastly, building your own project can be a fulfilling and satisfying experience, allowing you to learn new skills and showcase your creativity. So why settle for something off-the-shelf when you can build your own customized solution that perfectly fits your needs?

What is FPV?
FPV, or First Person View, is a thrilling experience that allows you to see and navigate the world from a completely different perspective. It essentially involves controlling a small drone or aircraft by viewing its movements through a camera mounted on it, which transmits the video to a screen or goggles worn by the operator in real-time. This offers an immersive perspective that makes you feel like you’re flying, allowing you to explore, race, and perform stunts with a level of freedom and excitement that’s hard to match.
FPV has gained immense popularity in recent years among hobbyists, filmmakers, and even professional pilots who use it for training and analysis purposes. If you’re looking for an exciting and unique way to explore the world, FPV is definitely worth giving a shot!
Choosing Your Parts
Building your own FPV drone can be a fun and rewarding process, but it all starts with choosing the right parts. First and foremost, you’ll need a frame that can accommodate the size and weight of your components, while also being durable enough to withstand crashes. From there, you’ll need to decide on a flight controller, motors, and ESCs that meet your needs in terms of performance and compatibility.
When it comes to the camera and video transmitter, make sure to choose ones that provide a clear and reliable signal, and consider your options for antennas and goggles as well. Batteries, propellers, and other accessories are also important factors to consider when building your drone. Overall, take the time to research and compare different options, and don’t be afraid to ask for help or advice from the knowledgeable FPV community.
By carefully selecting the right parts and components, you can ensure your FPV drone is both functional and fun to fly.
Frame selection
When it comes to building your bike, selecting the right frame is crucial. The first step in finding the perfect frame for your ride is to determine your riding style and requirements. Are you a road cyclist or a mountain biker? Do you need your bike primarily for commuting or off-roading? Once you know your needs, you can choose between materials like aluminum, carbon fiber, or steel, each with their own advantages and disadvantages.
Remember to keep in mind budget and intended use when selecting the right frame for your bike. Whether you want something lightweight for speed or something more durable for off-road adventures, there are frames out there for every rider.
Motor and propeller selection
When it comes to building your drone, choosing the right motor and propeller is crucial for optimum performance. There are many factors to consider, including weight, size, and power requirements. The propeller size should match the motor’s specifications and function.
A larger propeller will produce more thrust but requires a powerful motor to handle the added load. On the other hand, a smaller propeller requires less power but may not be suitable for heavy payloads. When selecting a motor, it’s essential to consider the Kv rating, which indicates the motor’s speed.
The lower the Kv rating, the more power the motor generates, enabling the drone to carry a higher payload and maintain stability. It’s also crucial to consider the voltage of the battery you will be using and match it with the motor’s specifications. Overall, the right combination of motor and propeller will determine the drone’s flight characteristics, including speed, stability, and maneuverability.
Choosing the right parts takes time and research, but it’s worth the effort for a successful drone build and an enjoyable flying experience.
Choosing the right flight controller
When it comes to building your own drone, choosing the right flight controller is crucial. The flight controller is essentially the “brain” of your drone, and it ensures that everything runs smoothly in-flight. It’s important to consider your needs and preferences when selecting a flight controller.
Factors such as size, weight, and compatibility with your other components should be taken into consideration. It’s also important to choose a flight controller that is user-friendly, especially if you’re new to building drones. Ultimately, finding the right flight controller is all about balancing cost, functionality, and ease of use.
By doing your research and comparing different options, you can ensure that your drone is equipped with the best possible flight controller for your needs.
Camera and video transmitter selection
When it comes to building your own drone, choosing the right camera and video transmitter is crucial. The camera is what captures all the visuals, while the video transmitter sends those visuals back to your controller. There are a lot of options out there, so it’s important to choose ones that are compatible with each other and meet your needs.
For the camera, you’ll want to consider factors like resolution, frame rate, and low-light performance. Some popular cameras for drones are the GoPro Hero, Runcam Split, and Caddx Tarsier. As for the video transmitter, you’ll want to look for one with good range and reliability.
The TBS Unify Pro and the FuriousFPV Stealth Long Range are two options to consider. Overall, choosing the right camera and video transmitter can heavily impact the quality of your drone’s footage and performance. So take your time and do your research to find the best fit for your specific drone build.
Assembly
If you’re interested in flying FPV drones, building your own can be a rewarding and cost-effective option. However, the assembly process can seem daunting at first. The first step is to gather all the necessary components, including a frame, flight controller, motors, electronic speed controllers (ESCs), propellers, and a camera system.
Then, the assembly process begins with attaching the ESCs to the motors and soldering the connections. The flight controller is then installed on the frame, followed by the camera system. Finally, propellers are attached and the whole system is calibrated.
It’s important to take your time and double-check all connections, as a mistake can lead to a crash during flight. With some patience and attention to detail, building your own FPV drone can be a fun and satisfying project.
Building the frame
To begin building the frame of your project, you need to gather all the necessary materials. This will include your wood planks, nails, screws, and a saw. Once you have everything on hand, you’ll need to start assembling the frame.
Begin by measuring and cutting the wood planks to the correct size. Make sure you’re precise as this will affect the overall stability of the frame. Then, nail the planks together, using a hammer and nails.
You may also use screws for additional stability if required. Ensure that the frame is flat and level, and double-check all measurements before securing the joints. Once you’ve finished building the frame, you can move on to the next step of your project.
With careful planning and construction, your frame will not only look great, but it will also provide sturdy support for everything else that goes into your creation.
Attaching the motors and propellers
When it comes to assembling your drone, attaching the motors and propellers can be a critical and tricky step. Firstly, it is essential to identify which motor and propeller belong to each other and which ones should spin clockwise or counter-clockwise. Once you’ve attached the motor to the drone’s frame, you can move on to attaching the propeller, ensuring it’s secured and tight.
It’s crucial to note that different motors have different threads; some have left-hand threads, while some have right-hand threads. Be sure to check the threads and screw them appropriately. The propellers should be checked to ensure that the blades are balanced and in good condition to avoid any unwanted vibrations that may affect the drone’s stability.
Remember to take caution and avoid over-tightening the propellers, as this could lead to damage to the motor or propeller. With the motors and propellers correctly attached, your drone will be ready to take to the skies and soar through the air with steady and reliable performance.
Mounting the flight controller and other electronics
When it comes to building your own drone, it’s important to know how to properly mount the flight controller and other electronics. The flight controller is essentially the “brain” of your drone and will regulate its flight and movements. To start, you’ll want to choose a suitable frame that will hold all of your components securely in place.
Then, use zip ties or adhesive tape to secure the flight controller and any other electronics to the frame. It’s important to ensure that the wires are neatly organized and securely attached. You don’t want loose wires getting in the way or causing malfunctions during flight.
Another tip is to test all of your components before final assembly to make sure everything is working properly. Once everything is securely in place, you can move on to installing your propellers and other exterior features. With a bit of patience and attention to detail, you’ll have your very own customized drone ready to fly in no time!
Configuration and Testing
Once you’ve gathered all the necessary components for your drone, it’s time to assemble and configure it. Before starting, you should check for any defects or damages in your parts to ensure proper functionality. Once done, start by assembling the frame, attaching the motors, and mounting the propellers.
After that, connect the flight controller and receiver to the drone’s power source and connect them to the radio transmitter, which will allow the drone to be remotely controlled. Once all the components are securely connected, make sure to verify that each motor direction is correct and the flight controller’s firmware is up-to-date. Next, move on to configuring the flight controller, which involves setting up the accelerometer, gyro, and PID (Proportional, Integral, Derivative) controls.
Lastly, you should test your drone in a controlled environment to ensure it’s functioning properly. Check the motor spin, flight movements, and radio connection. Overall, building your own FPV drone takes time and patience, but the end result is worth it.
Calibrating your flight controller
Calibrating your flight controller is an essential part of setting up your drone. In simple terms, calibration refers to adjusting the sensors on the flight controller to ensure the accuracy of the drone’s movements. To calibrate your flight controller, you will need to use software specific to your drone’s model, such as Cleanflight or Betaflight.
Once you have connected your drone to your computer, you can begin calibrating the sensors, including the accelerometer and gyroscope. It’s worth noting that calibration will need to be carried out every time you make changes to the drone’s hardware or configuration. By calibrating your flight controller, you can reduce the risk of collisions, improve stability, and increase flight precision.
So, take the time to calibrate your drone before each flight – you’ll be glad you did!
Setting up your FPV goggles
Setting up your FPV goggles can be a bit intimidating, but with the right guidance, it can be an effortless process. The most critical step in the set-up process is the configuration and testing of the goggles. Once you have everything out of the box, it’s essential to familiarize yourself with the goggles’ buttons and their functions.
After that, you need to configure the channels and frequencies to match those of your drone. This process involves connecting the goggles to the drone and then using the menu to select the correct channels. With the channels set correctly, you can then go ahead and test the goggles to ensure everything is working as it should.
Testing includes checking the video feed and the signal strength to avoid the frustration of losing connection mid-flight. Ensuring your FPV goggles are set-up correctly is crucial, not just for safety but also to maximize your fun while flying your drone.
Testing your drone’s stability and controls
One of the most important steps when it comes to flying a drone is testing its stability and controls. Before taking off, it’s crucial to configure the drone properly by calibrating the compass and making sure the firmware is up to date. Once that’s done, testing the drone in a safe and open area allows for an evaluation of its stability.
Checking the response time of the controls is also important, making sure that the drone can effectively move in the desired direction without delay or overcompensation. An effective way to test the drone’s balance and control is by hovering in one place for a few moments and observing any drifting or wobbling. If the drone appears unstable, it may require further adjustment or tuning.
By ensuring the drone is properly configured and tested, pilots can have a more successful and stress-free flying experience.
Conclusion
So there you have it, ladies and gentlemen. Building your own FPV drone may seem daunting, but with the right components and a bit of patience, you’ll be soaring through the skies in no time! Not only is it a fun and rewarding hobby, but it also allows for a unique perspective and an adrenaline-fueled experience. And who knows, maybe one day you’ll even become a professional racing pilot, earning the title of the next “Top Gun” in the FPV community.
So grab your tools, put on your aviator sunglasses, and get ready to fly high – the sky’s the limit!”
FAQs
What components are needed to build an FPV drone?
To build an FPV drone, you’ll need a frame, flight controller, motors, electronic speed controllers (ESCs), camera, video transmitter, receiver, transmitter (remote control), battery, and propellers.
How do I choose the right camera for my FPV drone?
When choosing a camera for your FPV drone, consider factors such as image quality, field of view, weight, and durability. Popular choices include the RunCam Swift 2 and Foxeer Arrow.
How can I improve the range of my FPV drone’s video transmission?
To improve the range of your FPV drone’s video transmission, use a high-quality antenna for both the video transmitter and receiver, avoid flying in areas with interference, and consider using a video amplifier or diversity receiver.
What is the maximum flight time I can expect from my FPV drone?
The maximum flight time of an FPV drone depends on factors such as battery capacity, weight, and flying style. Generally, most FPV drones can fly for 5-15 minutes on a single battery charge. You can increase flight time by using a higher capacity battery or reducing the weight of the drone.


