Have you ever tried to fly a FPV drone with your bare hands? It’s a tough job! However, with a controller in hand, you can easily maneuver your drone around, capture stunning aerial footage, and experience the adrenaline rush of flying without worrying about a crash. But, if you’re new to the world of FPV drones, you may be wondering how to connect your controller to your drone. In this blog post, we will take a closer look at the steps you need to take to connect your controller to your FPV drone and get it up in the air!
Check compatibility between controller and drone
Looking to connect your controller to your FPV drone and fly high in the skies? The first step is to ensure that both are compatible with each other. Every drone is created with specific hardware and electronics, which might not be in sync with all controllers. Hence, before you go ahead and make the connection, ensure that the controller is compatible with your drone.
The compatibility will depend on the frequency and protocol used by the controller and the drone. It’s essential to refer to the manufacturer’s manual to determine the compatibility between your devices. You can also seek help from online forums or social media groups where you can connect with experienced FPV enthusiasts who can guide you on the best controller options that work well with your drone.
Once you’ve determined the compatibility, you can now move on to connecting the controller to your drone and begin an exciting journey as an FPV pilot!
Make sure controller and drone use the same frequency
If you’re new to the world of drones, it can be overwhelming to choose the right controller for your drone. One critical factor to consider is the frequency used by both your drone and controller. To ensure compatibility, it’s vital that your controller and drone operate on the same frequency.
In simple terms, the frequency refers to the number of times per second in which the signal moves from the controller to your drone. If the controller and drone use different frequencies, there will be a communication gap, and you won’t be able to control your drone effectively. Imagine trying to speak a different language from your friend; communication will be challenging, and misunderstandings can occur.
The same principle applies when your controller and drone use different frequencies. So, always check the compatibility between your controller and drone. When both use the same frequency, you’ll have a seamless flying experience and full control over your drone.
Ensure controller is fully charged
One of the first things you should do before taking your drone out for flight is to ensure that the controller is fully charged. A dead controller can quickly ruin a fun day of flying, so it’s best to avoid this issue altogether by charging your controller to full capacity. Additionally, it’s important to check the compatibility between your controller and drone before taking off.
Different models have different controllers, so make sure that you have the correct controller for your drone. It’s also important to keep in mind that not all controllers are compatible with all drones, so do your research to avoid any mishaps. By ensuring that your controller is fully charged and compatible with your drone, you can enjoy a successful and efficient day of flying without any interruptions.
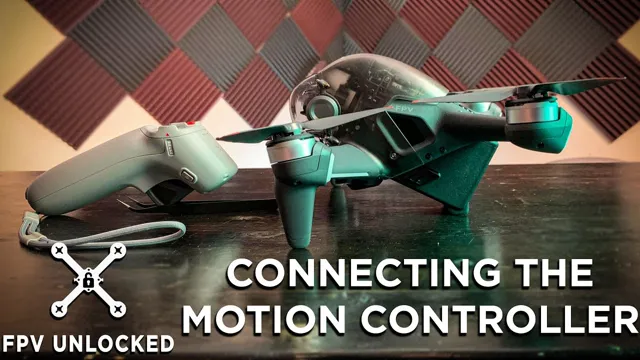
Pair controller with drone
Connecting a controller to an FPV drone can seem like a daunting task, but it is actually quite simple. First, ensure that both your drone and your controller are charged and turned on. Next, put your drone into binding mode, which will vary depending on the make and model of your drone.
Then, turn on your controller and look for the drone’s signal in the available devices list. Once you have connected the two, take a moment to test that all of the buttons and joysticks on your controller are functioning properly. It’s important to keep in mind that each drone and controller pairing will have specific calibration settings to adjust for wind resistance and altitude control.
Don’t forget to consult your manual for any specific information regarding setup and calibration. With your controller now properly connected to your FPV drone, you can enjoy the freedom and excitement of piloting your drone through the skies!
Put the controller and drone into pairing mode
When it comes to pairing your drone with your controller, the first step is to ensure that both are in pairing mode. Typically, this involves turning on both devices and pressing and holding a specific button on each until they make a connection. It’s important to consult your drone and controller manuals for specific instructions on how to put them into pairing mode, as the process can vary depending on the make and model.
Once you have successfully put both devices into pairing mode, your controller should be able to communicate with your drone, allowing you to take flight and capture stunning aerial footage. Remember, getting the pairing process right is essential to ensuring that your drone operates smoothly and safely, so take your time and follow the instructions carefully. With a little practice, you’ll be able to pair your controller and drone in no time, and take your aerial photography and videography to new heights!
Follow the specific pairing instructions for your controller and drone models
Pairing your controller with your drone is an essential process before beginning a flying activity. The pairing process may differ depending on your controller and drone models. Thus, it is vital to read the instruction manual and follow the specific pairing instructions carefully.
Usually, you will need to turn on your drone and press its pairing button. Then, activate your controller and put it in pairing mode, which can sometimes involve pressing specific buttons or combinations. Once the pairing process is initiated, your controller and drone will establish a connection, and you will be able to control the drone using the controller.
It is important to note that if you encounter any issues during pairing, you should refer to your instruction manual or consult with a professional for assistance. Overall, successfully pairing your controller and drone will ensure that you have a safe and enjoyable flying experience.
Calibrate controller and drone
One of the essential steps to successfully flying an FPV drone is to connect the controller to the drone properly. It’s important to calibrate the control sticks to ensure they are in their neutral positions before turning on the drone and connecting it to the controller. Once both are turned on and connected, you will need to bind the controller and drone, which involves following the specific manufacturer instructions provided in the user manual.
This typically involves pressing and holding a button on both the controller and drone simultaneously until the two devices are successfully bound. Once bound, verify that the controller is responding to the drone movements by checking the live feed on your FPV goggles or screen. Taking the time to properly connect and calibrate your controller and drone can help you avoid potential issues such as crashes or flyaways.
Perform a gyro calibration on both the controller and drone
It’s important to calibrate both your controller and drone before taking off to ensure a smooth flight. One important aspect of calibration is gyro calibration. This step ensures that the drone’s sensors can accurately detect changes in movement and orientation, allowing for precise and stable flight.
To calibrate your controller, begin by turning it on and connecting it to your drone. Hold the controller level and still, then follow the instructions in your drone’s manual to calibrate the gyroscope. This may involve rotating the drone in a specific way, so be sure to follow the instructions carefully.
Once you’ve calibrated the drone, repeat the process with the controller to make sure both are perfectly synced. A successful calibration not only improves flight stability but also helps extend the life of your equipment. With a little patience and attention to detail, you’ll be ready for safe and enjoyable flights every time.
Perform a radio calibration on your drone’s flight controller with the connected controller
Performing a radio calibration on your drone’s flight controller is an essential step to ensure smooth and stable flights. This calibration helps the flight controller and the connected controller understand each other’s signals accurately, resulting in excellent flight performance. To initiate this process, first, ensure that your transmitter and receiver are set up correctly and both switched on.
Next, enter the firmware settings and locate the section for radio calibration. Follow the instructions provided carefully, and complete the calibration process step by step. Once the calibration is done, test the drone outdoors in a safe, open area.
Check to see how it responds to controller movements, such as throttle, pitch, roll, and yaw. Make any necessary adjustments to the settings so that the drone is responsive to controller inputs. After completing these steps, you’re ready to take your drone off the ground and enjoy a smooth flying experience!
Test and troubleshoot for connectivity issues
Connecting a controller to an FPV drone is a crucial step in getting your drone up and running. First, ensure that your controller and drone are both powered on and within close proximity of each other. Check the manual for your specific controller and drone to locate the binding button or process for pairing them.
Once you have initiated the binding process, you should see a green or solid light on both the controller and drone indicating that they are connected. If you are still experiencing connectivity issues, try resetting both devices and attempting the pairing process again. It’s important to test and troubleshoot for connectivity issues before taking your drone out for a flight to avoid any mishaps or accidents.
With these steps in mind, you should have no trouble connecting your controller to your FPV drone and taking to the skies.
Perform a test flight to check connectivity and functionality
Before taking your drone on a trip, it is essential to perform a test flight to ensure connectivity and functionality. Testing your drone before your trip will help identify any issues that need to be addressed before taking off. The first step in performing a test flight is to check the drone’s battery to ensure it is charged and can handle the duration of the flight.
Next, you should connect the drone to your controller and test the drone’s connectivity. It is essential to ensure that the drone and controller are properly synced, and there is a secure connection before takeoff. If the connection is lost, this can cause the drone to crash, creating a dangerous situation.
While in flight, pay attention to any connectivity issues that may arise. If the drone starts drifting or losing connection, it is necessary to land and address the issue. Overall, performing a test flight before your trip will help troubleshoot any connectivity issues and ensure your drone is ready to take to the skies.
So, don’t forget to test your drone before your next adventure!
Troubleshoot any connectivity issues that arise
When experiencing connectivity issues, there are a few things you can try to troubleshoot the problem. First, make sure that all cables are properly connected and that your device is receiving power. If you’re connecting wirelessly, check that your device is connected to the correct network and that the signal is strong enough.
You can also try resetting your router or modem, which often resolves connection problems. Another helpful tool is to use a network analysis tool to diagnose the issue. This software can detect and diagnose problems that may be causing your connection to fail or operate at a slow speed.
Remember that addressing connectivity problems quickly can often mean the difference between a productive day and one full of frustration.
Conclusion
In conclusion, connecting your controller to your FPV drone is easier than you might think. Just like forming a strong connection with another person, you need to take the time to understand each other’s needs and communication styles. With a little bit of patience and persistence, you’ll be soaring through the skies with your drone in no time.
So, keep calm and fly on!”
FAQs
What type of controller is needed to connect to an FPV drone?
Typically, a radio transmitter or remote controller is needed to connect to an FPV drone.
How do I connect my controller to my FPV drone?
Firstly, ensure that your controller is compatible with your drone’s receiver. Then, follow the manufacturer’s instructions to bind the controller and drone.
Why won’t my controller connect to my FPV drone?
This could be due to various reasons, such as incompatible frequencies between the controller and drone, or a faulty connection. Check the manual and troubleshooting guide for your specific drone and controller to troubleshoot the issue.
Can I use a phone app to control my FPV drone instead of a controller?
Some drones have the capability to be controlled through a phone app, but this typically only allows for basic functions and limited range. A physical controller is recommended for optimal control and range.


