Featured image for this comprehensive guide about what is bnf drone?
Image source: i.pinimg.com
The world of drones is vast, exciting, and often, a little bit intimidating for newcomers. As you delve deeper into this high-flying hobby, you’ll encounter a dizzying array of acronyms: RTF, PNP, ARF, DIY, and of course, BNF. While some terms clearly describe what you’re getting, others, like BNF drone, can leave you scratching your head. If you’ve been wondering what this specific designation means and whether it’s the right choice for your aerial adventures, you’ve come to the perfect place.
A BNF drone represents a sweet spot for many pilots, offering a unique balance between convenience and customization. It’s an option designed to get you in the air faster than building from scratch, but with more flexibility than a ready-to-fly package. Understanding what is BNF drone is crucial for making an informed purchasing decision, especially as your skills grow beyond basic beginner models. It opens doors to a wider range of high-performance and specialized unmanned aerial vehicles (UAVs).
In this comprehensive guide, we’ll demystify the BNF drone concept, breaking down its components, benefits, and the essential steps to get yours flying. We’ll explore why countless hobbyists and professionals opt for BNF models, how they compare to other drone types, and what you need to consider before making a purchase. By the end, you’ll not only know exactly what is BNF drone, but you’ll also be equipped with the knowledge to confidently navigate the market and choose the perfect one for your needs.
Quick Answers to Common Questions
What does “BNF” actually stand for?
BNF stands for “Bind-N-Fly.” It means your BNF drone comes mostly ready to fly, just needing you to “bind” it to your existing radio transmitter.
What’s the main benefit of buying a BNF drone?
The biggest perk of a BNF drone is convenience! You save time and effort because the drone is already assembled and set up, allowing you to get flying faster if you already own a compatible radio.
Do I need anything else if I buy a BNF drone?
Yes, you’ll definitely need your own radio transmitter (controller) that’s compatible with the BNF drone’s receiver. You’ll also need batteries for both the drone and your radio, and a charger for the drone batteries.
Are BNF drones good for beginners?
A BNF drone can be great for beginners who already have a decent radio controller from another drone or RC vehicle. It simplifies the initial setup, letting you focus on learning to fly rather than building.
Can I use any radio controller with a BNF drone?
Not just any! Each BNF drone is designed to work with a specific radio protocol (like FrSky, Spektrum, Crossfire, etc.). You must ensure your existing radio controller supports the same protocol as your chosen BNF drone.
📋 Table of Contents
- Unpacking the Acronym: What Does BNF Really Mean in the Drone World?
- The Core Components of a BNF Drone: What You Get (and Don’t Get)
- Why Choose a BNF Drone? Advantages for Pilots
- The Binding Process: Getting Your BNF Drone Airborne
- Navigating the BNF Landscape: Key Considerations Before Buying
- BNF Drones vs. RTF, PNP, and DIY: A Comparative Look
- Conclusion: Embrace the Freedom of a BNF Drone
Unpacking the Acronym: What Does BNF Really Mean in the Drone World?
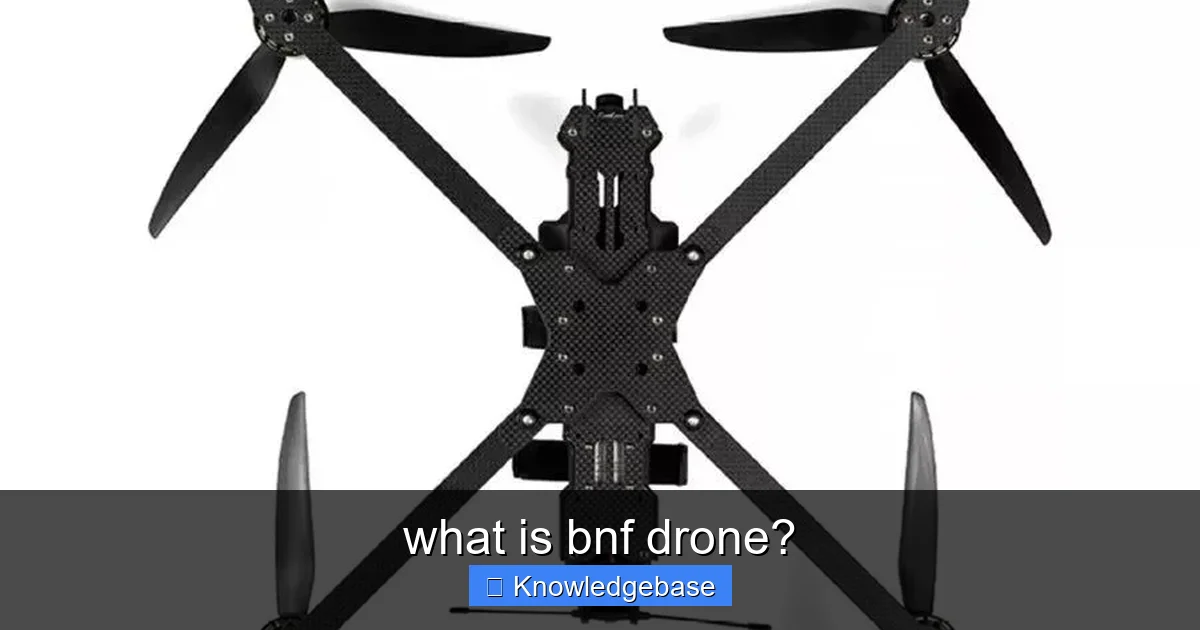
Let’s cut straight to the chase: BNF stands for “Bind-N-Fly.” This designation is a cornerstone of the drone industry, particularly popular among hobbyists and intermediate pilots. When you purchase a BNF drone, it means the drone comes fully assembled, complete with all necessary electronic components – motors, Electronic Speed Controllers (ESCs), flight controller, and most importantly, a pre-installed radio receiver.
Learn more about what is bnf drone? – what is bnf drone?
Image source: media.cdnws.com
The “Bind” part of “Bind-N-Fly” refers to the process of linking this pre-installed receiver to your own compatible radio transmitter (also known as a remote controller). Once bound, your transmitter can communicate with the drone, allowing you to control its every movement. The “Fly” part implies that once the binding is successful, and you’ve potentially added a battery, the drone is ready for immediate flight, usually requiring minimal to no additional setup or calibration.
| Aspect | BNF (Bind-N-Fly) Characteristics | Key User Consideration/Benefit |
|---|---|---|
| Definition | A fully assembled drone that includes all essential components EXCEPT the radio transmitter (controller). | “Ready-to-bind” to your own compatible transmitter, saving assembly time. |
| Included Components | Drone frame, motors, ESCs, flight controller, receiver, and usually propellers & battery. | Provides a complete, pre-tested flight system without requiring component sourcing or wiring. |
| Radio Transmitter | Not included. Requires user to supply their own compatible transmitter (e.g., FrSky, Spektrum, ELRS). | Allows pilots to use their preferred, higher-quality, or multi-protocol radio controller. |
| Target User | Intermediate to experienced pilots who already own a suitable radio transmitter. | Ideal for expanding a drone fleet or upgrading without purchasing redundant controllers. |
| Setup Required | Binding the drone’s receiver to the user’s transmitter and basic flight controller configuration. | Minimal setup compared to DIY kits; often ready to fly within minutes of unboxing. |
| Cost Implication | Generally more affordable than a Ready-To-Fly (RTF) package (which includes a basic controller). | Cost-effective for pilots already invested in a quality transmitter, offering better value for the drone itself. |
This concept stands in stark contrast to other common drone categories:
- Ready-To-Fly (RTF): These drones come with everything you need in the box – drone, transmitter, battery, charger, and often spare parts. They are perfect for absolute beginners who want to fly straight out of the box with zero fuss.
- Plug-N-Play (PNP) / Almost Ready-to-Fly (ARF): These drones are assembled but do *not* include a radio receiver or a transmitter. You need to purchase and install your own receiver and use your own transmitter, along with adding batteries and a charger.
- Do-It-Yourself (DIY): This involves buying every single component individually – frame, motors, ESCs, flight controller, receiver, camera, VTX, etc. – and assembling the drone from scratch. It offers maximum customization and a deep learning experience but demands significant time and technical skill.
A BNF drone offers a compelling middle ground. It bypasses the complexity of a full build (DIY) and the need to install a receiver (PNP/ARF), while giving you the freedom to use your preferred, often higher-quality, transmitter that you may already own from other drone or RC models, unlike a basic RTF package.
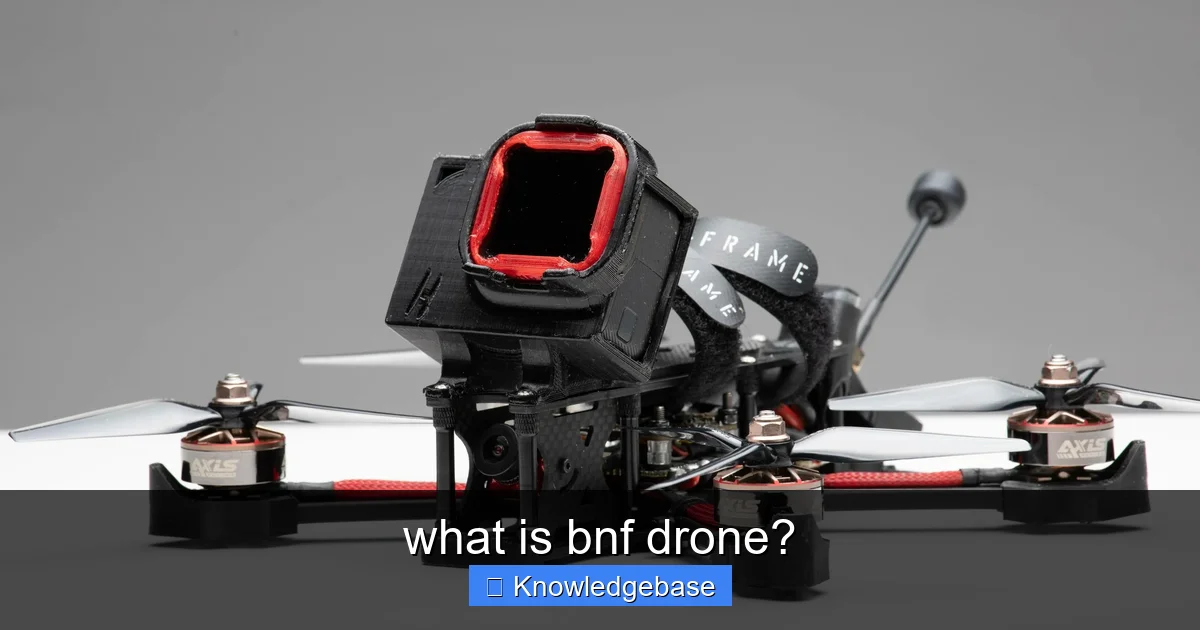
The Core Components of a BNF Drone: What You Get (and Don’t Get)
Understanding what is BNF drone also requires a clear picture of what’s included in the box versus what you’ll need to supply yourself. Generally, a BNF drone package aims to provide a complete, flight-ready airframe, minus the essential user interface and power source.
Learn more about what is bnf drone? – what is bnf drone?
Image source: blogger.googleusercontent.com
What’s Typically Included in a BNF Drone Package:
- Frame: The structural backbone of the drone, ranging from tiny plastic whoop frames to robust carbon fiber freestyle or long-range frames.
- Motors: The powerful units that spin the propellers, usually brushless for performance drones.
- Electronic Speed Controllers (ESCs): These regulate the power from the battery to the motors, dictating their speed and direction. In many modern BNF drones, especially smaller ones, the ESCs are integrated directly into the flight controller board (an AIO or All-In-One board).
- Flight Controller (FC): The brain of the drone, running firmware like Betaflight, ArduPilot, or INAV. It processes pilot inputs and sensor data to stabilize and control the drone’s flight.
- Radio Receiver: This is the key component that makes it a BNF drone. It’s pre-installed and wired to the flight controller, ready to “bind” to a compatible transmitter. Common protocols include FrSky, Spektrum, Crossfire (TBS), ELRS (ExpressLRS), and Futaba, among others.
- Propellers: Usually a set of props matched to the motors and drone size.
- FPV System (for FPV drones):
- Camera: Captures the live video feed.
- Video Transmitter (VTX): Sends the camera feed wirelessly to your FPV goggles or monitor.
- Antenna: For the VTX to transmit the video signal.
- Other Minor Components: Wiring, connectors, possibly LED lights, buzzer, and sometimes GPS modules for larger or more advanced models.
What’s Typically NOT Included (and What You’ll Need):
- Radio Transmitter (Remote Controller): This is the single most important item you need to supply. It must be compatible with the drone’s pre-installed receiver protocol. This is where the cost savings and preference for BNF drone models often come into play – pilots already own a high-quality transmitter they love.
- LiPo Battery: While the drone comes with a battery connector (e.g., XT30, XT60), the actual flight battery is almost always sold separately. You’ll need to ensure you get the correct cell count (e.g., 2S, 4S, 6S) and capacity (mAh) for your specific BNF drone.
- Battery Charger: You’ll need a suitable LiPo charger to power up your batteries.
- FPV Goggles or Monitor (for FPV drones): If you’re flying an FPV BNF drone, you’ll need goggles (analog or digital, depending on the drone’s VTX system) to see the live video feed.
- Tools: While assembly is complete, minor adjustments or repairs might require basic tools (screwdriver set, hex wrenches).
- Spare Parts: While some basic spare props might be included, you generally won’t get a full set of spare motors, arms, or electronics.
The philosophy behind the BNF drone is to leverage your existing investment in a high-quality transmitter and potentially batteries/chargers, thus reducing the overall cost and complexity for the manufacturer and, ultimately, for the pilot.
Why Choose a BNF Drone? Advantages for Pilots
The popularity of BNF drones among experienced hobbyists is no accident. This category offers several compelling advantages that make it an attractive option, especially once you’ve outgrown basic beginner models or if you’re looking to expand your fleet.
- Cost-Effectiveness (If You Already Own a Transmitter): This is perhaps the biggest draw. A good quality radio transmitter can be a significant investment, often ranging from $100 to $500+. Since a BNF drone doesn’t include one, you’re not paying for a redundant transmitter every time you buy a new drone. This makes expanding your fleet much more affordable.
- Freedom to Use Your Preferred Radio: Every pilot has their favorite transmitter – one that fits their hands perfectly, has custom switches, and feels just right. A BNF drone allows you to stick with your beloved radio, ensuring a consistent and comfortable flying experience across all your models. You won’t be stuck with the often basic and less customizable transmitters included in RTF kits.
- Reduced Setup Time Compared to Building from Scratch: While not as instant as RTF, a BNF drone significantly cuts down on the time and technical expertise required compared to a full DIY build. All the soldering, wiring, and component mounting are already done. You just need to bind it, perhaps adjust some flight controller settings, and you’re ready to fly.
- Often Higher Quality Components: Manufacturers selling BNF drones frequently equip them with better quality components (motors, ESCs, flight controllers, FPV systems) than entry-level RTF kits. This is because they target a more discerning pilot who understands and values performance. You get more bang for your buck in terms of component quality and flight characteristics.
- Upgradability and Customization Potential: While pre-built, many BNF drone models use standard components that can be easily swapped out or upgraded. Want a more powerful VTX? A different camera? A faster flight controller? In many cases, these modifications are straightforward, giving you a degree of customization typically reserved for DIY builds.
- Ideal for Pilots with Multiple Drones: If you own several drones (e.g., a tiny indoor whoop, a freestyle quad, and a long-range cruiser), using BNF drone models allows you to fly all of them with a single transmitter. This simplifies your gear, reduces clutter, and ensures a familiar control feel across your entire fleet.
- Target Audience: BNF drones are particularly well-suited for:
- Intermediate pilots looking to upgrade from an RTF or beginner model.
- Experienced pilots wanting to add a new drone type to their collection without a full build.
- Pilots who have already invested in a high-quality radio transmitter and FPV goggles.
- Anyone who appreciates the convenience of a pre-assembled drone but wants the flexibility of using their own control gear.
In essence, a BNF drone offers a pathway to enjoying advanced flight experiences without the steep learning curve and time commitment of building from scratch, all while leveraging your existing high-value equipment.
The Binding Process: Getting Your BNF Drone Airborne
Once you’ve purchased your BNF drone, the most crucial step before your maiden flight is the “binding” process. This is how your radio transmitter establishes a wireless link with the drone’s pre-installed receiver. The exact steps can vary slightly depending on the receiver protocol (e.g., FrSky, Spektrum, Crossfire, ELRS) and your specific transmitter, but the general principle remains the same.
General Steps for Binding a BNF Drone:
- Power On Your Transmitter: Ensure your radio transmitter is fully charged and powered on. Make sure it’s set to the correct model memory if you have multiple drone profiles.
- Put Your Transmitter into Bind Mode: This is typically done through the transmitter’s menu system. Navigate to your model’s settings and look for an option like “Bind,” “Internal RF,” “External RF,” or “Receiver” settings. Select the appropriate protocol (e.g., D8, D16, ACCESS, DSMX, ELRS) that matches your drone’s receiver.
- Power On Your Drone in Bind Mode:
- Method 1 (Bind Button): Many BNF drones have a small “bind button” on the flight controller or receiver. With the drone powered off, press and hold this button, then connect the LiPo battery. The receiver’s LED lights should start flashing, indicating it’s in bind mode.
- Method 2 (CLI Command – Betaflight/INAV): For some drones, especially those running Betaflight or INAV, you can enter bind mode via the flight controller software. Connect your drone to your computer, open Betaflight Configurator (or similar), go to the CLI tab, and type a specific command (e.g.,
bind_rxfor FrSky receivers, orbind_rx_spifor SPI receivers, or follow instructions for external modules like ELRS). Then hit Enter. The drone will enter bind mode. - Method 3 (Specific Manufacturer): Some manufacturers (e.g., Spektrum) might have unique sequences like plugging in the battery, unplugging, and replugging quickly to enter bind mode. Always consult your drone’s manual for precise instructions.
- Complete the Binding: Once both your transmitter and drone’s receiver are in bind mode, the binding process should complete automatically within a few seconds. The receiver’s LED lights will usually change from flashing rapidly to a solid green or blue, indicating a successful bind.
- Exit Bind Mode:
- On your transmitter, usually, you just exit the bind menu.
- On the drone, simply unplug the battery and then reconnect it normally (without holding the bind button).
- Verify Communication: After rebinding and rebooting the drone, connect it to your computer and open Betaflight Configurator. Go to the “Receiver” tab. Move your transmitter’s sticks and switches. You should see the corresponding channels (Roll, Pitch, Yaw, Throttle, Aux channels) respond in the configurator. If they don’t, the bind was unsuccessful, or your channel mapping is incorrect.
Important Considerations:
- Firmware Compatibility: Ensure your transmitter’s firmware (e.g., OpenTX, EdgeTX) and the drone’s receiver firmware are compatible. Sometimes, older transmitters might need a firmware update to bind with newer receivers, or vice versa.
- Receiver Protocol: Double-check that your transmitter module is set to the *exact* protocol of your drone’s receiver (e.g., FrSky D16, not FrSky D8; ELRS 2.4GHz, not ELRS 900MHz).
- Failsafe Settings: This is critically important. In Betaflight (or similar), always configure your failsafe. This determines what the drone does if it loses connection with your transmitter (e.g., motors shut off, drone drops, or attempts to land). Never fly without a properly configured failsafe.
- Channel Mapping: If your stick inputs don’t match the movements in the receiver tab (e.g., moving the roll stick affects pitch), you’ll need to adjust the channel mapping in your flight controller software (e.g., AETR1234, TAER1234).
While the first bind might seem daunting, it’s a straightforward process once you understand the steps. Always refer to the specific manuals for both your BNF drone and your radio transmitter for the most accurate and up-to-date instructions. A successful bind is your first step towards unlocking the full potential of your new Bind-N-Fly drone!
Navigating the BNF Landscape: Key Considerations Before Buying
Choosing the right BNF drone isn’t just about finding one that looks cool; it’s about matching the drone’s specifications to your existing gear, skill level, and intended use. With the vast array of options available, here are the crucial factors to consider before making your purchase.
Transmitter Compatibility: The Absolute First Check
This cannot be stressed enough. The primary reason for buying a BNF drone is to use your existing radio. Therefore, you *must* ensure the drone’s pre-installed receiver is compatible with your transmitter’s protocol. Common protocols include:
- FrSky: D16, ACCESS, ACCST (check specific versions).
- Spektrum: DSMX, DSM2.
- TBS Crossfire / Tracer: Requires a TBS module on your transmitter.
- ELRS (ExpressLRS): Requires an ELRS module on your transmitter.
- Futaba: S-FHSS, FASST.
If your transmitter doesn’t support the drone’s receiver protocol, the drone is essentially useless to you unless you replace the receiver – which defeats the “Bind-N-Fly” purpose. Always confirm the receiver type and protocol in the product description.
Flight Controller & Firmware
Most modern FPV BNF drones come with popular open-source flight controller firmware like Betaflight, INAV, or ArduPilot. Understanding which firmware the drone runs is important:
- Betaflight: The most popular for freestyle, racing, and cinematic FPV drones, known for its extensive tuning options and high performance.
- INAV: Excellent for GPS-enabled drones, offering advanced navigation features like Return-to-Home, Waypoint navigation, and altitude hold, often found on long-range or more autonomous BNF drone models.
- ArduPilot: A powerful and highly capable suite, suitable for complex applications and larger drones, often seen in more professional or research-oriented UAVs.
Familiarity with the firmware will make initial setup and tuning much easier. Check the FC board type (e.g., F4, F7) as this impacts processing power and available features.
Battery Type & Connector
Since batteries are almost always separate, you need to know what kind of LiPo battery your BNF drone requires:
- Cell Count (S): 1S, 2S, 3S, 4S, 5S, 6S. This indicates the voltage. Smaller drones might use 1S-3S, while powerful freestyle or racing drones typically use 4S-6S. Mismatching the cell count can damage the drone or result in poor performance.
- Capacity (mAh): Determines flight time. Higher mAh usually means longer flight time but also more weight.
- Discharge Rate (C-rating): Indicates how much current the battery can safely deliver. Higher C-ratings (e.g., 75C, 100C) are needed for high-performance drones.
- Connector Type: The physical plug on the drone for the battery. Common types are BT2.0 (tiny whoops), XT30 (smaller quads), and XT60 (larger quads). Ensure your batteries have the matching connector.
Having a compatible charger for your LiPo batteries is also essential.
FPV System (Camera & VTX)
For FPV (First Person View) BNF drones, the video system is paramount:
- Analog vs. Digital: Analog systems (e.g., Caddx, RunCam) are cheaper, have lower latency, but suffer from static and lower resolution. Digital FPV systems (e.g., DJI O3 Air Unit, Caddx Vista, Walksnail Avatar) offer stunning HD video quality but are more expensive, can have slightly higher latency, and require compatible digital goggles. Make sure your FPV goggles match the drone’s VTX system.
- Camera Quality: Look for details on the camera sensor, lens, and low-light performance, especially if you plan to fly in varying conditions or capture cinematic footage.
- VTX Power (mW): Higher milliwatt (mW) output means better range and penetration, but also more heat and battery drain. Ensure it complies with local regulations.
Size & Purpose: What Are You Flying For?
BNF drones come in all shapes and sizes, each designed for a specific purpose:
- Tiny Whoops / Micro Drones (65-85mm): Excellent for indoor flying, learning FPV in a safe environment.
- Cinewhoops (85-150mm with prop guards): Designed to carry small HD cameras (e.g., GoPro Naked) for smooth, stable, and safe indoor/outdoor cinematic footage.
- Freestyle Quads (3-6 inches): Built for acrobatic maneuvers, tricks, and flying through challenging environments.
- Racing Drones (5-6 inches): Optimized for speed and agility on race tracks.
- Long-Range Drones (6-7 inches or more, often with GPS): Designed for extended flight times and covering vast distances, often for exploration or mapping.
- Cruisers / Camera Platforms: Larger, more stable platforms for carrying heavier cameras and achieving longer flight times (less common as BNF, often ARF/DIY).
Choose a size and type that aligns with where and how you intend to fly.
Brand Reputation & Support
While component quality is high in many BNF drone models, brand reputation still matters. Research brands known for reliability, good customer support, and readily available spare parts (e.g., GEPRC, iFlight, Eachine, EMAX, Holybro, BetaFPV). A reputable brand often means better build quality and easier troubleshooting down the line.
By carefully considering these factors, you can confidently select a BNF drone that perfectly complements your existing gear and flying ambitions, ensuring a smooth transition to thrilling aerial experiences.
BNF Drones vs. RTF, PNP, and DIY: A Comparative Look
To truly appreciate the value proposition of a BNF drone, it’s helpful to compare it directly with its counterparts in the drone market. Each type caters to a different pilot profile and offers a unique balance of cost, convenience, and customization.
Drone Type Comparison Table
| Feature | Ready-To-Fly (RTF) | Bind-N-Fly (BNF) | Plug-N-Play (PNP) / Almost Ready-to-Fly (ARF) | Do-It-Yourself (DIY) |
|---|---|---|---|---|
| Assembly Level | Fully assembled | Fully assembled | Fully assembled (needs receiver installation) | All parts separate, requires full assembly |
| Transmitter Included? | Yes (usually basic) | No | No | No |
| Receiver Included? | Yes (pre-bound) | Yes (pre-installed) | No | No |
| Battery/Charger Included? | Usually Yes | Usually No | Usually No | No |
| Skill Level Required | Beginner | Beginner to Intermediate | Intermediate | Advanced / Expert |
| Initial Setup Effort | Very Low (charge & fly) | Low (bind transmitter, minor settings) | Medium (install receiver, bind, configure) | Very High (solder, wire, configure everything) |
| Cost | Low-Medium (package deal) | Medium (drone only) | Medium-High (drone only) | Variable (can be low or very high depending on parts) |
| Customization | Very Low | Low-Medium (component upgrades) | Medium-High (select own receiver/transmitter) | Very High (select every component) |
| Pros | Easiest to start, all-inclusive. | Uses preferred TX, less setup than DIY/PNP, often better components than RTF. | Flexibility to choose own TX/RX, no soldering for drone main parts. | Maximum control, learning, repairability, unique builds. |
| Cons | Basic TX/RX, limited upgrades, redundant gear. | Requires existing compatible TX/RX, no battery/charger. | Still requires TX/RX purchase, receiver installation. | Time-consuming, steep learning curve, troubleshooting can be hard. |
| Best For | Absolute beginners, first drone. | Pilots with a TX, expanding fleet, upgrading from RTF. | Pilots with a TX, want more customization than BNF, enjoy light building. | Experienced hobbyists, specific requirements, deep learning. |
Ready-To-Fly (RTF) Drones: The Gateway Drug
RTF drones are the simplest entry point into the hobby. They are designed for minimal effort – unbox, charge, and fly. The biggest advantage is convenience; everything is included. However, the included transmitters are often basic, lack advanced features, and are not easily compatible with other drones. Upgrades are also limited. RTF is excellent for new pilots to get a feel for drone control without any technical hurdles, but most quickly outgrow them.
Plug-N-Play (PNP) / Almost Ready-to-Fly (ARF) Drones: A Step Towards Customization
PNP or ARF drones are assembled but come without a receiver or transmitter. This gives pilots the freedom to choose their preferred radio system (transmitter + receiver). The main difference from BNF is that you have to install and wire your receiver yourself, which requires a basic understanding of electronics and possibly some soldering. This offers more customization than BNF but requires a bit more effort upfront. They are suitable for intermediate pilots who want to select their receiver but avoid the full build.
Do-It-Yourself (DIY) Drones: The Ultimate Freedom
DIY is for the ultimate tinkerer and enthusiast. Every component is selected and assembled by the pilot. This offers unparalleled customization, allows for precise optimization for specific tasks (e.g., lightest racing quad, heaviest lift cinematic rig), and provides an invaluable learning experience about how drones work. The downsides are significant: a steep learning curve, immense time commitment for building and troubleshooting, and the potential for errors. DIY is for advanced pilots who enjoy the building process as much as (or more than) the flying.
The BNF Sweet Spot
The BNF drone carves out a niche by offering the plug-and-play convenience of a pre-assembled drone while allowing pilots to use their existing, often higher-quality, radio transmitter. It eliminates the need for receiver installation (unlike PNP/ARF) and the redundant hardware of an RTF kit. This makes the BNF drone an excellent choice for anyone who has moved past the absolute beginner stage, owns a decent transmitter, and wants to expand their drone capabilities without diving into the complexities of a full custom build. It represents a fantastic balance of convenience, performance, and controlled customization for a vast segment of the drone community.
Conclusion: Embrace the Freedom of a BNF Drone
The journey through the drone world is filled with choices, and understanding terms like BNF drone is key to making the right ones for your flying style and skill level. We’ve uncovered that a BNF drone, or “Bind-N-Fly,” is a fully assembled drone with all essential electronics, crucially including a pre-installed radio receiver, allowing you to link it to your existing, compatible radio transmitter.
This category of drone offers a compelling sweet spot for many pilots. It liberates you from the often-basic transmitters of RTF kits, saves you the cost and hassle of buying new radio gear with every drone, and significantly reduces the setup time compared to building a drone from scratch or even the receiver installation of a PNP/ARF model. For the intermediate pilot looking to upgrade, expand their fleet, or simply fly with their preferred, high-quality controller, the BNF drone is an ideal solution.
From understanding the core components included (and not included) to mastering the binding process and navigating the critical buying considerations like transmitter compatibility and drone purpose, you are now well-equipped with the knowledge of what is BNF drone. It’s a category that champions efficiency, leveraging your existing investments while providing access to a diverse range of high-performance and specialized aerial platforms.
So, if you’re ready to elevate your drone experience, ditch redundant equipment, and enjoy the freedom of using your favorite radio, exploring the world of BNF drones is your next logical step. Happy flying!
🎥 Related Video: BNF Drone Camera Module #arduino #arduinouno #drone #camera #techbotic #diy
📺 Eazytronic Shorts ( Official )
Frequently Asked Questions
What does BNF stand for when referring to drones?
BNF stands for “Bind-N-Fly.” This term indicates that the drone comes fully assembled and mostly ready to fly, but it requires you to “bind” it with your own compatible radio transmitter (controller).
What exactly is a BNF drone?
A BNF drone is a fully assembled drone that includes all necessary components like motors, ESCs, flight controller, and receiver, but it does not come with a radio transmitter. You need to provide your own compatible controller and typically a battery to get it airborne.
What do I need to fly a BNF drone after purchasing it?
To fly a BNF drone, you will primarily need a compatible radio transmitter that can bind with the drone’s installed receiver. Additionally, you will usually need to purchase a suitable flight battery and a charger, as these are often not included with BNF packages.
Are BNF drones a good option for beginners?
BNF drones can be suitable for beginners who already own or are planning to buy a specific radio transmitter. They offer a simple setup process compared to building a drone, as you only need to bind your controller and add a battery.
What are the main advantages of choosing a BNF drone?
The primary advantage of a BNF drone is convenience, as it’s pre-assembled and pre-configured, saving you build time. It also allows you to use your preferred radio transmitter, which is a great benefit if you already own one or want a specific high-quality controller.
How does a BNF drone differ from an RTF or ARF drone?
A BNF drone differs from an RTF (Ready-To-Fly) drone because an RTF package includes everything, including the radio transmitter. It differs from an ARF (Almost-Ready-To-Fly) drone, which typically requires more assembly and often the addition of components like motors, ESCs, or a flight controller.


