You’re finally ready to take your drone experience to the next level by using FPV (first-person view) goggles. And fortunately, Eachine has some of the best FPV goggles in the market. Connecting them to your drone is easier than you may think, and this article will guide you through the steps so you can get started in no time.
First, make sure that your drone is FPV-compatible and that it has a camera. Also, ensure that your Eachine FPV goggles and drone are on and their batteries are fully charged. Then, turn your attention to the receiver module on the Eachine FPV goggles.
To connect the goggles to the drone, you’ll have to match the frequency of the receiver module to that of the video transmitter on your drone. You can do this simply by cycling through the channels until you see the drone’s video feed appear on the goggles. Once this is done, you can adjust the antenna of the receiver module to increase the signal strength and minimize video interference.
It’s important to note that the exact process of connecting Eachine FPV goggles to your drone may vary depending on the model of your drone and goggles. So, it’s always a good idea to refer to the manuals provided by both manufacturers to make sure you’re following the correct steps. In conclusion, by following the steps outlined in this article, you’ll be able to connect your Eachine FPV goggles to your drone and experience the thrill of flying like never before.
Don’t be intimidated by the process- it’s easier than it seems, and the payoff is well worth it!
What You’ll Need
If you’re an avid drone enthusiast, then you know the importance of having high-quality FPV goggles to enhance your flying experience. The Eachine FPV goggles are a popular choice among drone pilots, but how do you connect them to your drone? Firstly, you’ll need to ensure that your drone is compatible with the Eachine goggles. You’ll also need to have a transmitter and receiver that can connect to the goggles.
Once you have all the necessary equipment, start by powering on your drone, transmitter, and goggles. Next, use the transmitter to search for the frequency that the goggles are on. Once you’ve found the frequency, connect the receiver to your drone and adjust the settings on your goggles until you have a clear image.
It’s that simple! With a little bit of practice, you’ll be able to connect your Eachine FPV goggles to your drone seamlessly and enjoy an immersive flying experience.
FPV Goggles and Drone
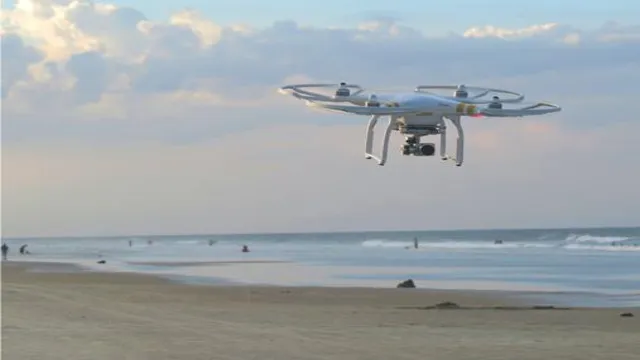
If you’re considering FPV flying with a drone, you’ll need a few things to get started. The most essential item is a pair of FPV goggles, which provide a first-person view of what your drone’s camera captures. These goggles allow you to experience the thrill of flying your drone from a bird’s-eye view, and they can vary in price, features, and quality.
You’ll also need a drone that is compatible with FPV goggles, such as racing or freestyle drones. It’s important to consider the type of drone you want to fly and the level of experience you have in piloting it. Additionally, you’ll need to ensure that your goggles are fully charged and that your drone’s camera and transmitter are properly connected.
FPV goggles and a drone provide a unique and exciting way to explore the aerial world, but always remember to fly safely and follow local regulations.
Step 1: Power on Your Drone
When it comes to connecting your Eachine FPV goggles to your drone, the first step is to power on your drone. This is a crucial step to ensure that both your drone and goggles are turned on and ready to communicate with each other. Once your drone is powered on, you’ll want to open your goggles’ menu and navigate to the “search” option.
From there, your goggles should be able to detect the video feed from your drone and establish a connection. It’s important to make sure that your goggles and drone are on the same channel to avoid any connectivity issues. By starting with a simple step like powering on your drone, you’ll be able to establish a connection between your goggles and drone much more easily.
Before you know it, you’ll be ready to take to the skies and experience FPV flying like never before!
Double Check Battery Levels
When you are preparing to fly your drone, it’s important to ensure that your battery levels are fully charged before taking off. The first step in doing so is to power on your drone. Turning on your drone not only allows you to check the battery levels but also lets you ensure that all the components are working correctly.
By checking the battery levels, you can be sure that your drone will remain in the air for the desired amount of time. To do so, you should look at the battery indicator on your drone or on your remote control. This will show you how much battery life is remaining and allow you to determine whether you need to replace or recharge your batteries before taking off.
By double-checking your battery levels, you can avoid any disappointments or crashes due to a sudden loss of power while flying. Remember, healthy batteries equal happy flights!
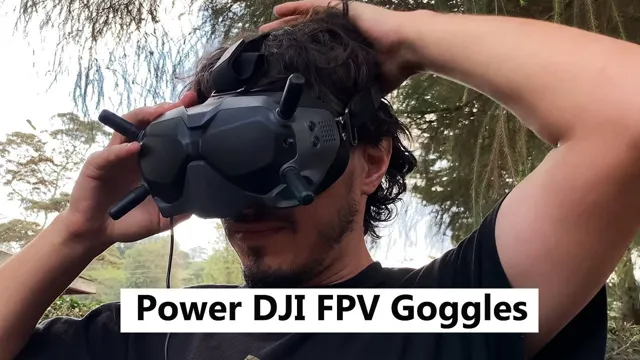
Step 2: Power on Your Goggles
Now that you have successfully connected your Eachine FPV drone and goggles to the same frequency, it’s time to power on your goggles. This step is pretty straightforward, as all you need to do is press and hold the power button until the goggles turn on. Once you see the blue LED light turn on, you can release the button.
If you’re having trouble finding the power button, it’s usually located on the side of the goggles or underneath the panel. When the goggles turn on, you should see a startup screen, which may vary depending on the make and model of your goggles, but usually includes information like signal strength and battery life. At this point, you should be able to see live footage from your drone’s camera on the goggles, giving you a first-person perspective as you navigate your drone through the air.
Congratulations, you’re now ready for takeoff!
Adjust Settings as Necessary
As you gear up for your next adventure, powering on your goggles is a crucial step in getting started. But before you do that, it’s important to make sure your settings are adjusted to your liking. Some goggles come pre-set with default settings, but you may want to make some changes based on your preferences.
For example, you may want to adjust the brightness or contrast to better suit the lighting conditions you’ll be in. Every person’s eyesight is unique, so you may need to adjust the focus to ensure the best possible visual experience. Don’t be afraid to play around with the settings until you find what works best for you.
Once you’ve made these adjustments, you’re ready to power on your goggles and start your adventure. Get ready for an immersive and thrilling experience as you explore the world around you through high-quality goggles that are customized to your exact specifications.
Step 3: Put Your Goggles into Pairing Mode
To connect your Eachine FPV goggles to your drone, the third step is to put them into pairing mode. This initiates the process of syncing your goggles to your drone’s camera feed. To do this, turn on your goggles and navigate to the settings menu.
From there, select “pairing mode” or “search for device.” This will put your goggles into a mode where they’re actively searching for a drone to connect to. Make sure your drone is turned on and within range before putting the goggles into pairing mode.
Once your goggles find the drone, they will connect automatically, and you’ll be ready to experience an immersive FPV flight! Remember, failure to properly pair your goggles to your drone will result in no video feed and a less-than-optimal flying experience. With just a few simple steps, you can ensure a successful connection every time.
Follow Manufacturer’s Instructions
When it comes to putting your goggles into pairing mode, it’s important to follow the manufacturer’s instructions carefully. Depending on the make and model of your goggles, the method of putting them into pairing mode can vary. Some goggles may require a certain button combination or may enter into pairing mode automatically upon powering on.
It’s crucial to pay close attention to the instructions provided by the manufacturer to avoid any potential issues with the pairing process. By taking the time to read and follow the instructions closely, you can ensure a smooth and seamless pairing experience. After all, no one wants to waste time struggling to get their equipment to work properly when they could be out enjoying their sport or activity instead.
So, take a few moments to review the instructions, and then put your goggles into pairing mode with confidence and ease.
Step 4: Pair Your Goggles with Your Drone
Connecting your Eachine FPV goggles to your drone is a straightforward process that only requires a few steps. The first step is to ensure your drone is on and ready to transmit video signals to your goggles. Next, turn on your goggles and navigate to the channel selection menu.
From there, select the same channel frequency as your drone. Once the channels are matched, you should be able to see the live feed from your drone on the goggles. It’s important to note that some drones require additional pairing methods, such as binding processes, before the video signal can transmit to your goggles.
Be sure to consult your drone’s instructions for any additional pairing requirements. By following these simple steps, you’ll be ready to take to the skies and enjoy an immersive FPV experience with your Eachine goggles and drone.
Consult Your Drone’s User Manual
When it comes to pairing your drone with your goggles, it’s important to consult your drone’s user manual first. Every drone is different and may have varying steps to pair with your goggles. Some drones may require you to first power on your goggles before turning on the drone, while others may need you to turn on the drone first.
Make sure to check your user manual for the correct order of operations. Additionally, your drone’s manual may include information on how to troubleshoot any pairing issues you may encounter. Don’t disregard the manual as an unnecessary piece of paperwork – it’s your best resource for ensuring a successful pairing between your drone and goggles.
Step 5: Test the Connection
Now that you’ve connected your Eachine goggles to your drone, it’s time to test the connection. This step is crucial as it ensures the video transmission from your drone’s camera to your goggles is working properly. To test the connection, start by powering on your drone and goggles.
Next, check that your goggles are receiving a clear video signal from the drone. You can do this by adjusting the antenna or the frequency settings on your goggles. It’s also important to take note of any interference or static in the video feed, as this can affect your flying experience.
Once you’re satisfied with the video quality, take your drone for a test flight and see how the transmission holds up. With a solid connection between your drone and Eachine goggles, you’ll be able to enjoy a smooth and immersive FPV flying experience.
Make Sure Video is Coming Through Clearly
Now that you’ve established your video call, it’s important to test the connection to ensure the video is coming through clearly. This will save you from any embarrassing technical issues during the call. Start by checking the video and audio quality.
You want to make sure both are clear and without any lagging or echoing. It’s also helpful to test the call with a friend or colleague to get feedback on the quality. If possible, test the call in the same environment where you’ll be conducting the actual call.
This can help you identify any potential issues with lighting, background noise, or internet connectivity. By testing the connection beforehand, you can be confident that your video will be smooth and clear, allowing you to focus on the conversation. Remember, a successful video call requires more than just a working connection – it requires high-quality video and audio.
Final Thoughts
Connecting your Eachine FPV goggles to your drone can seem complicated at first, but it is actually a straightforward process. First, you will need to power on your drone and ensure that it is transmitting the video signal. Then, power on your Eachine FPV goggles and change the channel to match the frequency of your drone’s video signal.
Once you have done this, you should be able to see a live feed of your drone’s camera on your goggles. It’s important to remember to always double-check both the frequency and the channel before taking off, to ensure a stable connection. With these simple steps, you’ll be ready to soar through the skies and experience your drone’s flight like never before.
Conclusion
In conclusion, connecting your Eachine FPV goggles to your drone is as easy as pie! Just follow these simple steps and you’ll be immersed in the thrill of FPV in no time. Don’t worry, you don’t have to be a rocket scientist to do it. But if you are a rocket scientist, even better! Who knows, you might just discover a new way to fly.
Happy droning!”
FAQs
What type of connector is needed to connect eachine FPV goggles to a drone?
Generally, an HDMI or AV cable is needed to connect eachine FPV goggles to a drone. However, it is advisable to check the drone specifications to ensure compatibility.
How do I connect eachine FPV goggles to my drone controller?
Eachine FPV goggles can be connected to a drone controller via an AV or HDMI cable. The cable needs to be plugged into the output port of the drone controller and the input port of the FPV goggles.
How do I adjust the focus of my eachine FPV goggles for a clearer image?
Eachine FPV goggles come with adjustable lenses to help adjust the focus according to individual preferences. Simply rotate the focus wheel until the image is clear.
Can I use my eachine FPV goggles with other drones besides eachine drones?
Yes, eachine FPV goggles can be used with other drones that have compatible output ports and are transmitting using the same frequency band. Consult the specifications of the drone and goggles to ensure compatibility.


