Flying a drone can be an exhilarating experience, but you know what can make it even more exciting? Capturing epic high-quality footage! If you have a drone, chances are you already have a camera attached to it. But, for those looking to take their drone flying experience to the next level, consider adding a first-person view (FPV) camera to your drone. Connecting an FPV camera to your drone may seem intimidating, but it’s actually quite simple.
In this article, we will go over everything you need to know about connecting an FPV camera to your drone, so you can capture stunning aerial footage like a pro.
Check Compatibility
When trying to connect an FPV camera to your drone, the first thing you want to do is check compatibility. Not all cameras will work with all drones, so it’s important to do your research beforehand. Check the specifications of your drone and the camera you want to use to ensure they are compatible.
You may need to purchase additional adapters or cables to make the connection work. It’s also important to make sure the camera is attached securely to the drone and properly aligned for the best viewing angle. Once you’ve checked compatibility and properly attached the camera, you’ll be able to enjoy a whole new perspective on your drone flights.
Ensure camera and drone have compatible connectors.
When it comes to using a camera and drone together, it’s important to check the compatibility of their connectors. Not all cameras and drones are designed to work seamlessly together, so it’s vital to ensure that both devices have connectors that match up. This means you should take the time to research the connectors for both your camera and drone before attempting to use them together.
It’s also important to note that even if the connectors look similar, they may not be compatible, so double-checking is key. Failure to do so could result in damage to your devices, or worse, accidents while flying a drone. By taking the time to check compatibility and ensuring that your camera and drone have matching connectors, you can enjoy a smoother and more successful aerial photography experience without any surprises.
Secure Mounting
Connecting an FPV camera to your drone can be a tricky task, but it’s important to ensure that the camera is securely mounted to avoid any damage or accidents during flight. The first step is to choose a sturdy mounting solution that will keep the camera in place without any vibration or movement. There are various types of mounts available, including fixed mounts, adjustable mounts, and gimbal mounts, each with their own benefits and drawbacks.
Once you’ve chosen the right mount, make sure to use strong and secure mounting screws to attach the camera. You can also use a bit of thread locker to ensure that the screws stay in place. It’s also important to check the camera’s weight and balance in relation to the drone’s center of gravity, as it can affect the stability and performance during flight.
With a properly mounted and balanced FPV camera, you can enjoy a smooth and safe flight without any worries.
Mount the camera securely to the drone.
When it comes to aerial photography and videography, mounting the camera securely to the drone is absolutely essential. You don’t want to risk losing the camera and footage mid-flight due to it coming loose or falling off. There are a few things to consider when mounting the camera to ensure that it’s as secure as possible.
First, make sure that you’re using the appropriate mounting bracket for your type of drone and camera. Different drones and cameras will require different types of mounts, so do your research before purchasing. It’s also important to make sure that you attach the mount to a sturdy part of the drone, such as the body or arms.
Don’t attach the mount to any moving parts or fragile components, as this could cause damage to both the drone and the camera. Once you’ve attached the mount, double-check that the camera is tightly secured and not wobbling or shaking. By taking the time to properly mount your camera, you can rest assured that your footage will be safe and secure throughout the duration of the flight.
Consider vibration isolation solutions.
“vibration isolation solutions” When it comes to ensuring the stability and longevity of your equipment, vibration isolation solutions are an important consideration. One key factor in achieving effective isolation is securing your equipment with proper mounting techniques. This means using high-quality, sturdy mounting hardware and ensuring it is properly tightened and secured.
But it also means considering the vibration isolation properties of the mount itself. Anti-vibration mounts can provide a significant reduction in the amount of vibration that is transmitted to your equipment. This is especially important if your equipment is located in an environment with high levels of vibration or shock.
By using vibration isolation solutions and secure mounting techniques, you can protect your equipment from damage and extend its lifespan. So, if you’re in need of reliable and effective vibration isolation solutions, don’t forget to consider the importance of secure mounting.
Wiring and Power
Connecting an FPV camera to a drone can be an intimidating task, but with a little bit of knowledge and some careful handling, it’s a task that even beginners can accomplish. The first step in connecting your FPV camera is to identify the wiring. Most cameras come with three wires: a red wire for power, a black wire for ground, and a yellow wire for video transmission.
You’ll want to carefully connect the red wire to the power source on your drone, and the black wire to the ground. Then, carefully attach the yellow wire to the video transmitter. It’s important to make sure that your connections are secure and that there’s no chance of any wires coming loose mid-flight.
Once your wiring is done, it’s time to test your camera and make any necessary adjustments. Turn on your drone and check to see how your camera is set up. You may need to adjust the angle of the camera to get the best view, or adjust the settings to improve the quality of the video.
Take some time to play around with the settings until you find the perfect setup for your drone. Overall, connecting an FPV camera to your drone is all about taking your time and being careful. With a little bit of patience and some attention to detail, you can have your camera set up and ready to fly in no time at all.
So next time you’re looking to enhance your drone flying experience, consider adding an FPV camera for some added excitement and immersion!
Wire the camera to the drone’s power source.
When it comes to wiring your camera to the drone’s power source, it’s important to follow the manufacturer’s instructions carefully and precisely. In order to avoid damaging the camera or the drone, you’ll want to make sure that all the cables and connections are secure and properly insulated. One important consideration is the power source itself – make sure that the voltage and amperage are appropriate for your camera’s needs.
You may also want to consider using a voltage regulator or other power management device to ensure smooth and consistent power delivery. With the right setup and attention to detail, you can be confident in capturing great footage from your drone camera without any hiccups or technical difficulties. Keep in mind that safety should always come first, so if you are unsure about any aspect of the wiring process, it’s best to consult a professional or refer to the manufacturer’s guidelines.
Check voltage and current requirements.
When it comes to wiring and powering your electrical devices, it’s important to check the voltage and current requirements. Every device has specific electrical needs, and failure to account for these requirements could lead to damage or even electrical fires. Make sure to read the product manual or consult with a professional to determine the necessary voltage and current for your device.
Once you have this information, make sure to match it with the voltage and current supplied by the power source. It’s also important to note that using an improper fuse can also cause damage to your device. Always use a fuse that matches the electrical specifications of your device and power source.
By ensuring that the voltage and current requirements are properly matched and that the correct fuse is used, you can help prevent dangerous electrical problems from occurring. So, before plugging in that new electronic gadget, take the time to double-check its electrical requirements to ensure that everything is safe and sound.
Consider using a voltage regulator.
If you’re planning on wiring your electronic devices, then a voltage regulator can be a lifesaver. These devices maintain a consistent voltage output despite changes in input voltage or current, thus ensuring that your electronic devices receive a steady stream of power. Without a voltage regulator, your devices can easily become damaged due to voltage surges or drops.
For instance, imagine you’re using a 12V power supply to power your gadgets, but at some point, there is a sudden voltage surge and it jumps to 15V. That sudden voltage spike can harm your device’s circuits and even cause permanent damage. But, with a voltage regulator in place, the voltage will be regulated and kept at a stable level to protect your equipment.
So, when you’re wiring your projects, a voltage regulator is undoubtedly worth considering.
Testing and Calibration
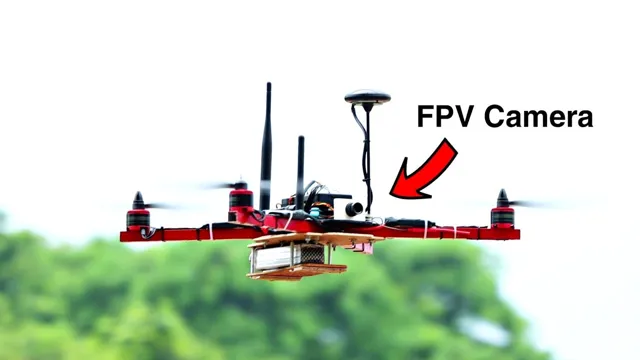
Connecting an FPV camera to your drone is an essential pre-flight requirement that ensures you get a live feed of your drone’s environment. To connect your FPV camera, begin by identifying the camera’s video out port and the drone’s video in port. Use an analog cable to connect the two ports.
Next, power up your camera and make sure it is in the correct mode. Turn on your drone and connect your goggles or monitor. Adjust the angle and position of the camera to get the best view of your drone’s surroundings.
After connecting the camera, conduct a thorough test to ensure its functionality and calibration. Check the color balance, exposure, and sharpness of the image. The quality of your FPV feed will determine the overall flying experience, so it is essential to take extra time to ensure all the connections are secure and the camera is calibrated correctly.
Test camera functionality and adjust camera alignment.
When it comes to setting up a camera system, it’s important to tinker with the functionality and alignment of the camera to ensure that everything is in working order. Testing and calibration are essential components of this process, allowing you to make adjustments that will improve the overall clarity and accuracy of your footage. By playing around with the different settings, you can get a better feel for how the camera operates and make sure that it is capturing everything it needs to.
Additionally, tweaking the camera alignment can help you get a better view of your subject, reducing the likelihood of blind spots or unclear footage. Whether you’re setting up a security camera or recording a live event, taking the time to test and calibrate your equipment can help you achieve the best possible results. So remember, if you want to capture everything in the best possible light, don’t forget to test and adjust your camera’s functionality and alignment!
Conclusion
So, there you have it – connecting your FPV camera to your drone isn’t rocket science, but it does require a bit of technical know-how. With the right tools and a little patience, you’ll be able to get your camera up and running in no time. So go ahead, dive into the world of FPV and take your drone flying experience to new heights – quite literally!”
FAQs
What type of connector do I need to connect the FPV camera to my drone?
You will need a JST-SH 1.0mm connector to connect the FPV camera to your drone’s video transmitter.
Can I mount the FPV camera on any part of the drone?
You need to mount the FPV camera on the front of the drone as it will provide you with the best perspective and will help in avoiding obstacles.
How do I adjust the camera angle for the best view while flying?
You can adjust the camera angle using the tilt mechanism present on the camera. You can either use a wrench or your hand to adjust it.
Do I need to make any changes in my drone’s settings to use an FPV camera?
Yes, you may need to make some changes to your drone’s settings to make it compatible with the FPV camera. For instance, you may need to change the channel frequency to match with the camera’s frequency.
Can I use any FPV camera model with my drone?
No, you need to make sure that the FPV camera you are planning to use is compatible with your drone’s video transmitter. You also need to check that the camera’s voltage requirements match with your drone’s voltage output.


