If you’re new to the world of drone racing, you might be wondering where to begin. Assembling a drone might sound like a daunting task, but rest assured, it’s easier than you think. Building your racing drone can be a fun and rewarding experience that gives you a better understanding of how these aerial machines work.
Plus, you get to customize it to your liking and truly make it your own. In this blog post, we’ll walk you through the basics of assembling an FPV racing drone, from choosing the right components to the final touches before takeoff. So, buckle up and let’s get started!
Tools and Materials Needed
If you’re interested in assembling your own FPV racing drone, there are a few key tools and materials that you’ll need to have on hand. First and foremost, you’ll need a good set of soldering tools and a soldering iron to attach the various components to the drone’s printed circuit board. A set of pliers and side cutters will also come in handy when working with small wires and other delicate materials.
Additionally, you’ll need to purchase the various components that make up the drone, including a flight controller, motor speed controllers, and an FPV camera. It’s important to choose high-quality components that are compatible with each other to ensure that the drone functions properly. Finally, you’ll need a good set of instructions or a guide to help you through the assembly process.
With the right tools and materials and a bit of patience, you can create your very own FPV racing drone and take to the skies!
Soldering Iron and Solder
If you’re looking to do any electronics projects or repairs, you’re going to need a soldering iron and some solder. These are the basic tools needed to join electrical components together. A soldering iron is essentially a pen-shaped device that generates heat to melt solder, which is a metal alloy that melts at a low temperature.
A good soldering iron should have a temperature control, typically ranging from 300°C to 500°C. A lower temperature is preferable for delicate electronics work, while a higher temperature is better for heavier-duty soldering. Some soldering irons come with adjustable tips, allowing for greater flexibility and precision.
When choosing solder, you want to go for a high-quality brand that melts evenly and gives a strong bond. Too much solder can create problems, so it’s important to apply just enough to form a solid electrical connection. With some practice and the right tools, anyone can solder like a pro!
Wire Cutters and Strippers
When it comes to electrical work, having the right tools and materials on hand is essential. Two of the most important tools are wire cutters and strippers. Wire cutters are used to cut through various sizes of electrical wire easily and neatly.
They come in different shapes and sizes, from diagonal cutters that can cut through thicker wires to precision cutters for smaller jobs. Wire strippers, on the other hand, are used to strip the insulation off of electrical wires to expose the metal. They come with different gauge sizes to match the thickness of the wire.
Without these essential tools, it’s nearly impossible to work with electrical wiring. Whether you’re a professional electrician or just doing some DIY work around the house, having reliable wire cutters and strippers is a must.
Electric Tape and Shrink Wrap
When it comes to electrical work, having the right tools and materials can make all the difference. That’s why it’s essential to have electric tape and shrink wrap on hand. Electric tape is a durable adhesive tape that is perfect for wrapping around wires to protect them from damage and ensure they stay in place.
Shrink wrap is a heat-shrinking material that can be used to cover wires, cables, and other electrical components for added protection and insulation. To use shrink wrap, simply place it over the item you want to cover and apply heat, which will cause the material to shrink and conform to the shape of the object. When working with electrical components, it’s always essential to prioritize safety, and having these tools and materials can help ensure you get the job done right.
So, make sure to keep a roll of electric tape and shrink wrap in your toolbox to be prepared for any electrical project that comes your way.
Flight Controller, ESCs, and Motors
When it comes to building your own drone, there are several key components you need to have in order to make it fly. One of the most important pieces is the flight controller, which serves as the “brain” of the drone and allows you to control its movements and actions. In addition to the flight controller, you’ll also need Electronic Speed Controllers (ESCs), which are responsible for regulating the speed and direction of the motors.
Speaking of motors, these are another crucial element to consider when building your drone. Choosing the right motor will depend on factors such as the size and weight of your drone, the desired speed and agility, and your overall budget. Other tools and materials you’ll need include a power distribution board, propellers, a battery, and wiring.
It may seem overwhelming at first, but with some research and careful planning, building your own drone can be a rewarding and exciting experience.
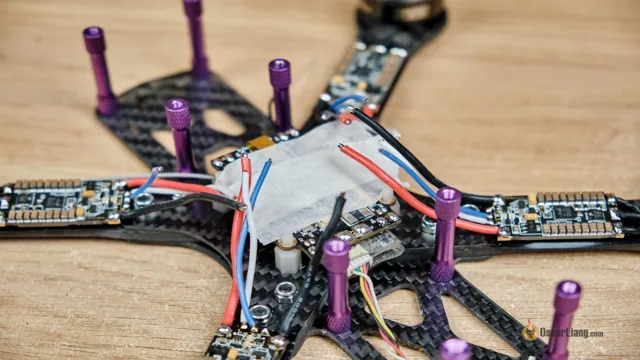
Building the Frame
Assembling a FPV racing drone is a process that can be both exciting and intimidating at the same time. Building the frame is the first step in getting your racing drone up and running. The frame is the backbone of the drone, and it’s important to choose one that can withstand the rigors of racing while being lightweight.
Carbon fiber is a popular material choice due to its strength and low weight. Start by attaching the arms to the frame using screws and nuts that come with the kit. Make sure the arms are level with the frame and the screws are tight.
Then, attach the motor mounts to the arms using more screws and nuts. The motor mounts are where the motors will be attached, so it’s important to install them securely. Lastly, attach the flight controller to the frame using mounting hardware.
This small piece of hardware is responsible for controlling the drone and keeping it stable during flight. As you assemble your frame, be sure to double check all screws and nuts for tightness before moving on to the next step. Once you have your frame assembled, you can move on to the next step in building your FPV racing drone.
Choose a Frame
When it comes to building the perfect picture frame, choosing the right frame is crucial. The frame you choose can either complement or detract from the artwork within it. So, how do you choose the right frame for your picture? First, consider the style of the artwork.
A modern piece may look better with a simple, sleek frame, while a vintage piece might benefit from a more ornate frame. Next, consider the colors within the artwork. Choose a frame that matches or complements these colors to create a cohesive look.
Finally, think about the room where the picture will be displayed. Is the décor modern or traditional? Choose a frame that fits the overall style of the room. With these factors in mind, you’ll be well on your way to creating a gorgeous frame that perfectly highlights your picture.
Install the Flight Controller and ESCs
Installing the flight controller and ESCs is a crucial step in building a drone frame. The flight controller is essentially the brain of the drone, responsible for receiving the pilot’s inputs and controlling the aircraft’s movements. The ESCs, or electronic speed controllers, regulate the power to the motors and keep the drone stable during flight.
To begin, ensure that the flight controller is compatible with the frame and that the ESCs are matched to the motors. Then, mount the flight controller onto the frame, taking care to align it correctly, and solder the ESCs to the power distribution board. Ensure that all the connections are secure and that there are no loose wires that could cause a short circuit.
Once everything is in place, it’s critical to test the flight controller to verify that it’s correctly installed and operating correctly. Once this is done, you can continue with the next steps of your drone build. Remember that taking your time and paying close attention to detail during this process will go a long way in ensuring the stability and safety of your finished product.
Install the Motors
Installing the motors is a critical step in building the frame of your machine. Before you begin, it’s essential to ensure that you have all the necessary parts and tools. Make sure the motors match the specifications of the frame and have the appropriate voltage and current requirements.
Once you have everything you need, start by mounting the motors securely onto the frame in the designated positions. It’s essential to ensure that the motors are level and parallel to each other to avoid any issues in the future. Tighten the screws and bolts with the appropriate torque to prevent any loosening.
Then, connect the wires to the motors carefully, ensuring that the polarity is correct. Test the motors and adjust the position if necessary before moving to the rest of the assembly. Remember, the quality of your motor installation can significantly impact the performance and lifespan of your machine, so take your time and do it correctly.
Attach the Propellers
After assembling the frame of your drone, the next step is to attach the propellers. These are the most important parts of the drone as they provide the necessary thrust for the drone to fly. The propellers are usually differentiated based on their size and pitch.
Larger propellers generate more lift, while propellers with a steeper pitch are more suited for higher speeds. When attaching the propellers, make sure that you match the propeller size with the motor size to ensure proper performance. It is also crucial to attach the propellers in the correct orientation, with two of them spinning clockwise and the other two spinning counterclockwise.
This ensures that the drone remains stable and balanced in the air. Be careful when handling the propellers as they can be sharp and might cause injury. In summary, attaching the propellers is a vital step in building a drone that can fly, and it’s important to ensure that they’re attached correctly for optimal performance.
Wiring and Configuration
Once you have all the necessary components for your FPV racing drone, the next step is wiring and configuration. This important step can seem daunting, but with proper attention and care, it can be completed easily. The first thing to do is to prepare the flight controller by soldering all the necessary wires onto it.
The next step is to connect the ESCs to the flight controller. This is generally done using a 4-in-1 ESC, which makes the process simpler. The power distribution board should also be connected at this point.
Next, connect the receiver to the flight controller using the specified protocol. After that, it’s time to focus on the camera and video transmitter. These should be connected to the appropriate pads on the flight controller for video transmission.
Finally, the battery should be connected to the power distribution board to provide power to all the components. Once everything is connected, it’s important to go through the configuration process and set up your drone for your personal preferences. This includes calibrating the ESCs and setting up any necessary software, such as Betaflight.
With these steps completed, your FPV racing drone is ready for takeoff!
Connect the Flight Controller to ESCs and Motors
Connecting your flight controller to your ESCs and motors is an essential aspect of building your drone. The first step is to identify the correct wiring for your ESCs, usually three wires: black, red, and white or yellow. You will need to connect each wire to their respective ports on the flight controller.
It’s important to ensure that you connect them correctly to avoid damaging your components. Once all your ESCs have been connected, you can proceed with connecting your motors to the ESCs. Before doing this, it’s a good idea to double-check that the motor rotation direction is correct.
You can do this by carefully manipulating the motor in the desired direction and checking the propeller’s rotation. If the propeller’s rotation matches the desired direction, you are good to go, and you can proceed with connecting the motor to the ESC. Once all your motors have been connected, it’s time to configure your flight controller.
This involves navigating the settings on your flight controller software, such as Betaflight, and assigning the correct motor order to correspond with your drone’s physical configuration. Overall, connecting your flight controller to your ESCs and motors is a crucial step in building a functional drone.
Set up Radio Receiver
When setting up a radio receiver, one of the first steps is to properly wire and configure it. It may seem overwhelming at first, but with a few simple steps, you’ll have your receiver up and running in no time. Firstly, you’ll need to gather all the necessary components, including the receiver itself, antenna, and power supply.
Once you have everything, connect the antenna to the receiver’s antenna input, and then plug the power supply into an outlet and connect it to the receiver. Next, you may need to fine-tune the receiver by adjusting the frequency and setting the volume. Some receivers come with pre-set configurations for specific stations, so be sure to consult the user manual for guidance.
Additionally, it’s important to ensure that the receiver is placed in a location with minimal interference, such as away from electronic devices, furniture, and appliances. By following these simple steps, you’ll be able to set up your radio receiver quickly and enjoy uninterrupted listening.
Configure Betaflight Software
When it comes to configuring your Betaflight software, there are a few things you need to consider in terms of wiring and setup. First off, make sure you have the right components in place and that everything is wired correctly. Check that your motors and ESCs are all hooked up correctly, and that your flight controller is connected to power and ground.
From there, you can begin configuring your Betaflight software. This process involves setting up your PID tuning, adjusting your rates and expo settings, and setting up your RX and modes. It’s important to take your time and make adjustments as needed until your drone is flying the way you want it.
Don’t be afraid to experiment with different settings and configurations until you find the one that works best for you. Overall, configuring Betaflight takes some time and effort, but with patience and persistence, you can get your drone flying like a dream.
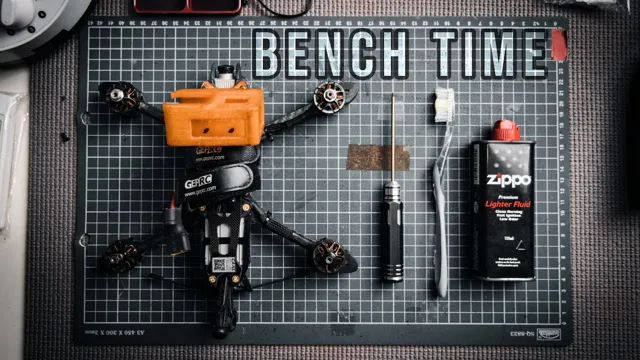
Final Checks and Test Flight
Now that you’ve got your FPV racing drone assembled, it’s time to do some final checks and test flights. Before taking your drone up in the air, ensure that all the components are functioning properly by checking all the connections, tightening screws and bolts, and testing the electronics. Make sure that the propellers are spinning in the correct directions, and replace any damaged or missing ones.
Double-check that the battery is fully charged, and do some initial testing with the drone on the ground to ensure it’s stable and not drifting. Once you’re confident that everything is working as it should, it’s time to take it up for a test flight. Start with a low altitude and gentle movements to get a feel for the drone’s responsiveness and maneuverability.
Once you’re comfortable, you can start pushing the limits and experimenting with different movements and tricks. Remember, practice makes perfect, and with enough time and dedication, you can become a skilled FPV racing pilot.
Check for Loose Connections and Secure All Components
When it comes to getting your drone ready for its first flight or a test flight after maintenance, one of the most important checks you should do is to look for loose connections and ensure that all the components are well-secured. This means carefully inspecting the wiring, making sure that the battery is firmly in place, and checking all the screws and bolts that hold the drone together. Loose connections can be dangerous and could cause the drone to malfunction mid-flight.
In addition, it’s essential to perform a test flight in a controlled environment to ensure that everything is working correctly. Go through a pre-flight checklist before takeoff, monitor the drone’s behavior during the flight, and make note of any abnormalities that you notice. Only after completing these final checks should you be confident in taking your drone out for more extensive flights or operations.
Remember, ensuring the safety of yourself and those around you is essential.
Calibrate ESCs and Flight Controller
After all the hard work of building and setting up your drone, you’re almost ready for the first test flight. However, before you can soar through the skies, there are a few final checks you need to make. One important step is to calibrate your ESCs (Electronic Speed Controllers) and flight controller.
This ensures that your drone will respond accurately to your control inputs and fly smoothly. To calibrate your ESCs, you’ll need to follow the manufacturer’s instructions, which typically involve connecting your ESCs to your flight controller and using your transmitter to calibrate each motor’s throttle range. Once your ESCs are calibrated, you can move on to calibrating your flight controller.
This usually involves connecting your drone to a computer, running a calibration program, and following the on-screen instructions. After you’ve completed these final checks, it’s time for the big moment: your test flight. Make sure you’re in a wide-open space away from people and obstacles, and take it slow at first to get a feel for how your drone handles.
With a little practice, you’ll be soaring through the skies in no time!
Take for a Test Flight and Adjust as Needed
As exciting as it may be, taking off on a brand new drone without thoroughly checking it over beforehand could result in a disastrous outcome. It is crucial to run through a final checklist to ensure everything is in perfect working order before placing your drone into flight. This includes double-checking propellors, controller signals, and camera functions.
Once you feel confident that everything is in place and working as it should, it’s time to take it for a test flight. Begin with a practice run, sticking to a low altitude, and gradually building up. If you find any issues during the test flight, it’s essential to land and make any adjustments as necessary.
Build up your confidence slowly, and once you are happy that your drone is functioning as it should, take it out for a proper flight and enjoy the experience!
Conclusion
Congratulations, you are now officially a drone assembler extraordinaire! With these steps, you have successfully built your very own FPV racing drone, and you are ready to take on the skies with your awe-inspiring creation. You have taught yourself patience, precision, and the importance of well-timed zips. Now go forth and soar like an eagle, or rather, a racing drone, and we’re sure you’ll be the envy of all.
Remember, practice, practice, practice, and always keep your eyes on the prize. Happy racing!”
FAQs
What are the essential components required to assemble a FPV racing drone?
The essential components required to assemble a FPV racing drone are a frame, flight controller, motors, electronic speed controllers, camera, video transmitter, antennas, and a remote controller.
Can I build a FPV racing drone with ready-to-use components or do I need to assemble it from scratch?
You can choose to build a FPV racing drone using ready-to-use components or assemble it from scratch, depending on your skill level and preference.
How do I choose the right propellers for my FPV racing drone?
You can choose the right propellers for your FPV racing drone by considering factors such as the size and pitch of the propeller, compatibility with your motor and ESC, and the type of flying you intend to do.
Do I need to have any technical knowledge or experience to assemble a FPV racing drone?
Yes, it is recommended that you have some technical knowledge and experience before attempting to assemble a FPV racing drone. This will ensure that you can troubleshoot any issues that may arise during the build process and ensure that your drone is safe to fly.


